Automatic Data Flow with One Click

 TapData Cloud offers you cloud services that are suitable for scenarios requiring rapid deployment and low initial investment, helping you focus more on business development rather than infrastructure management. Free trial with TapData Cloud.
 TapData Enterprise can be deployed in your local data center, making it suitable for scenarios with strict requirements on data sensitivity or network isolation. It can serve to build real-time data warehouses, enable real-time data exchange, data migration, and more.
In the Data Service Platform Mode, you can simply drag the source table to the required level to generate a data pipeline and automatically start the task, greatly simplifying the task configuration process. This article describes how to achieve the flow of data between different levels and finally provide it to the terminal business.
Procedure
In the left navigation panel, click Real-Time Data Hub.
On this page, you can conveniently access the data source information you have entered. TapData organizes the data governance and flow order into four distinct levels, providing a clear view of the data hierarchy.
 tip
tipFor detailed descriptions of each layer, see Real-Time Data Hub Introduction.
Follow the process below to complete the data flow with one click.
tipThrough the Master Data Model, you can adjust the table structure (such as adding fields), merge tables, build wide tables, etc. If the table of the Foundation Data Model already meets your business needs, you can directly publish the API or drag the table of the cache layer to the Target & Service.
- Flow to Foundation Data Model
- Flow to Master Data Model
- Flow to Target & Services
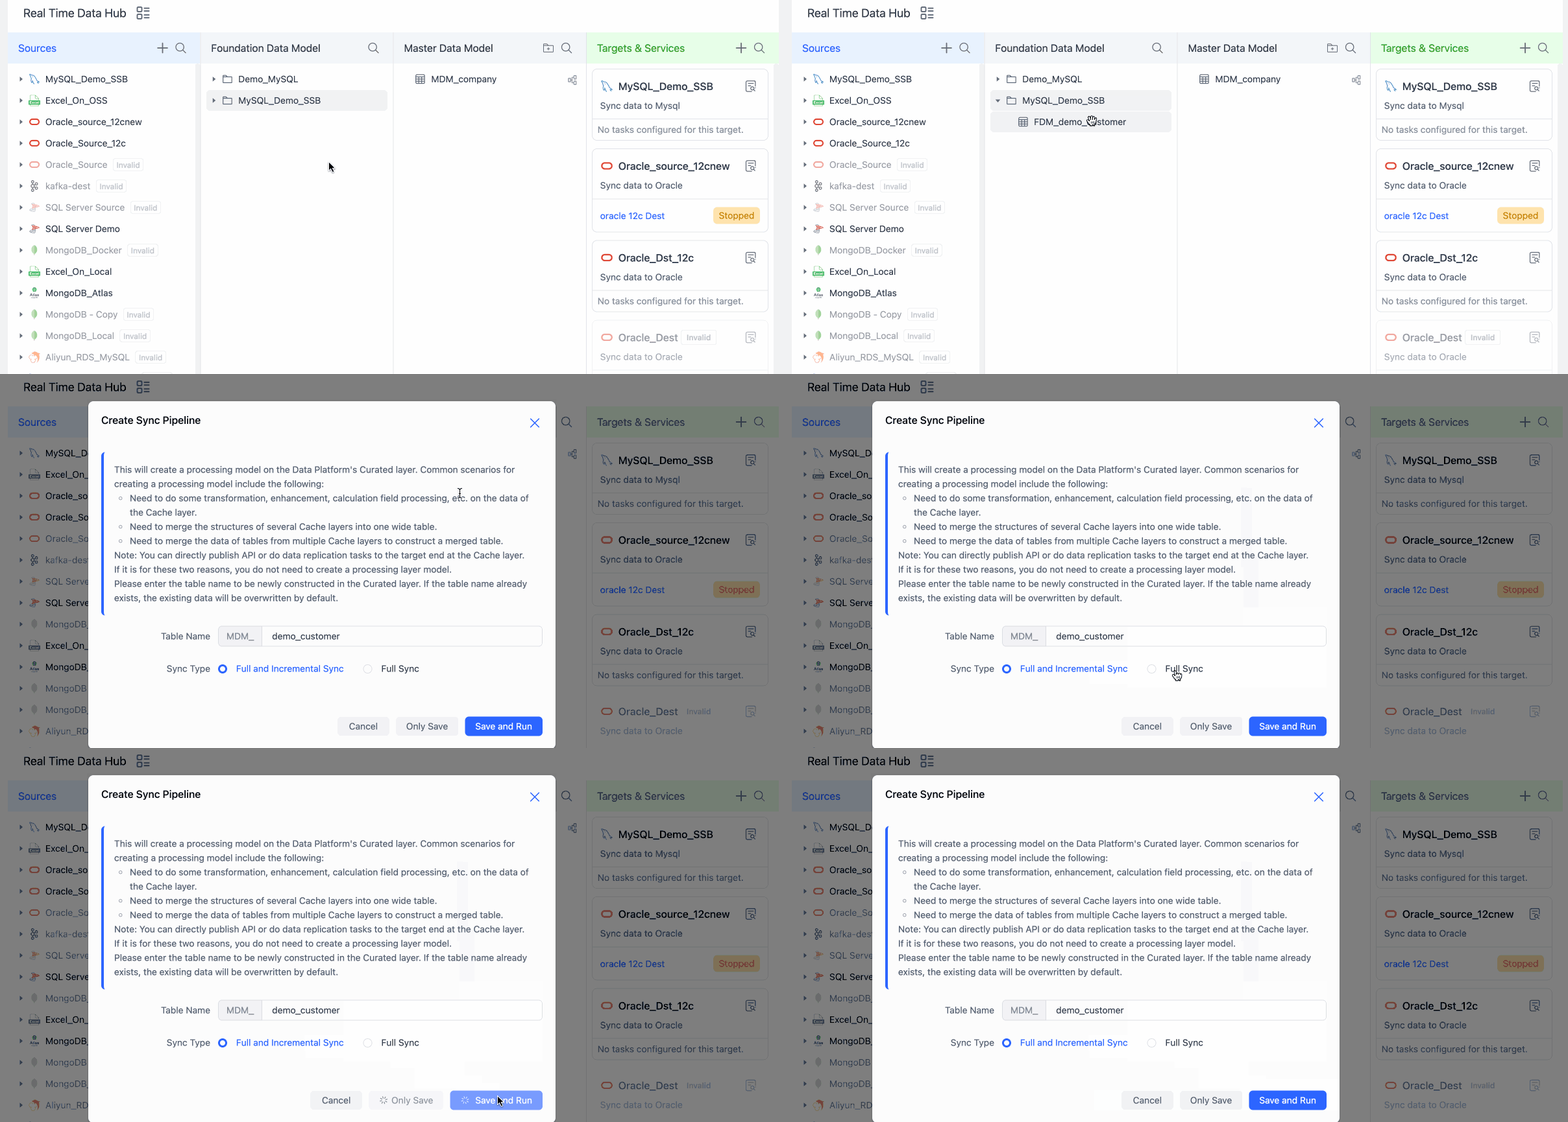
At the Sources, click the
 icon to find the table you want to synchronize and drag it to the Foundation Data Model.
In the pop-up dialog box, fill in the table prefix that is meaningful for your business, select the synchronization type, and choose whether to run the task.
In this case, the table we want to synchronize is the customer, fill in the prefix here is FDM_demo, then in the Master Data Model, the table is called FDM__demo_customer.

- Only Save: Save the task without running it. You can now click on the task name in the Foundation Data Model to customize the task further.
- Save and Run: No additional action is required. TapData will automatically create a data replication task to synchronize your selected tables in real-time to the Master Data Model and automatically verify. You can click the
 icon on the right side of the table name in the Foundation Data Model and jump to the task monitoring page to see the task operation details.
At the Foundation Data Model, click the
 icon to find the table you want to process and drag it to the Master Data Model.
In the pop-up dialog, fill in the table name and select whether to start the task.

- Only Save: Save the task without running it. You can now click on the task name in the target data card to customize the task further. On the redirected task configuration page, you can processing nodes to meet requirements such as table structure adjustment (e.g., adding fields), table merging, and building wide tables. Once the setup is complete, click Start in the upper right corner of the page.
- Save and Run: No further action is necessary as TapData automatically generates a data transformation task and initiates it to synchronize the table in real-time with the Data Processing Layer.
At the Data Processing Layer, find the target table and clicking on the icon as below show will allows you to explore the lineage of the table, revealing the chain of relationships that led to the creation of this data table. This feature assists you in effectively managing your tables.

In this case, we constructed a wide table called MDM_demo_customer based on the initial customer and lineorder tables.
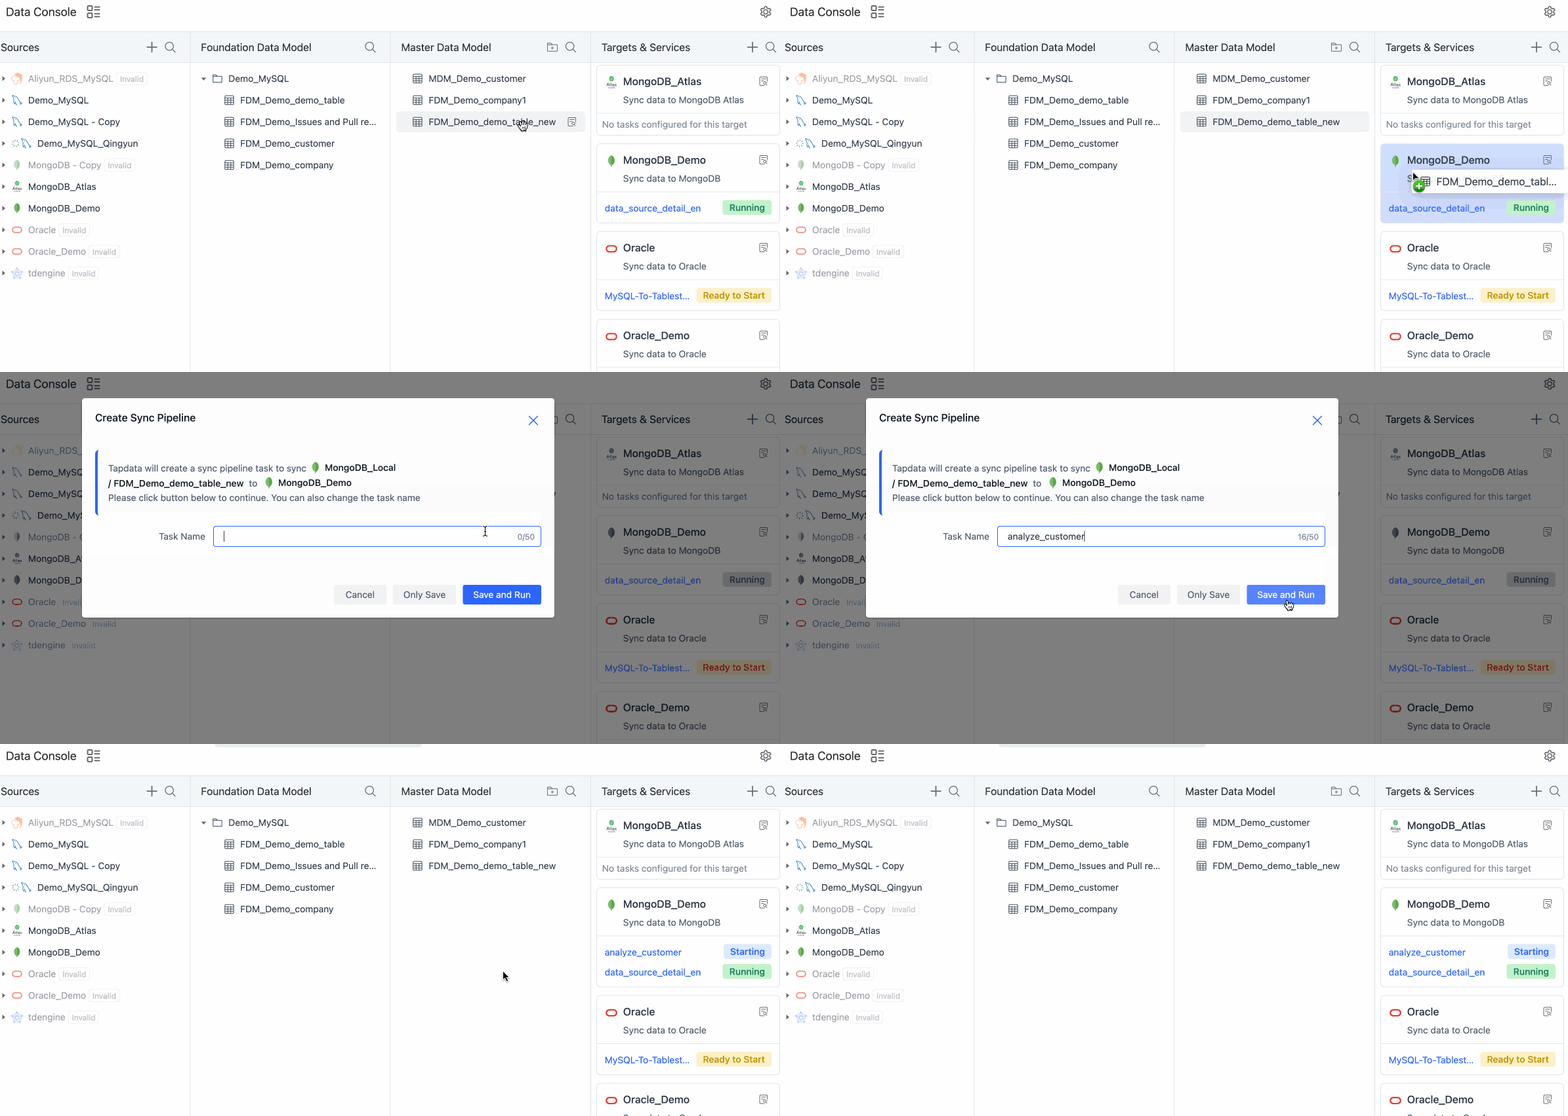
From either the Foundation Data Model or the Master Data Model , locate the desired table that you wish to synchronize. Then, simply drag and drop the table onto the target data source within the Targets & Service.

In the pop-up dialog, enter the task name and choose whether to run the task.
- Only Save: Save the task without running it. You can now click on the task name in the target data card to customize the task further. On the redirected task configuration page, you can add [processing nodes](/user-guide/data-development/process-node) to meet requirements such as table structure adjustment (e.g., adding fields), table merging, and building wide tables. Once the setup is complete, click the Start in the upper right corner of the page.
- Save and Run: No further action is necessary as TapData automatically generates a data transformation task and initiates it to synchronize the table in real-time with the Data Processing Layer.
Once setup is complete, TapData will automatically create a data transformation task to synchronize your source tables in real-time to the selected target data source and provide them to the final business. You can also click the task name in the target data card to enter the task monitoring page to see the detailed operation status. For more information, see Monitor Task.