Manage External Storage
To facilitate the quick reading of task-related information subsequently, TapData stores necessary configurations, incremental logs of source tables, and other information related to the task in its internal MongoDB database. To store more data, you can create an external database to store relevant data.
If you are using TapData Cloud, you can access this feature by navigating to Advanced > External Storage in the menu.
Prerequisites
An external database intended for data storage has been created. Currently, MongoDB and RocksDB are supported.
Create External Storage
In the left navigation bar, select System > External Storage.
On the right side of the page, click Create External Storage.
In the pop-up dialog, complete the configuration according to the instructions below.
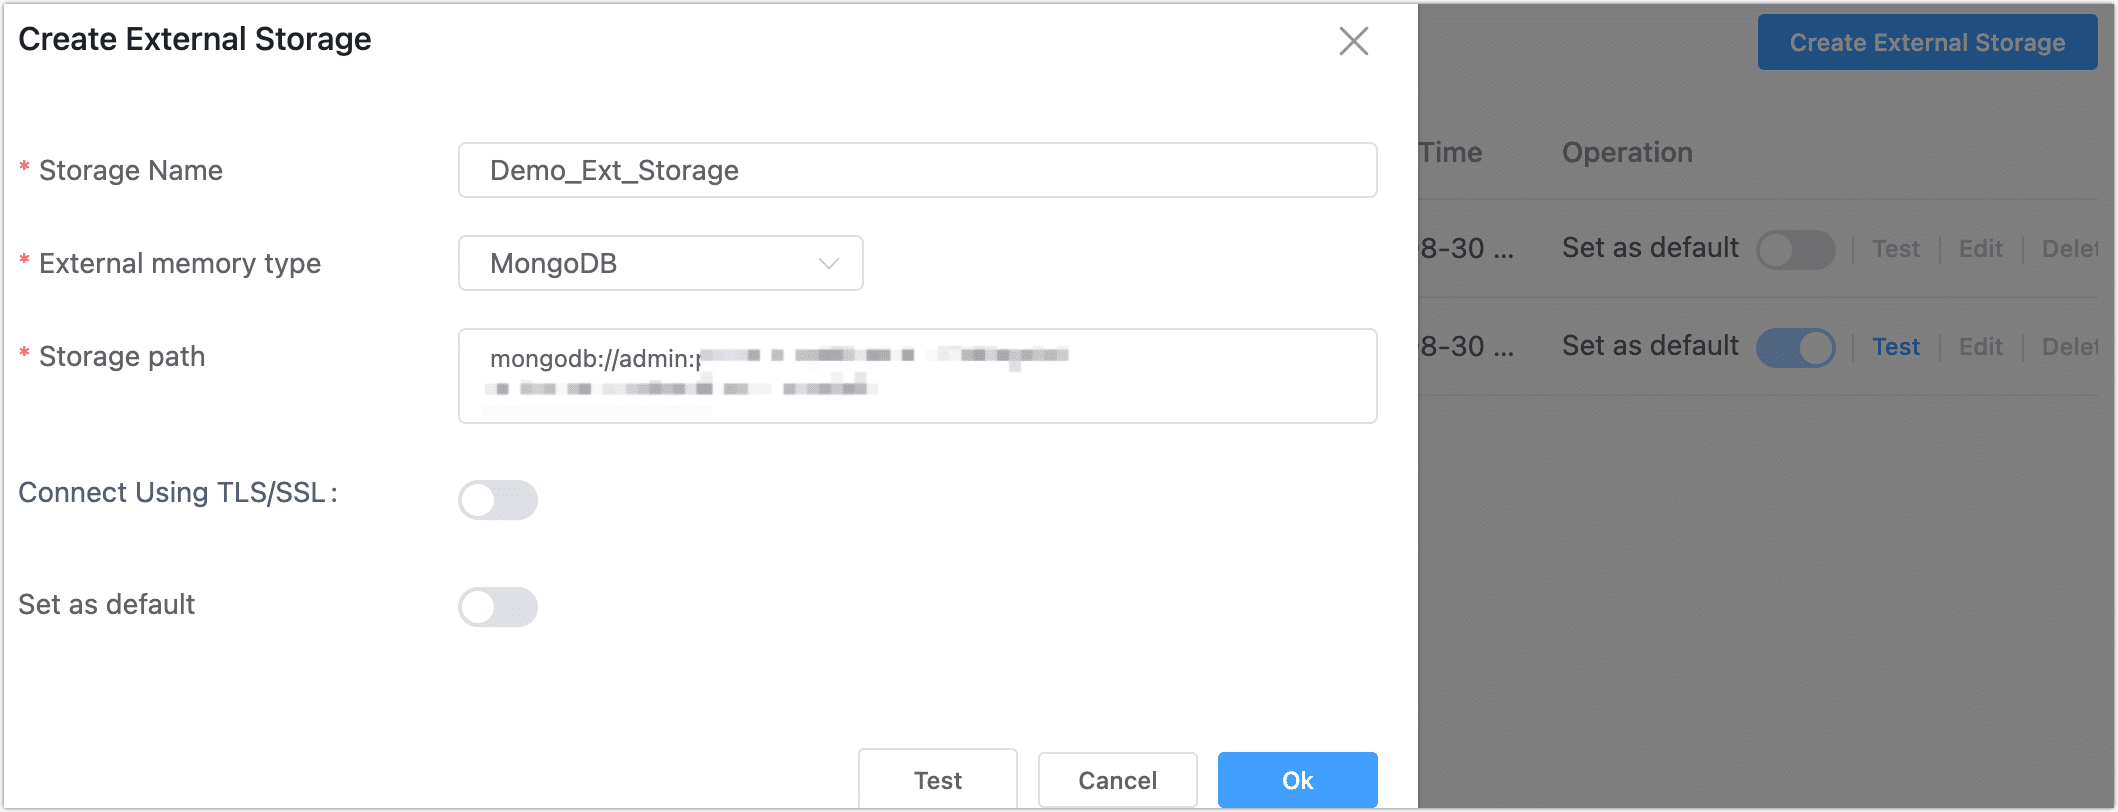
- Storage Name: Enter a cache name with business significance for easy identification later.
- External Memory Type: Supports MongoDB and RocksDB.
- Storage Path: Enter the database connection address, for example, for MongoDB refer to:
mongodb:/admin:password@127.0.0.1:27017/mydb?replicaSet=xxx&authSource=admin. - Connect Using TLS/SSL: Choose whether to enable TSL/SSL encryption; if this function is enabled, you will also need to upload the client’s private key.
- Set as Default: Choose whether to use it as the default external storage.
Click Test; after passing the test, click Save.
tipIf the connection test fails as indicated, please fix it according to the page prompt.
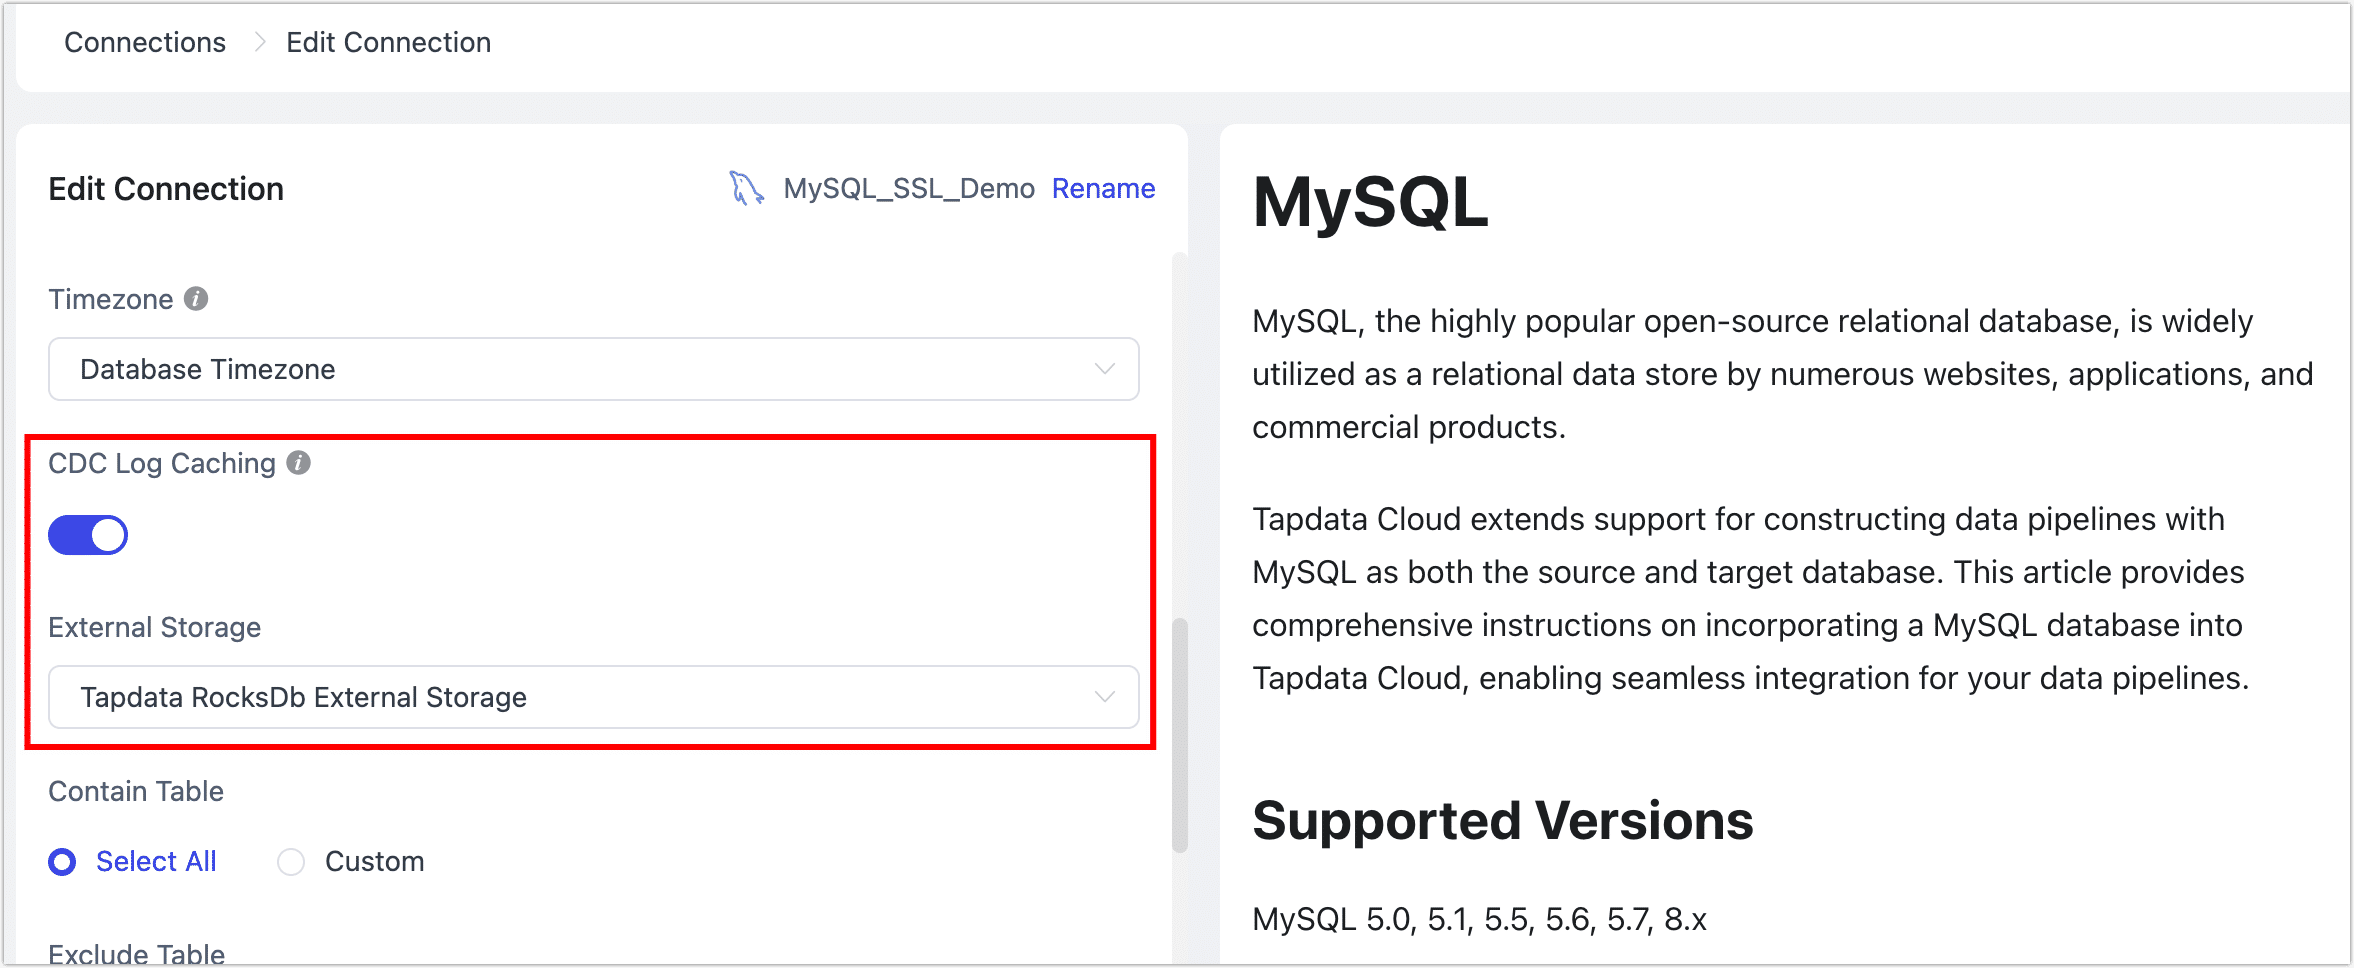
Use External Storage
You can enable the Shared Mining feature and select the recently configured external storage when creating a connection, as shown in the example below: