Adding Processing Nodes to Replication Tasks
TapData supports integrating processing nodes into data replication tasks for requirements like data filtering or field adjustments.
Union Node
With the Union node, you can merge multiple tables with similar or identical structures into one table. TapData will combine data with consistent field names, following the rules below:
- If the inferred type length and precision differ, the maximum length and precision are selected.
- If the inferred types are different, they are converted to a common type.
- When all source tables have consistent primary key fields, the primary key is retained; otherwise, it is removed.
- When all source tables have the same field with non-null constraints, the non-null constraint is retained; otherwise, it is removed.
- Unique indexes from the source tables are not transferred to the target table.
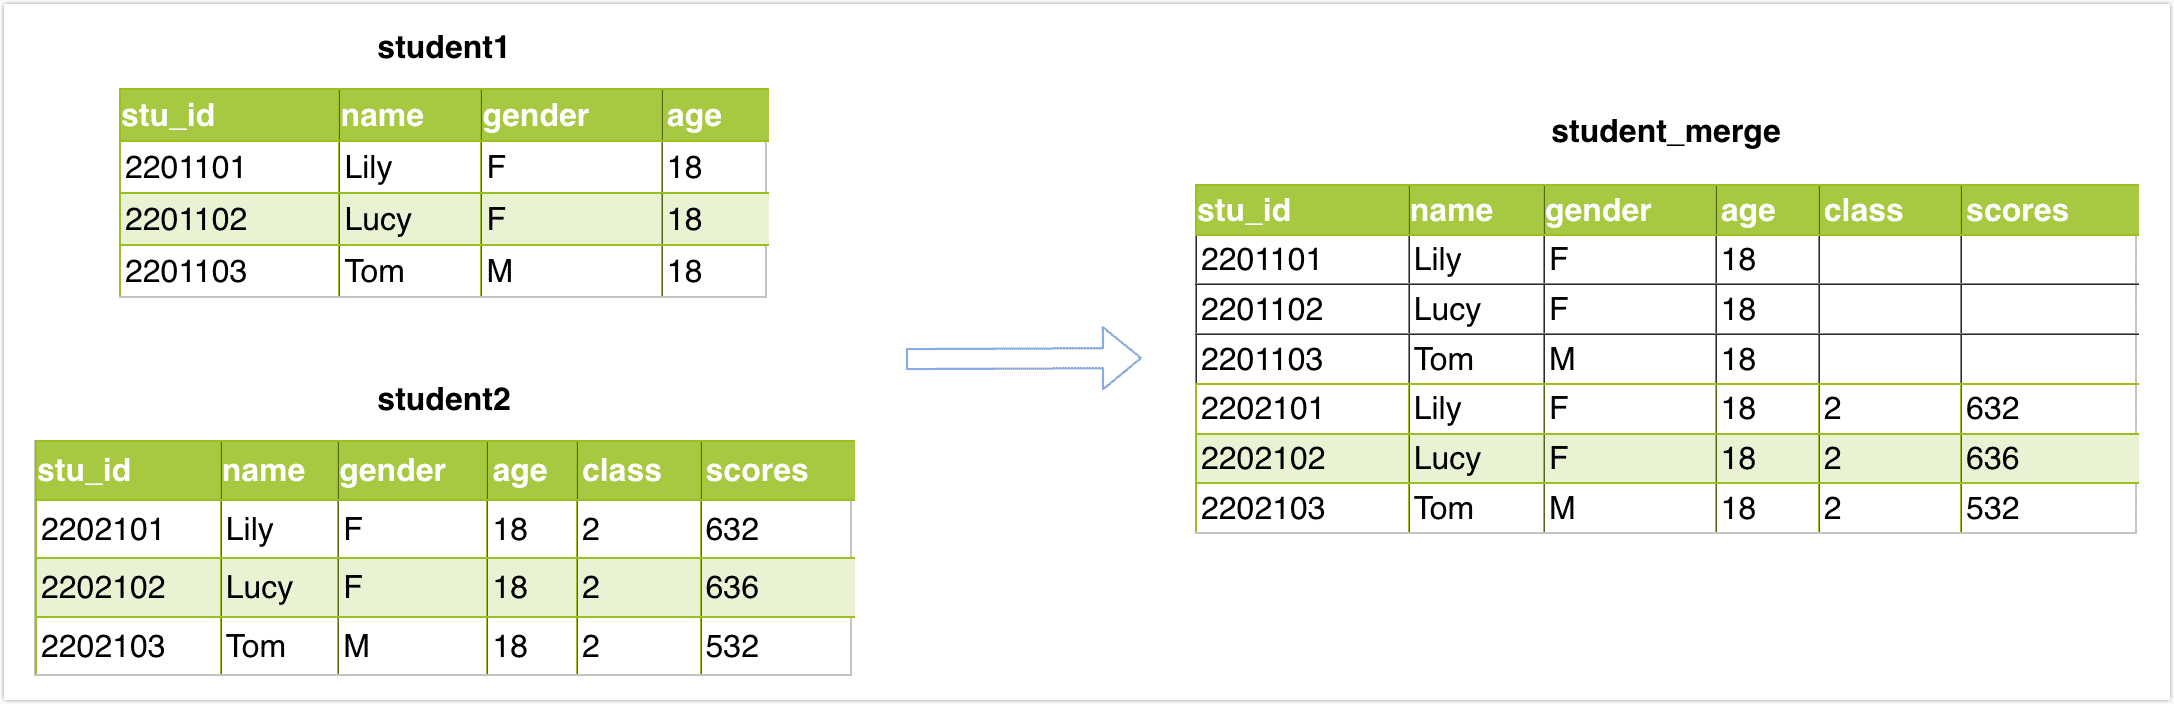
Scenario Example:
Suppose you want to perform a union operation on two tables, student1 and student2, with the same structure and then store the results in the student_merge table. The structure and data of the tables are as follows:
Operation Steps:
In the left navigation bar, click Data Replication.
Click Create on the right side of the page. Drag in the source node, union node, table editor, and target node in sequence from the left side of the page, and then connect them.
 tip
tipIn this scenario, we use the table editor node to specify a new name for the merged table to avoid overwriting the original table data.
Click the first node (source node) and select the tables to be merged (student1 / student2) in the right-side panel.
Click the Union node and choose the name of the merged table.
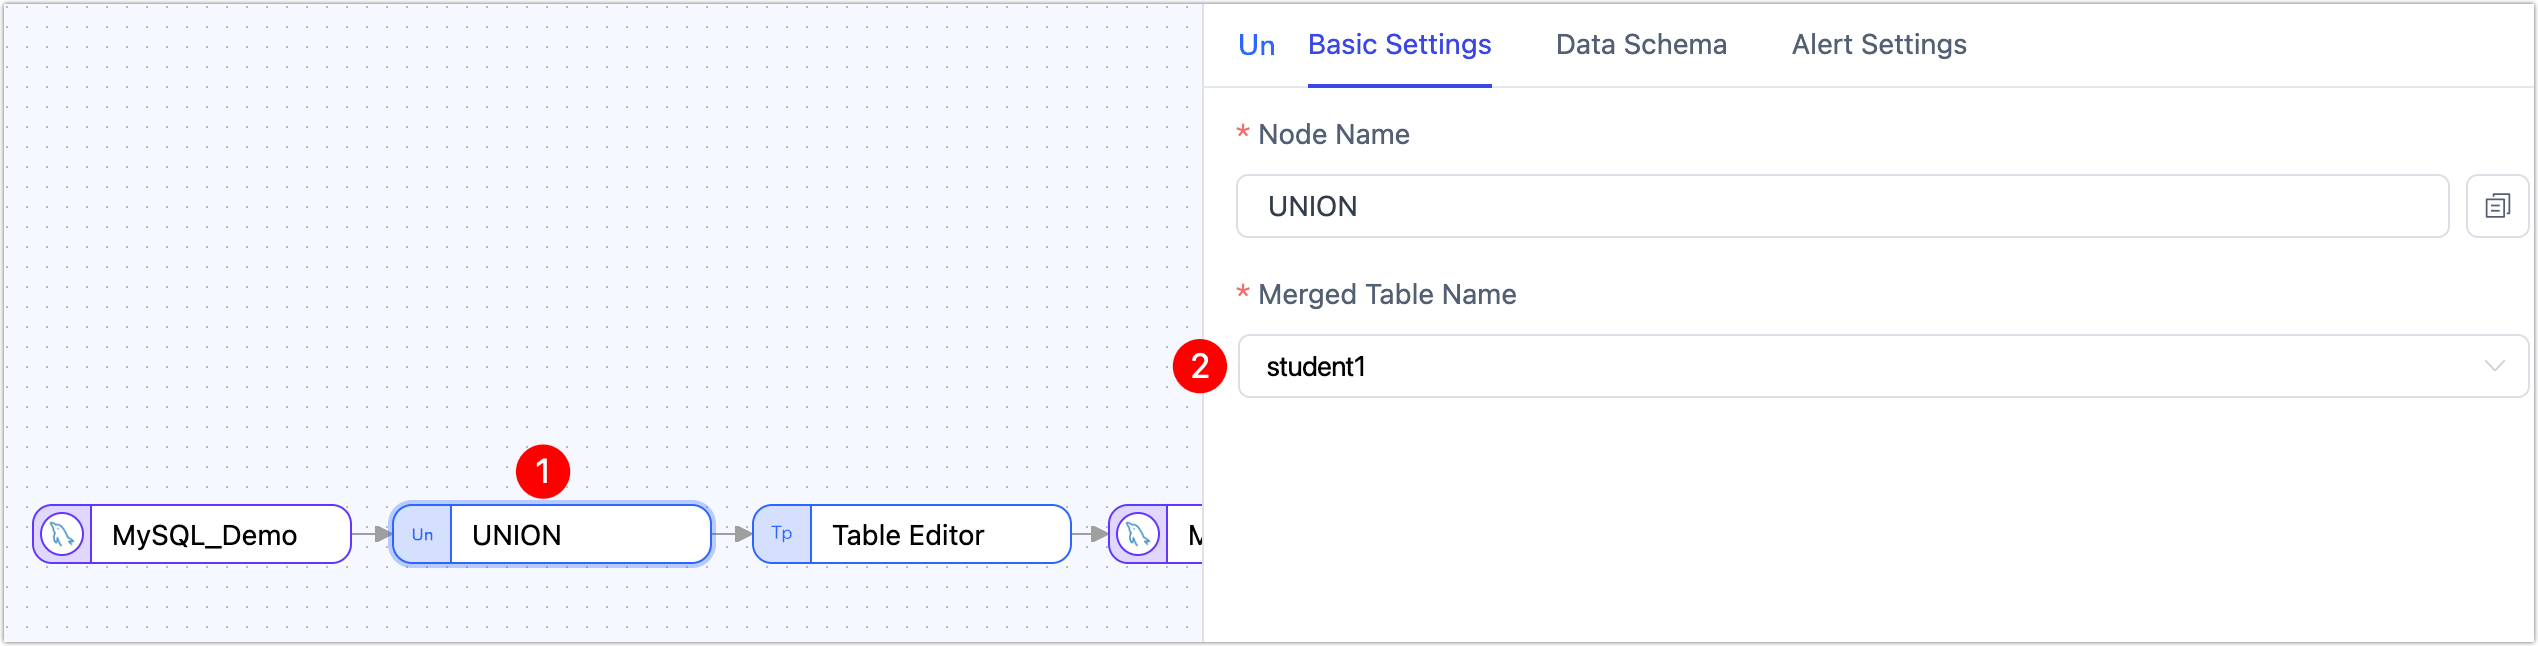
Click the Table Editor node and specify a unique new name for the table in the database, such as student_merge.
Click the target node, preview the table structure, and confirm it is correct. Click Start in the upper right corner.
Result Verification:
Query the student_merge table, and the result is as follows:
mysql> select * from student_merge;
+---------+------+--------+------+-------+--------+
| stu_id  | name | gender | age  | class | scores |
+---------+------+--------+------+-------+--------+
| 2201101 | Lily | F      |   18 |  NULL |   NULL |
| 2201102 | Lucy | F      |   18 |  NULL |   NULL |
| 2201103 | Tom  | M      |   18 |  NULL |   NULL |
| 2202101 | Lily | F      |   18 |     2 |    632 |
| 2202102 | Lucy | F      |   18 |     2 |    636 |
| 2202103 | Tom  | M      |   18 |     2 |    532 |
+---------+------+--------+------+-------+--------+
6 rows in set (0.00 sec)
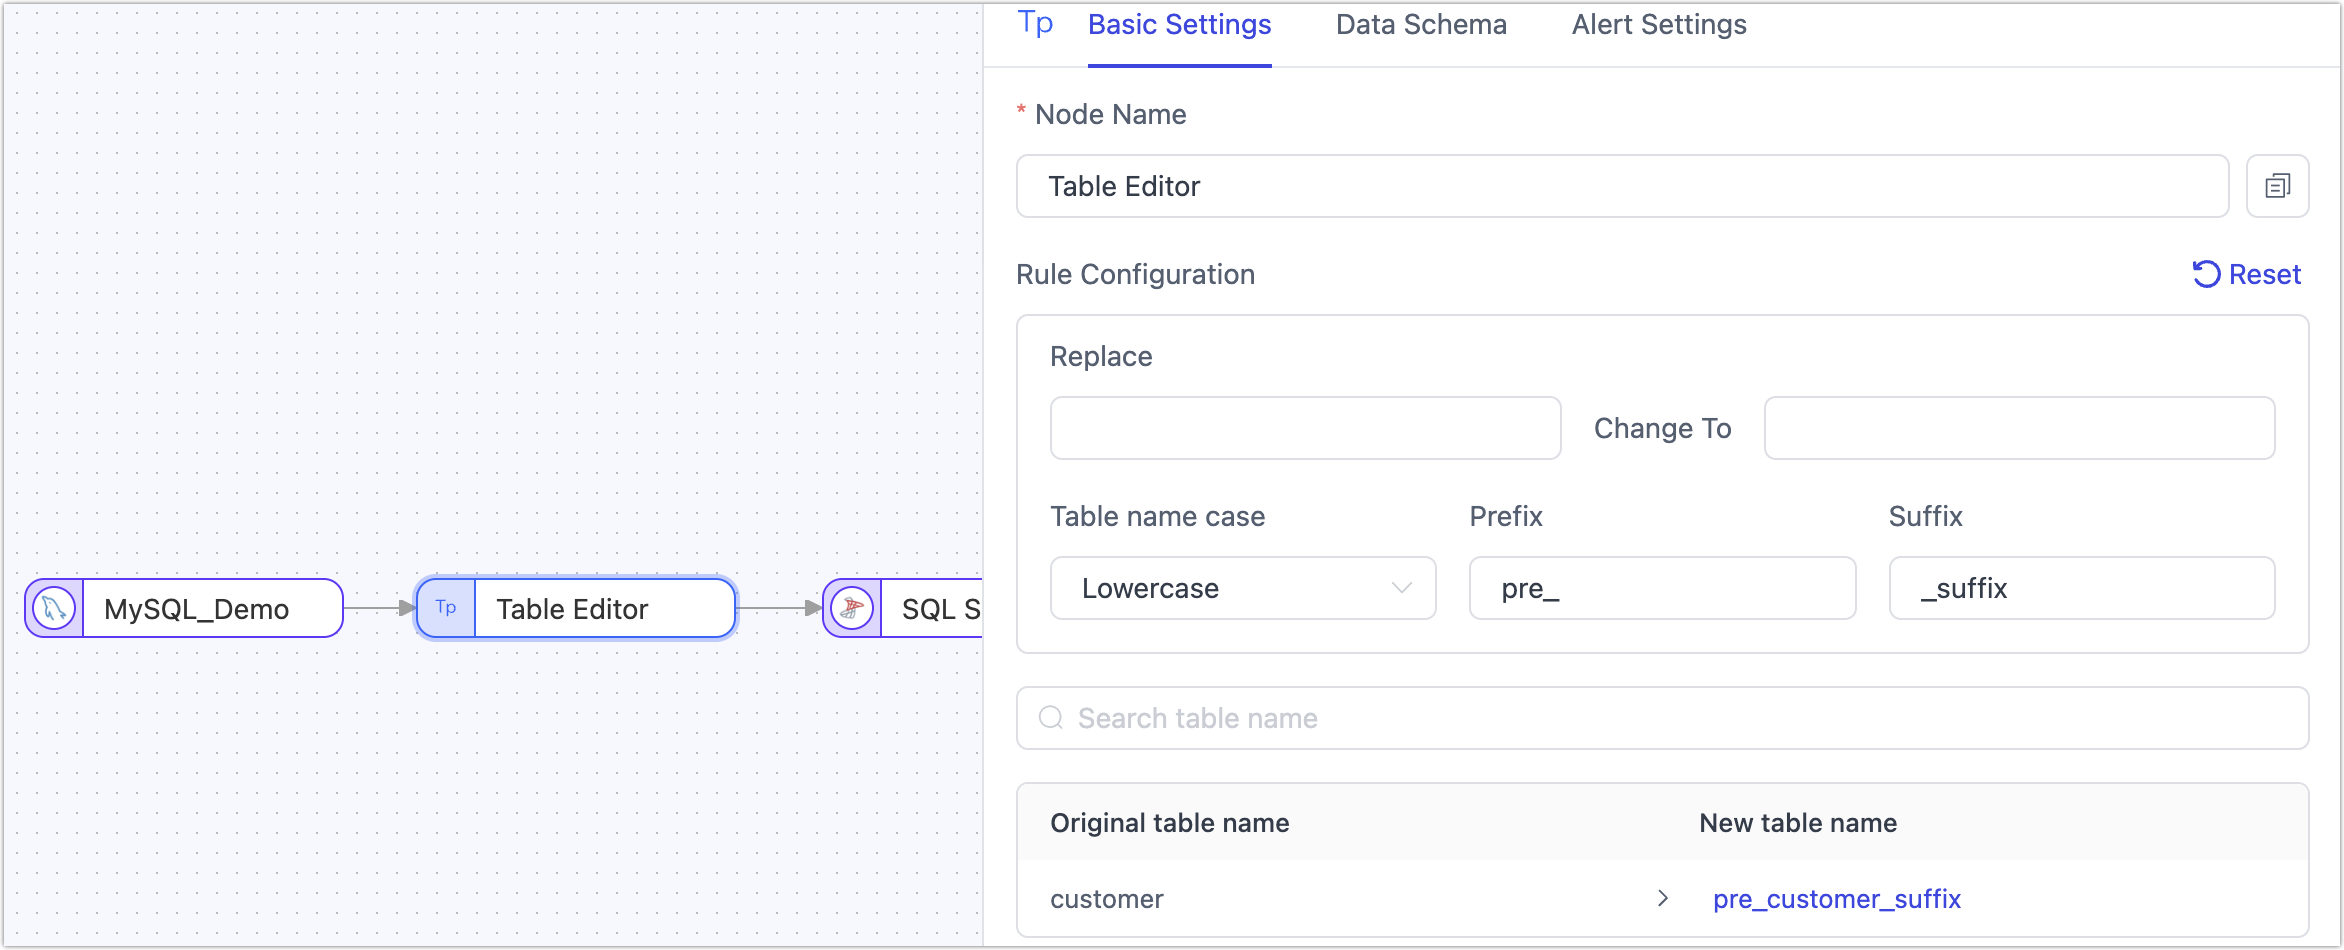
Table Edit Node
The table edit node primarily adjusts table names. Add a Table Edit node to the canvas and connect it with the data source. Click on the node to select operations (apply to all tables):
- Rename Tables
- Adjust Table Name Case
- Add Prefix/Suffix to Table Names
Additionally, you can directly specify a new name for individual target tables.
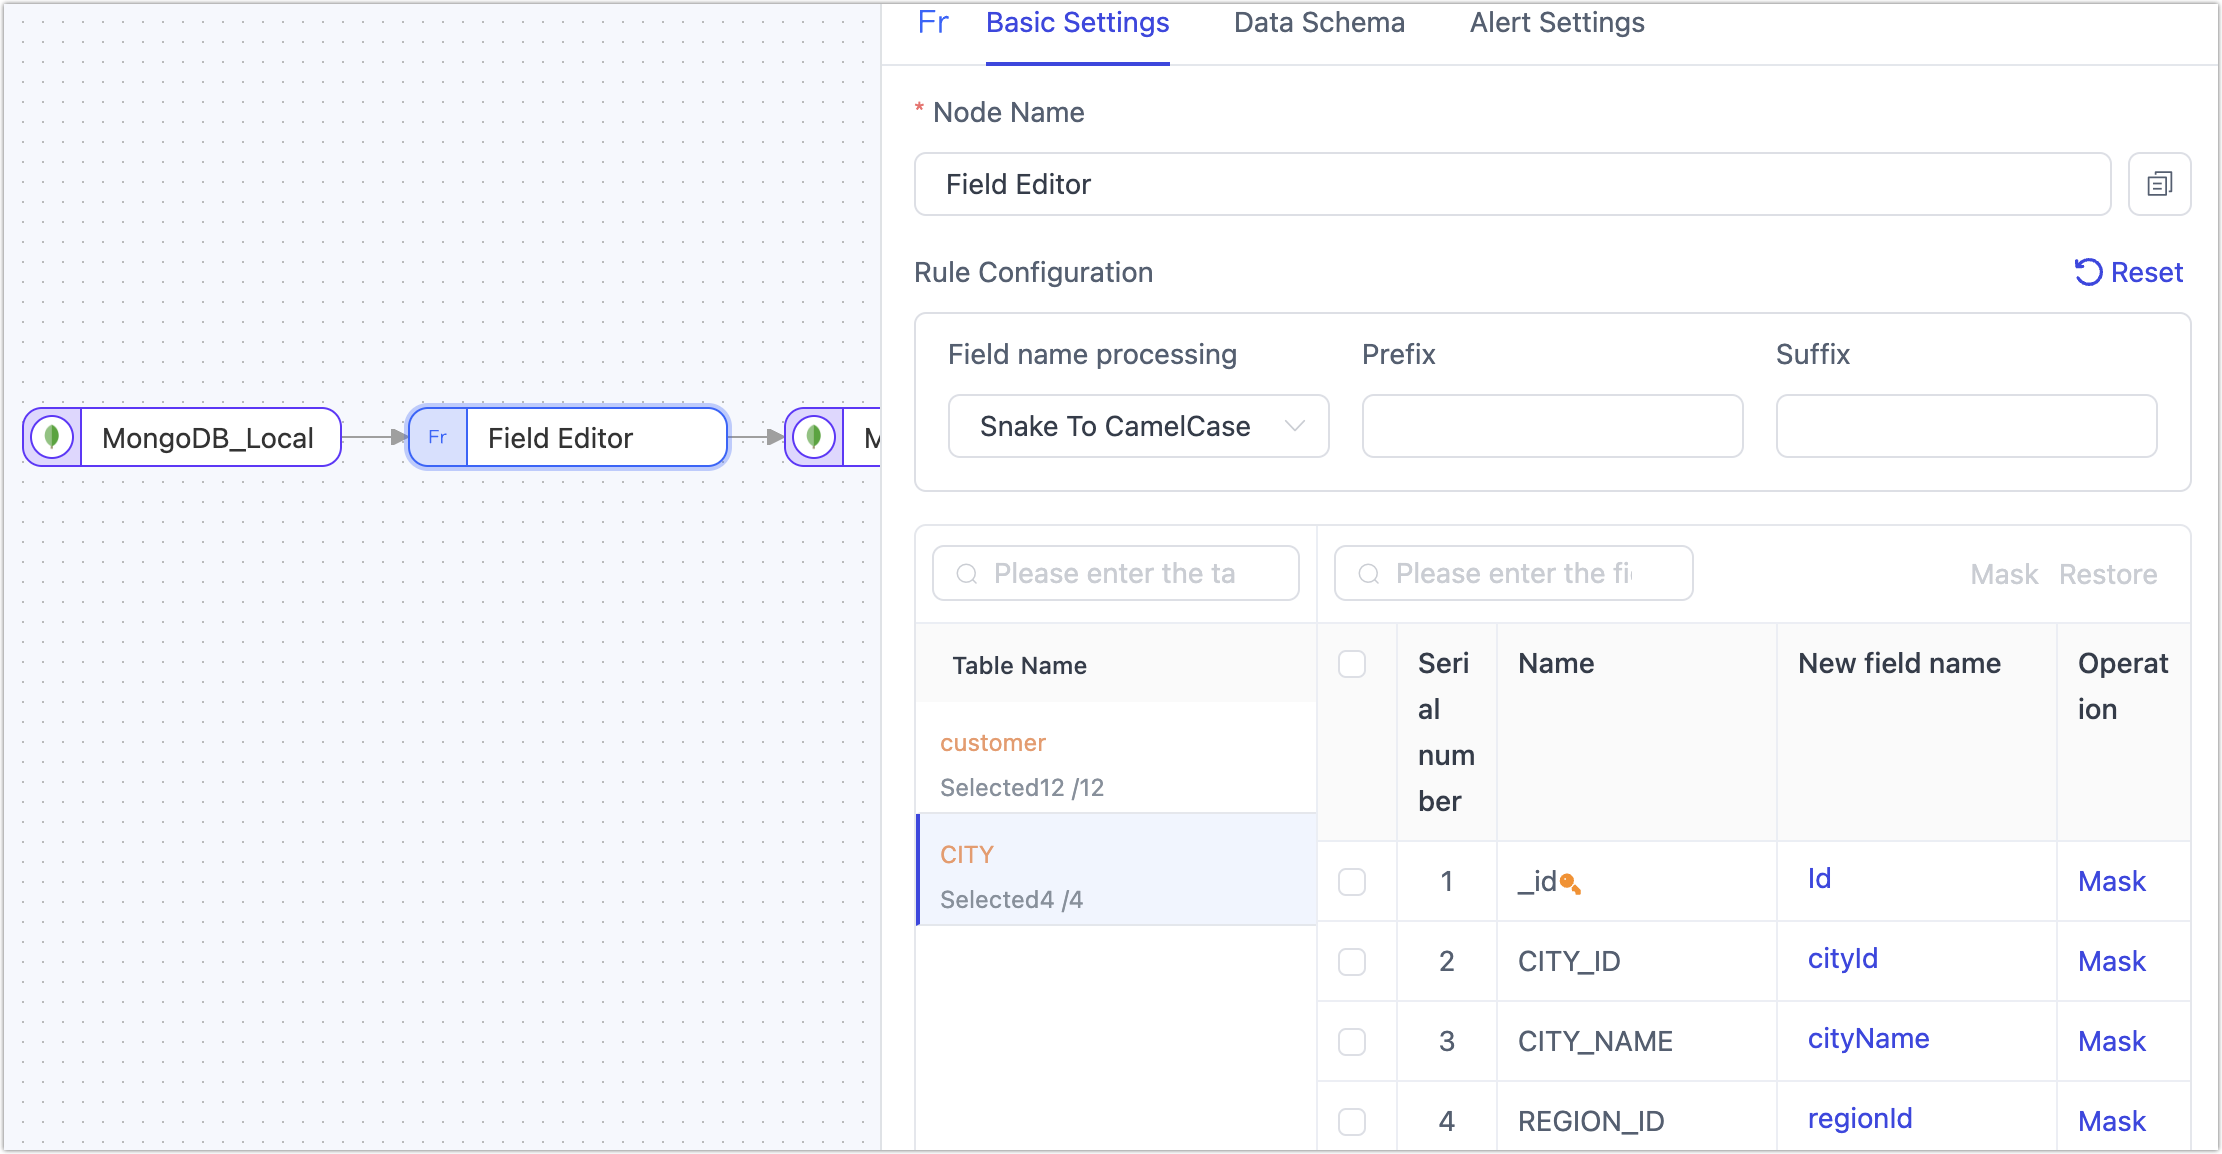
Column Edit Node
The column edit node mainly renames or changes the case of table fields. Add a Column Edit node to the canvas and connect it with the data source. Click on the node to select a uniform method for field name handling (apply to all tables). You can also click directly on the target field name to manually adjust individual fields:
- Convert to Upper Case: e.g., from
claim_idtoCLAIM_ID - Convert to Lower Case: e.g., from
CLAIM_IDtoclaim_id - Convert Snake Case to Camel Case: e.g., from
CLAIM_IDtoclaimId - Convert Camel Case to Snake Case: e.g., from
claimIdtoCLAIM_ID
Additionally, you can select a target field and click Mask to exclude it from being passed to the next node.
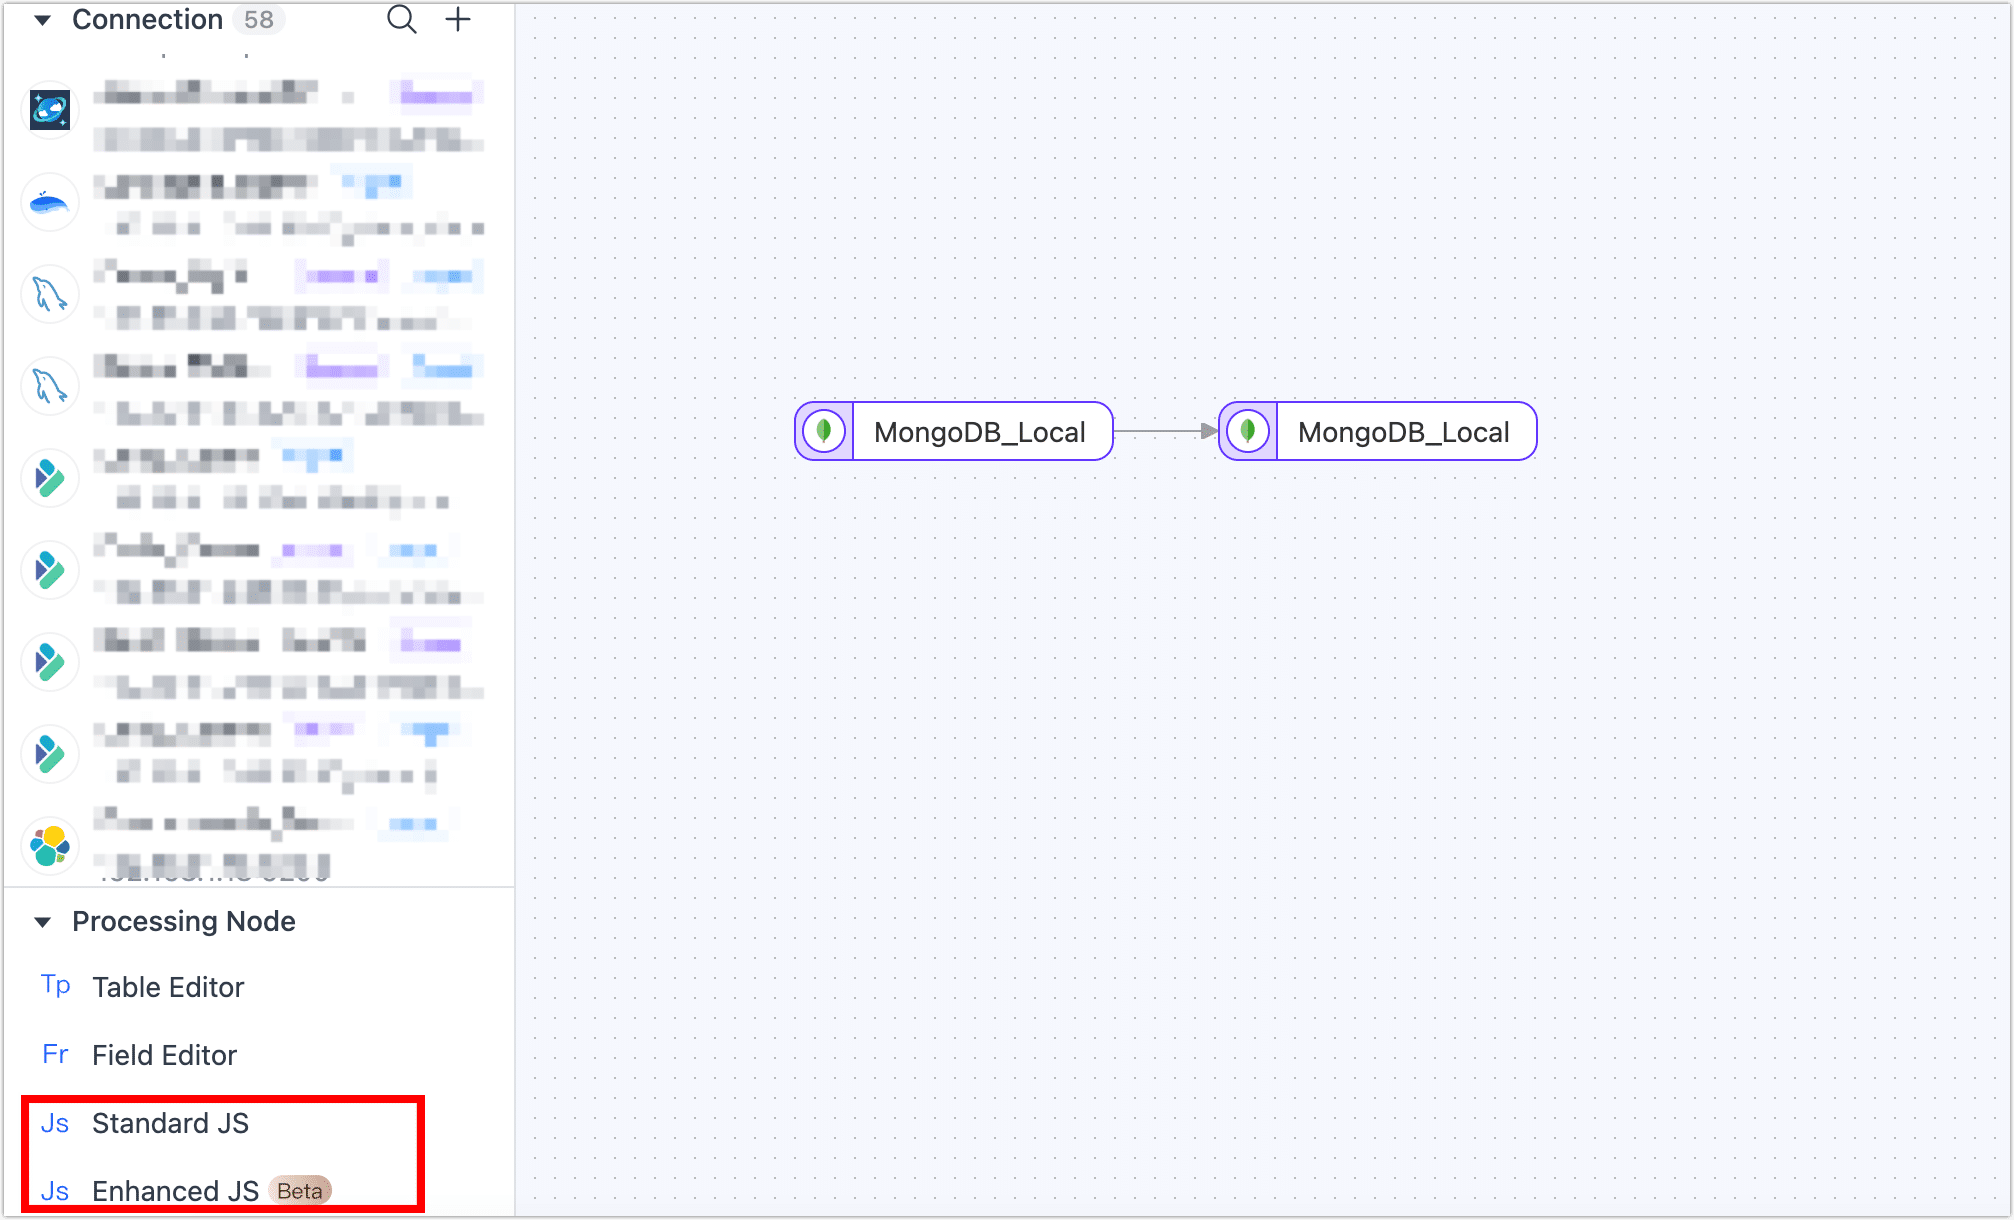
JS Node
Supports data manipulation using JavaScript scripts or Java code. Ensure the node is connected to both the source and target nodes before editing the code. If not connected, code editing is not possible.
After scripting, use the test button below the node to view inputs and outputs, aiding in debugging.
JS Node Model Declaration
For JS nodes, TapData employs sample data run tests to infer the node's model information. If the inferred model is inaccurate or missing fields, model declaration can be used to explicitly define field information.
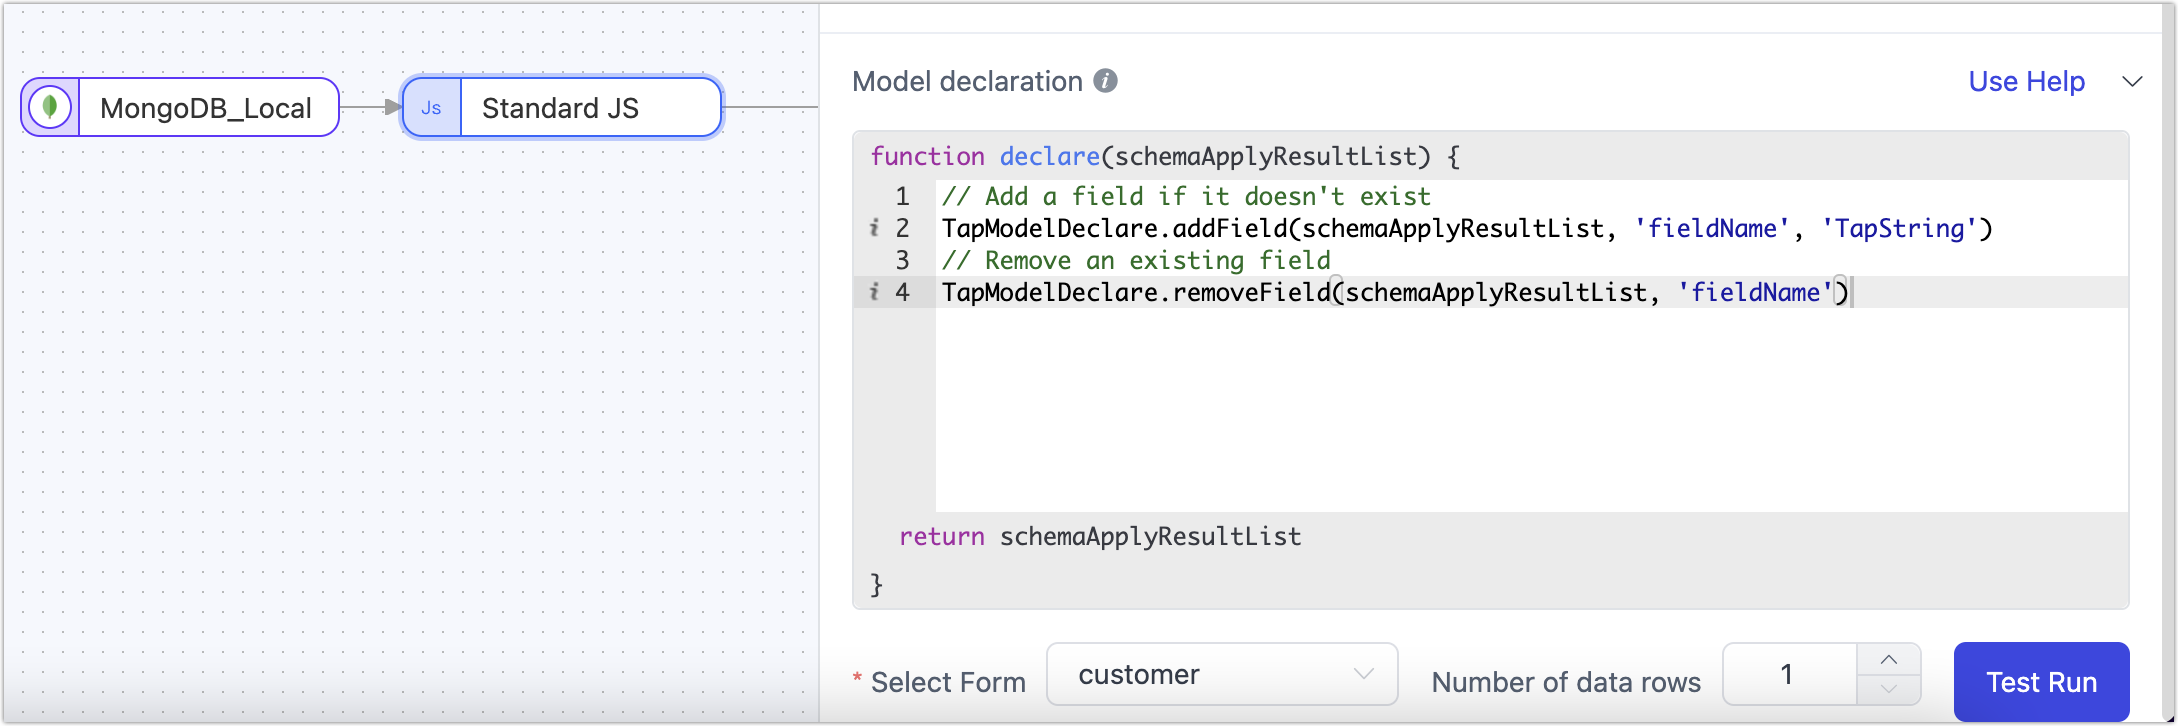
The model declaration in replication tasks supports the following methods:
// Add a field if it doesn't exist
TapModelDeclare.addField(schemaApplyResultList, 'fieldName', 'TapString')
// Remove an existing field
TapModelDeclare.removeField(schemaApplyResultList, 'fieldName')
// Update an existing field
TapModelDeclare.updateField(schemaApplyResultList, 'fieldName', 'TapString')
// Update or add a field
TapModelDeclare.upsertField(schemaApplyResultList, 'fieldName', 'TapString')
// Set a field as primary key
TapModelDeclare.setPk(schemaApplyResultList, 'fieldName')
// Unset a primary key
TapModelDeclare.unsetPk(schemaApplyResultList, 'fieldName')
// Add an index
TapModelDeclare.addIndex(schemaApplyResultList, 'indexName', [{'fieldName':'fieldName1', 'order': 'asc'}])
// Remove an index
TapModelDeclare.removeIndex(schemaApplyResultList, 'indexName')
JS Built-in Function Explanation
- Standard JS Built-in Functions: Useful for data record manipulation and calculation, such as converting date strings into Date objects.
- Enhanced JS Built-in Functions (Beta): On top of standard JS functions, supports external calls (e.g., network, database).
Time Operations
In scenarios where source and target databases are in different time zones, operations on date/time fields, like adjusting hours, are necessary. This requirement can be fulfilled using a time operation node.
Scenario Example:
In this case, the source database is in UTC+8, and the target database is in UTC+0, with an 8-hour difference.
Operational Process:
Log into the TapData platform.
Navigate to Data Pipeline > Data Replication and click Create.
Drag the source and target data sources to the canvas, followed by a time operation node, and connect them sequentially.
Configure the source node and select the tables.
Click on the Time Operation node and in the right panel, select the time type and operation method.
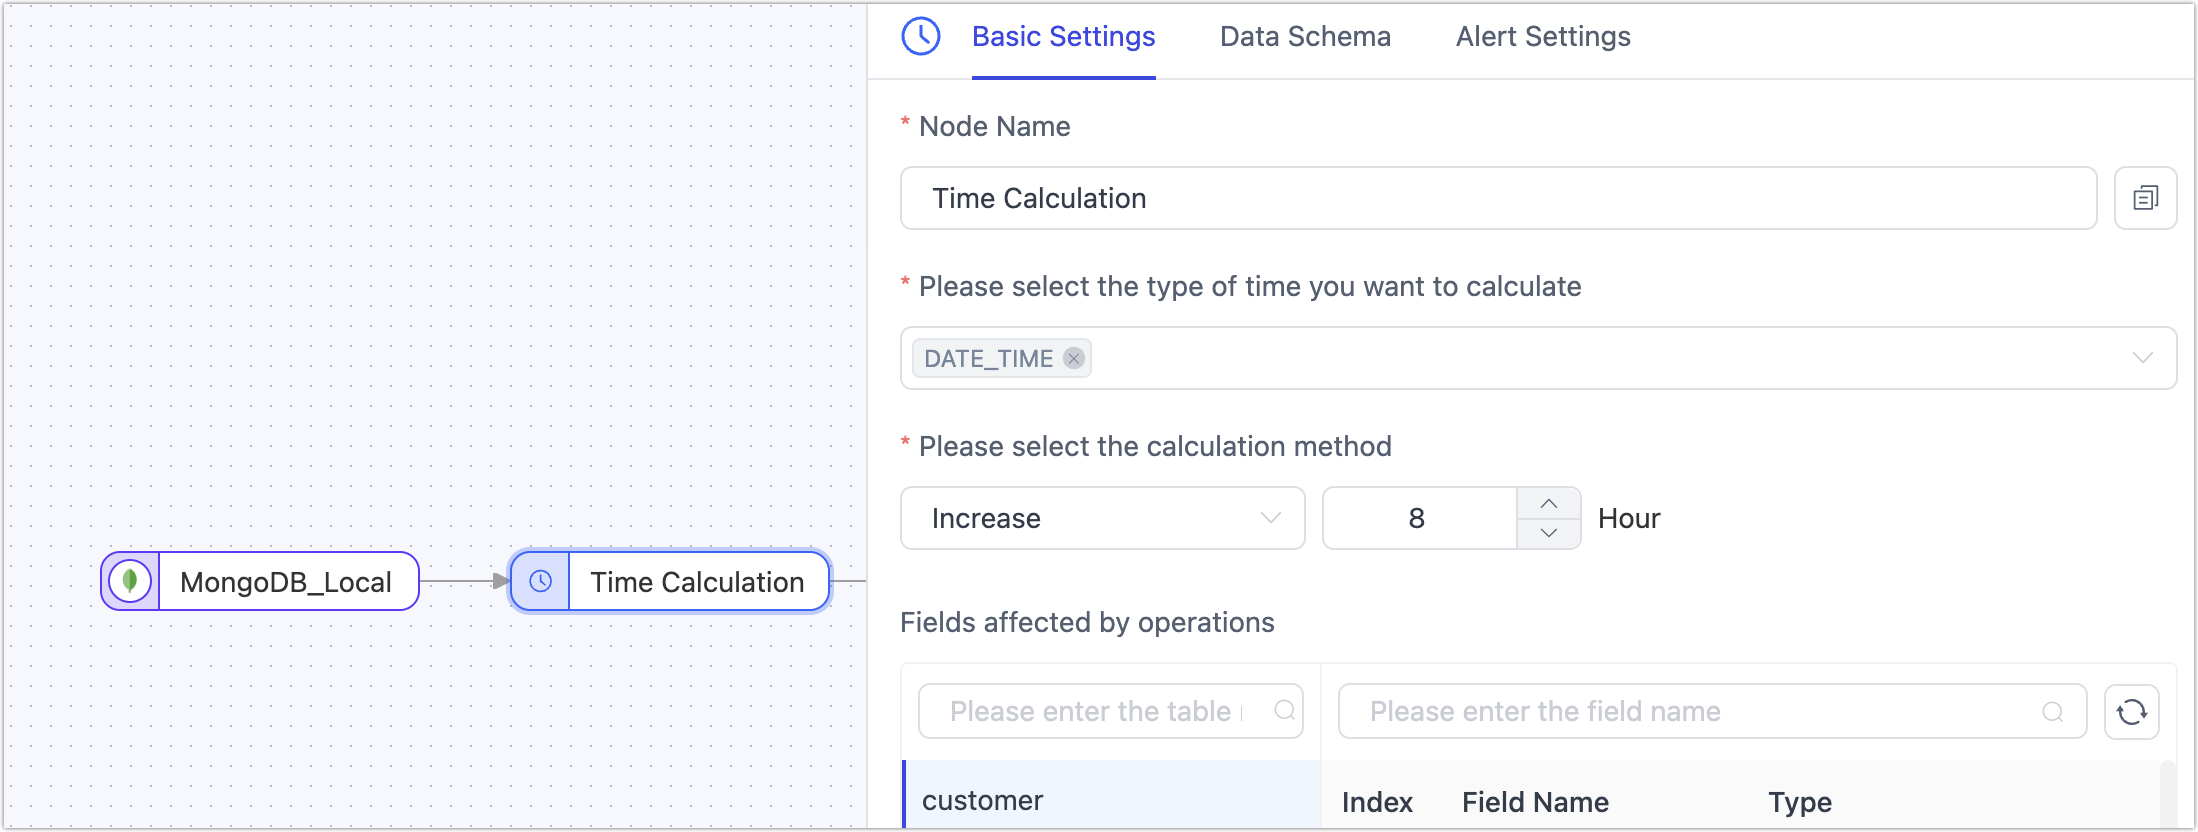
- Node Name: Defaults to the connection name, but you can set a meaningful name.
- Select the time type to operate on: TapData auto-detects supportable time types. You should choose based on your business requirements. Additionally, you can click the Model tab to see the relationship between time types and column names.
- Select the operation method: Supports adding or subtracting time, in integer hours. In this case, we choose to subtract 8 hours.
Complete the configuration for the target node and the task. For specific steps, see Creating a Data Replication Task.
Result Verification:
Query the same ID data from both the source and target tables, and you'll notice that the time has been adjusted by 8 hours as set.
-- Source table query result
SELECT birthdate FROM customer_new WHERE id="00027f47eef64717aa8ffb8115f1e66a";
+-------------------------+
| birthdate               |
+-------------------------+
| 2021-09-01 09:10:00.000 |
+-------------------------+
1 row in set (0.00 sec)

-- Target table query result
SELECT birthdate FROM customer_new_time WHERE id="00027f47eef64717aa8ffb8115f1e66a";
+-------------------------+
| birthdate               |
+-------------------------+
| 2021-09-01 01:10:00.000 |
+-------------------------+
Type Filtering
In scenarios involving data synchronization between heterogeneous data sources, some data types not supported by the target database might also lack business utility. In such cases, the Type Filtering node can quickly filter out unwanted same-type columns. The filtered fields will not be passed to the next node.
Operation: Add the Type Filtering node to the canvas and connect it to the data source. Click on the node and select the field types to filter (precision specification is not supported yet).
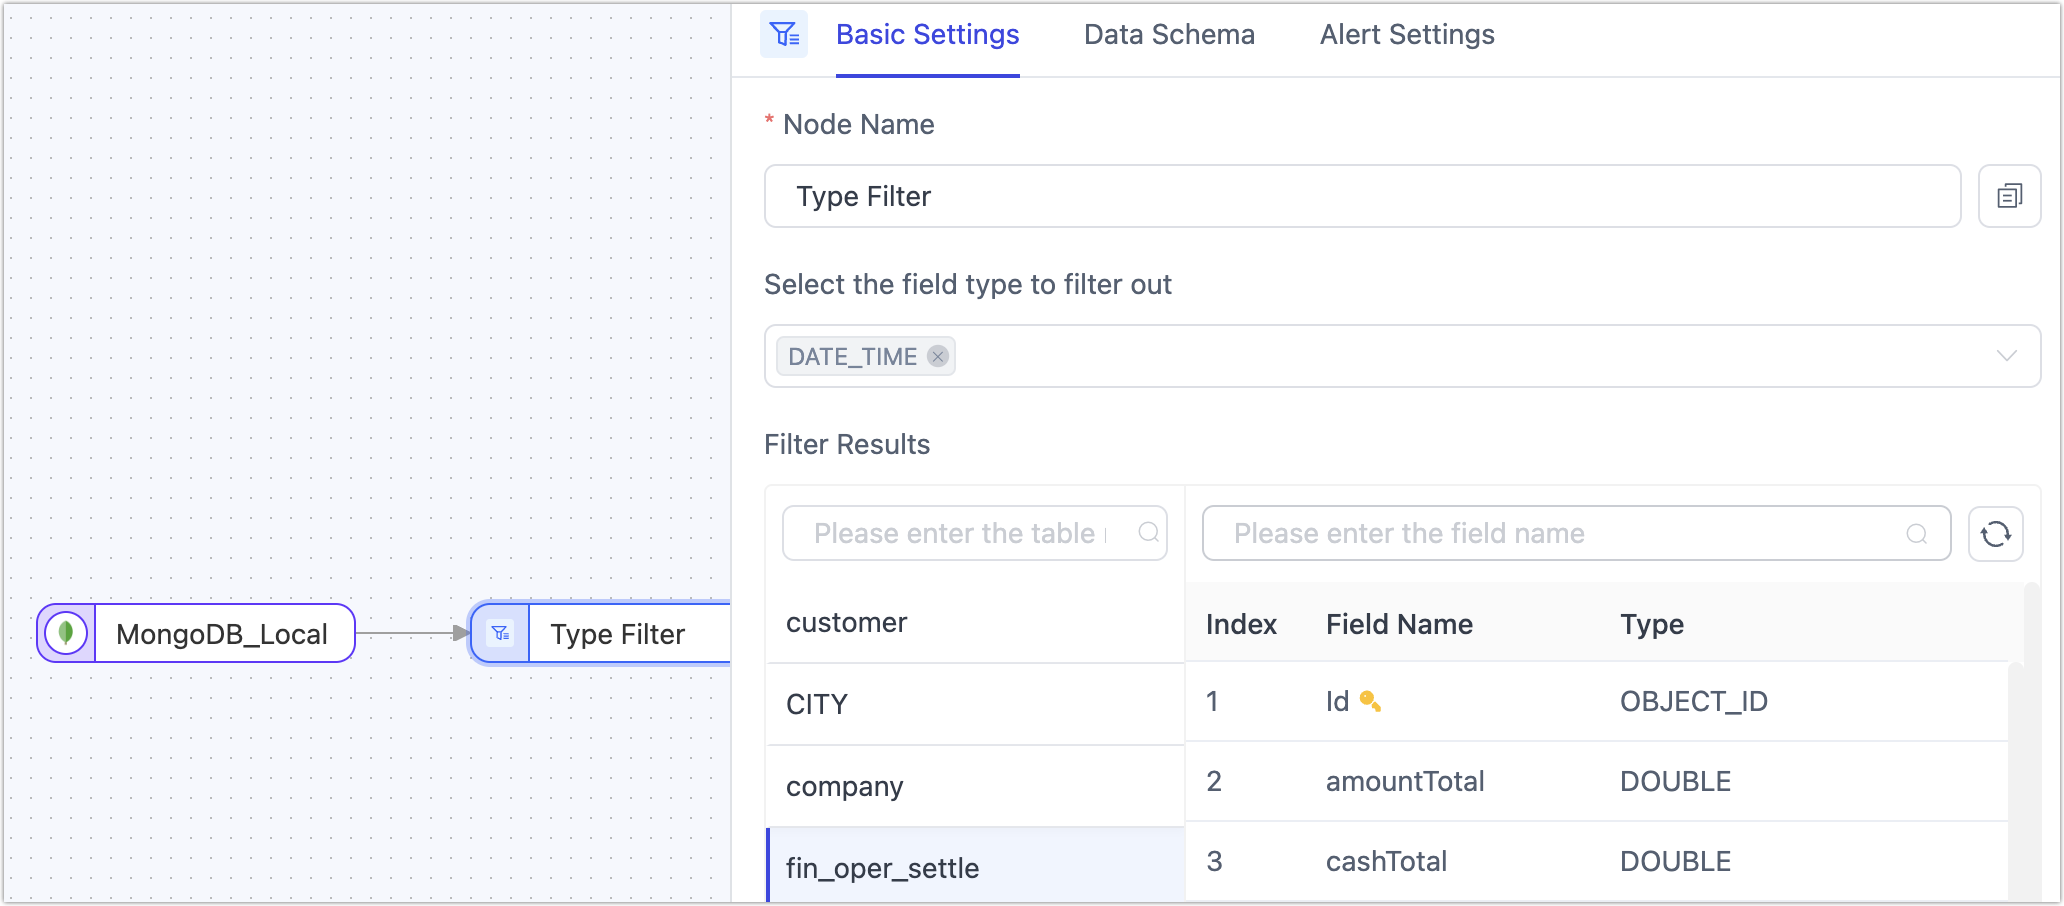
Precision specification for filtered field types is not yet supported. For instance, if the field type to be filtered is varchar, then varchar(16), varchar(12), etc., will all be filtered.
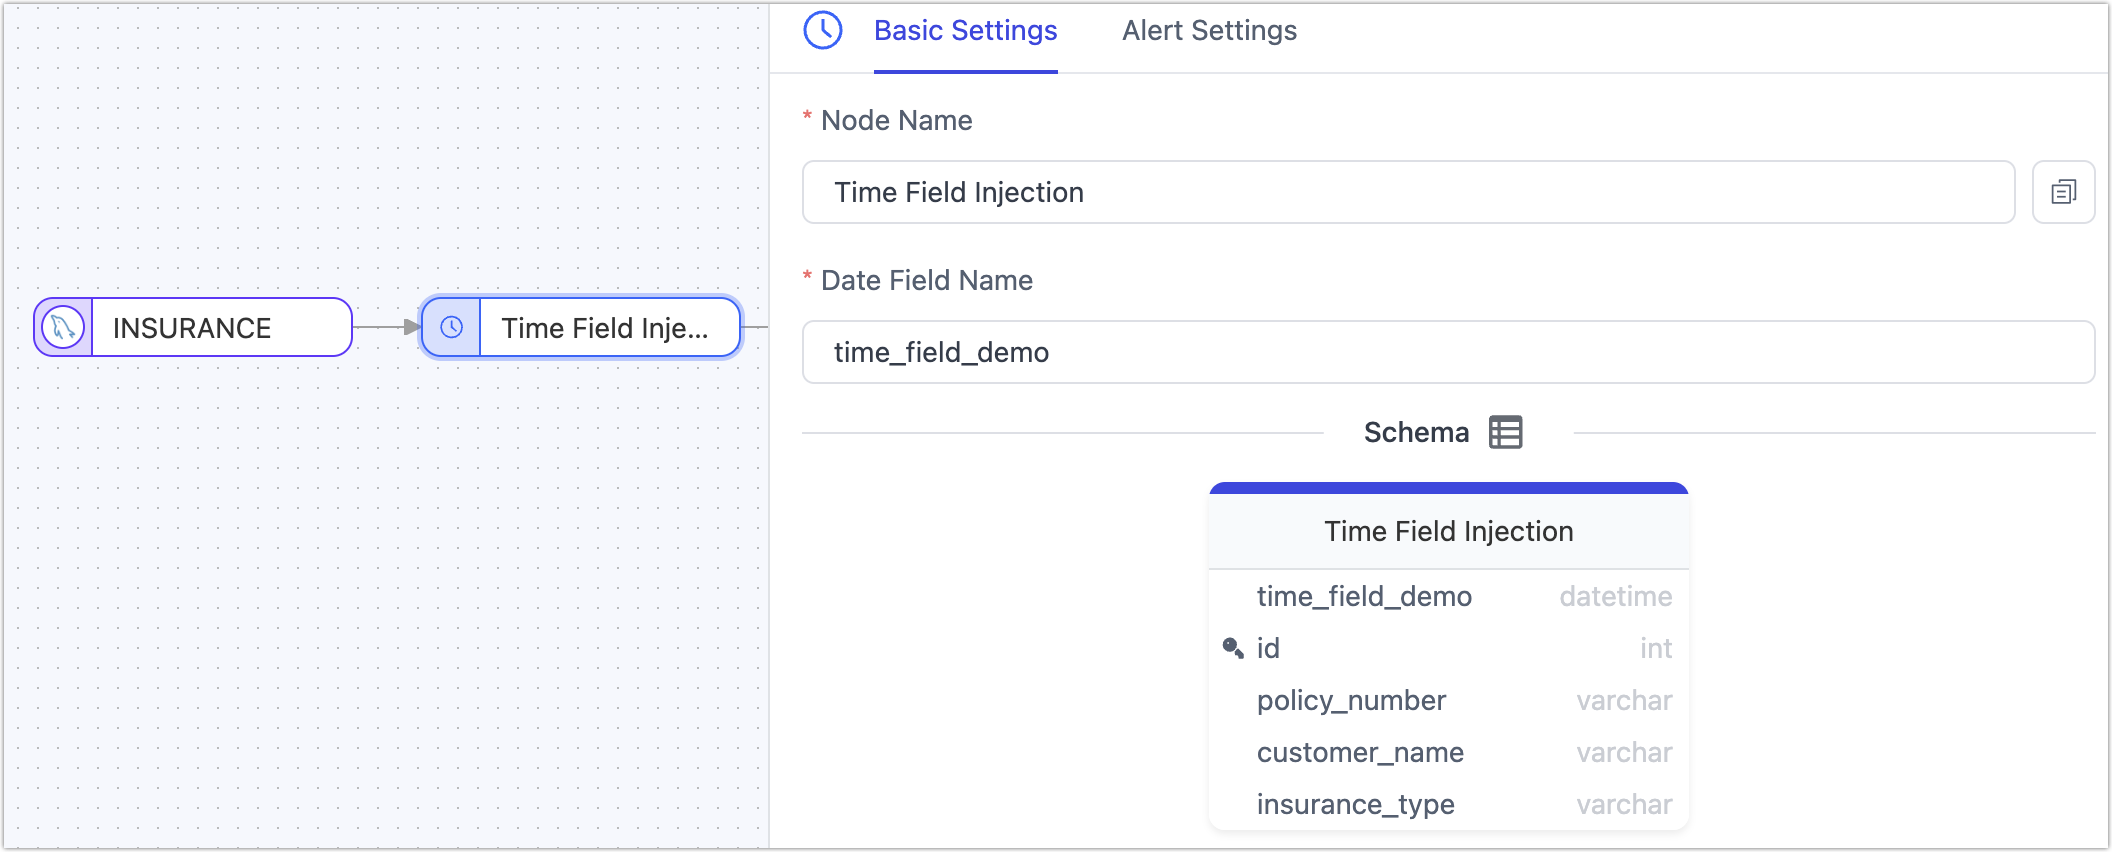
Time Field Injection
In real-time data integration and synchronization processes, capturing and synchronizing incremental data is key to ensuring data consistency and timeliness.
When the data source lacks complete CDC support or is restricted by permission controls from accessing incremental logs, we can add a time field injection node to the data synchronization chain. This node automatically adds timestamp information to the source table data read. Subsequently, in the target table's configuration, this field (of DATETIME type) can be selected for polling to achieve incremental data retrieval, thereby further enhancing the flexibility of real-time data acquisition methods.