Zoho Desk
Zoho Desk is a cloud-based customer service platform that supports ticket management, customer communication, and service automation. By integrating Zoho Desk as a data source in TapData, you can stream key data such as tickets, contacts, and conversations in real time. This is ideal for building unified customer service views, customer profiles, and service response monitoring systems.
Supported Data
TapData reads Zoho Desk data in a table-like format and syncs it to target systems. The table names correspond to Zoho Desk modules as follows:
- Tickets: Ticket records
- Departments: Department records
- Products: Product records
- OrganizationFields: Custom field definitions
- Contracts: Contract records
Notes
- Each Zoho Desk data source requires a unique service URL to ensure proper WebHook delivery.
- Since Zoho Desk limits the number of OpenAPI tokens per client, avoid using the same Client ID and Secret across multiple data sources to prevent throttling.
- In WebHook incremental mode, Zoho Desk marks deleted records with
IsDel = TRUEin update events. Note: if a task is reset and restarted, these deletions will not be retrieved via full sync again.
Prerequisites
Before connecting Zoho Desk to TapData, follow these steps to retrieve authentication credentials:
Obtain Organization ID.
Log in to Zoho Desk.
Click the
 icon in the top-right, search for APIs, and open the API authentication page to view the Organization ID.
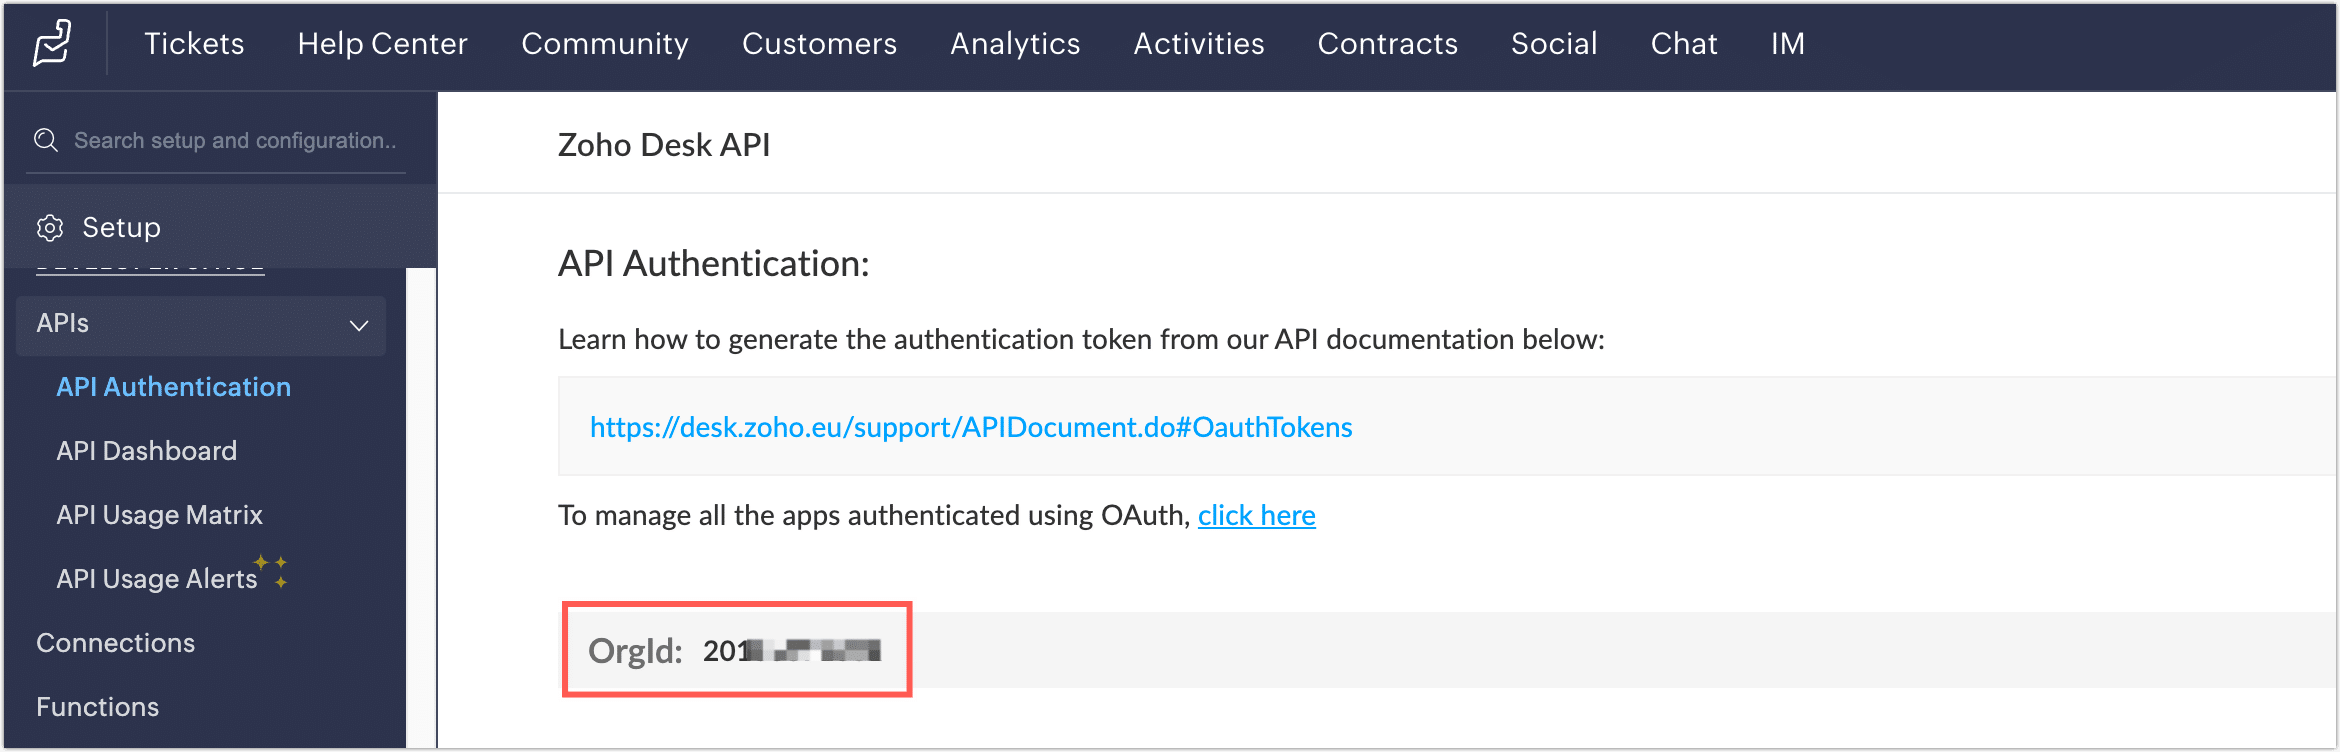
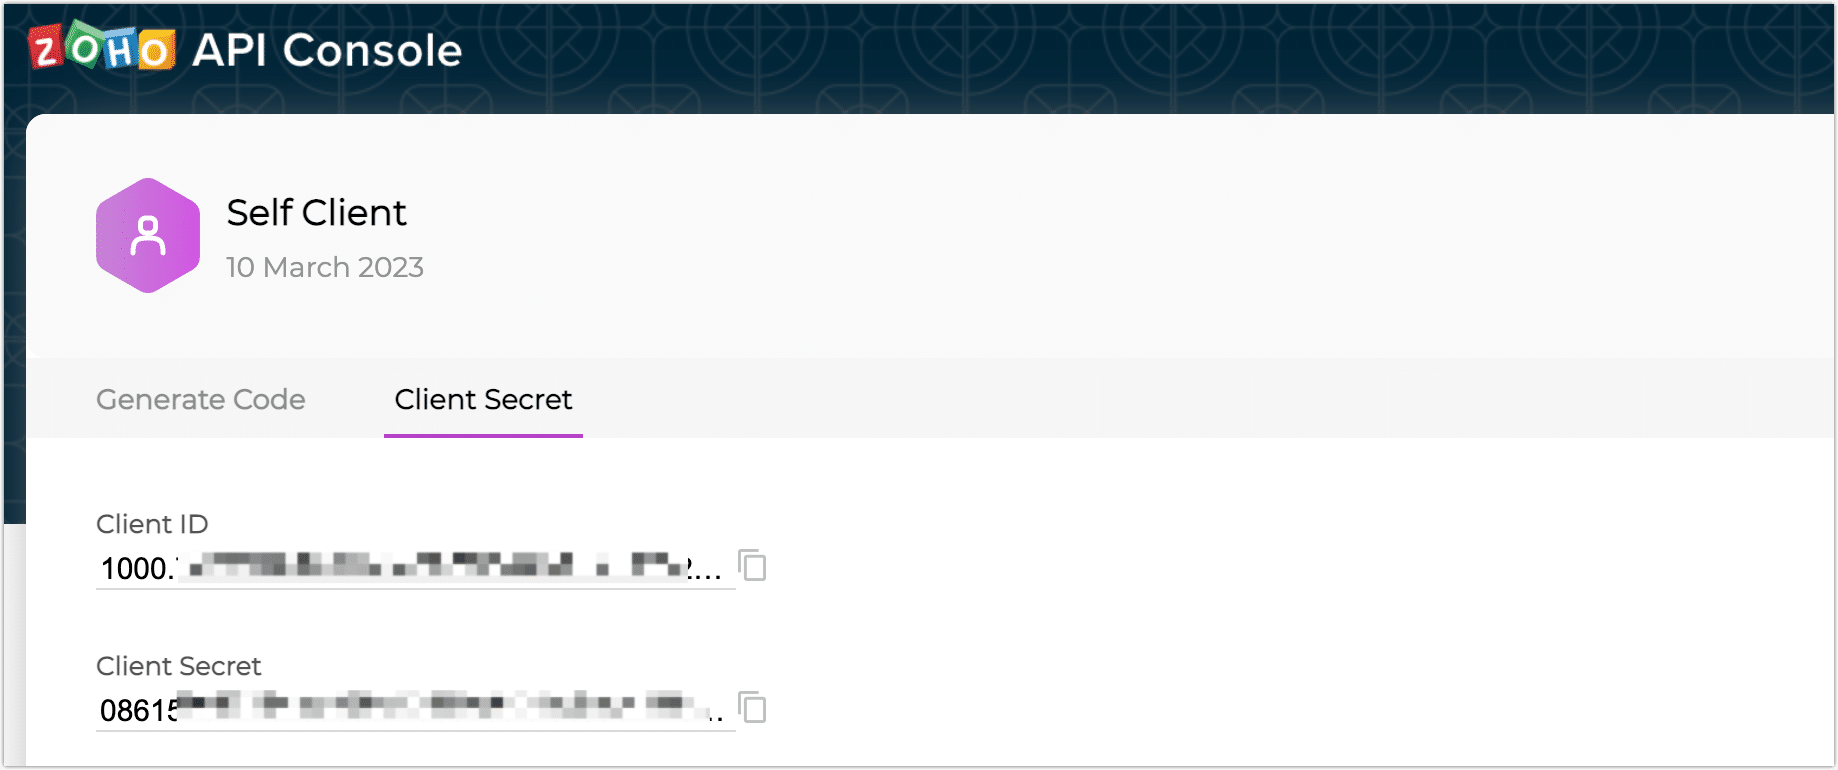
Obtain Client ID and Secret.
Go to the Zoho API Console and click GET STARTED.
Under Self Client, click CREATE NOW.
Click CREATE, then confirm with OK.
You will now receive the Client ID and Client Secret, which will be used in TapData.
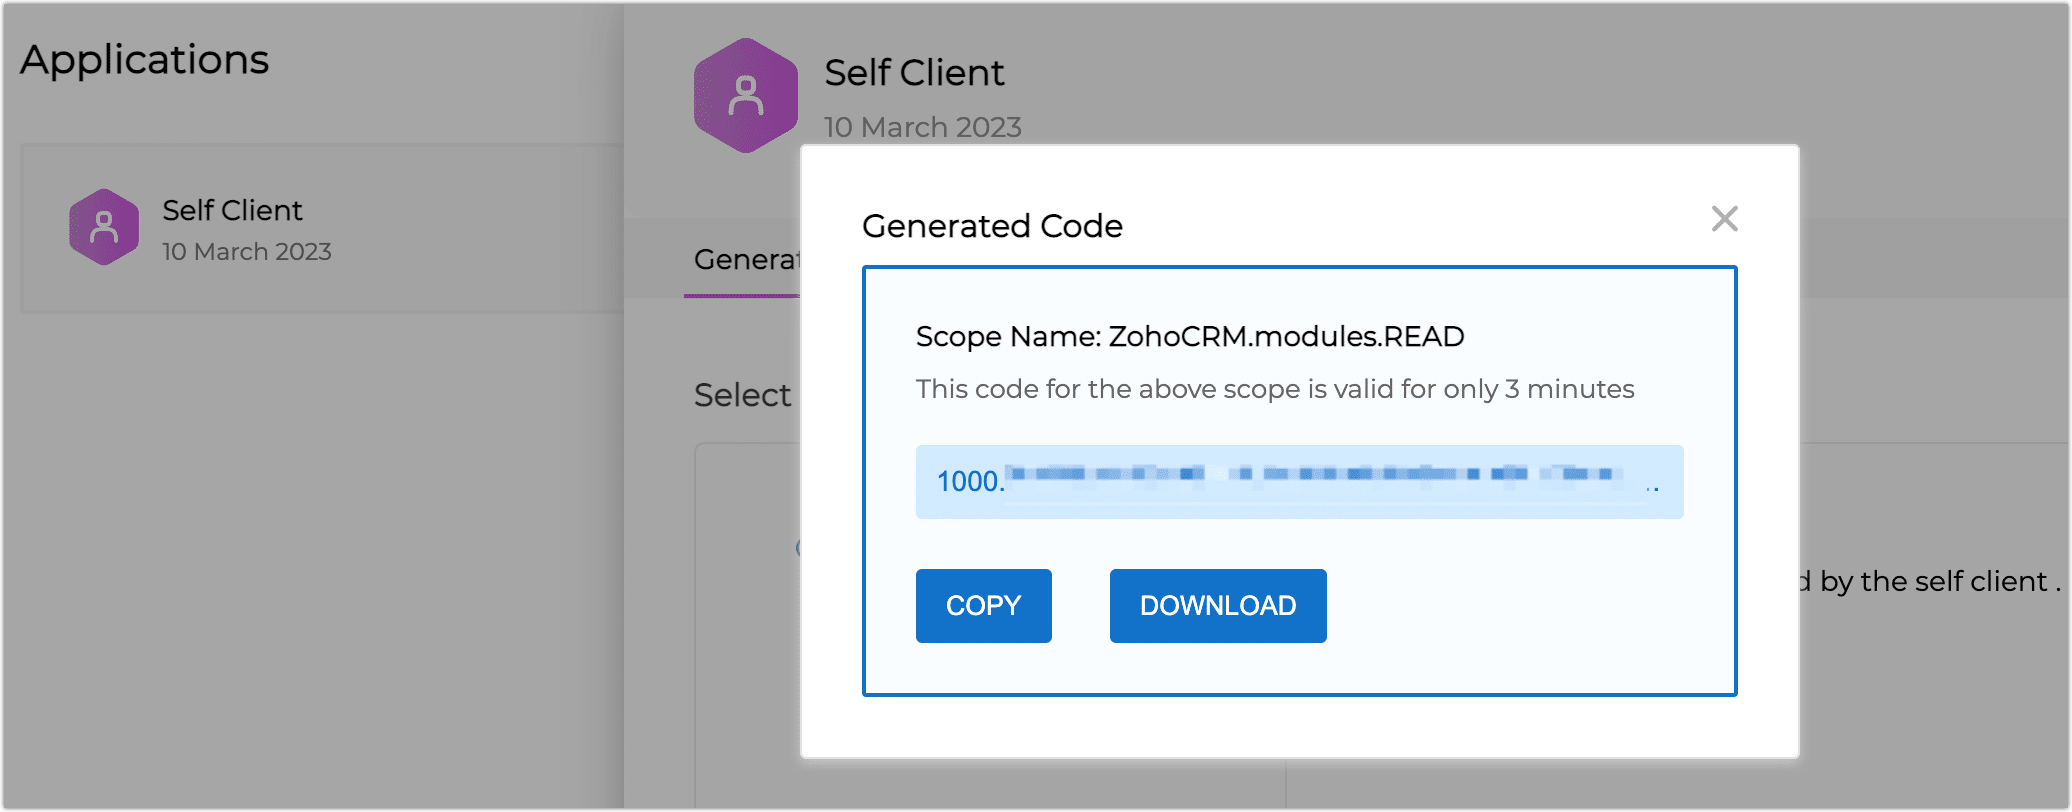
Generate Authorization Code.
Navigate to the Generate Code tab, enter the following Scope, authorization duration, and description, then click CREATE:
Desk.tickets.ALL,Desk.search.READ,Desk.contacts.READ,Desk.contacts.WRITE,Desk.contacts.UPDATE,Desk.contacts.CREATE,Desk.tasks.ALL,Desk.basic.READ,Desk.basic.CREATE,Desk.settings.ALL,Desk.events.ALL,Desk.articles.READ,Desk.articles.CREATE,Desk.articles.UPDATE,Desk.articles.DELETEIn the Select Portal section, choose the desired portal and environment (e.g., Production), then click CREATE.
Copy or download the generated code and store it securely. You’ll need this to complete the data source connection.
Connect to Zoho Desk
From the left navigation panel, click Connections.
Click Create on the right side of the screen.
In the pop-up dialog, search for and select Zoho-Desk.
Configure the data source according to the following instructions:
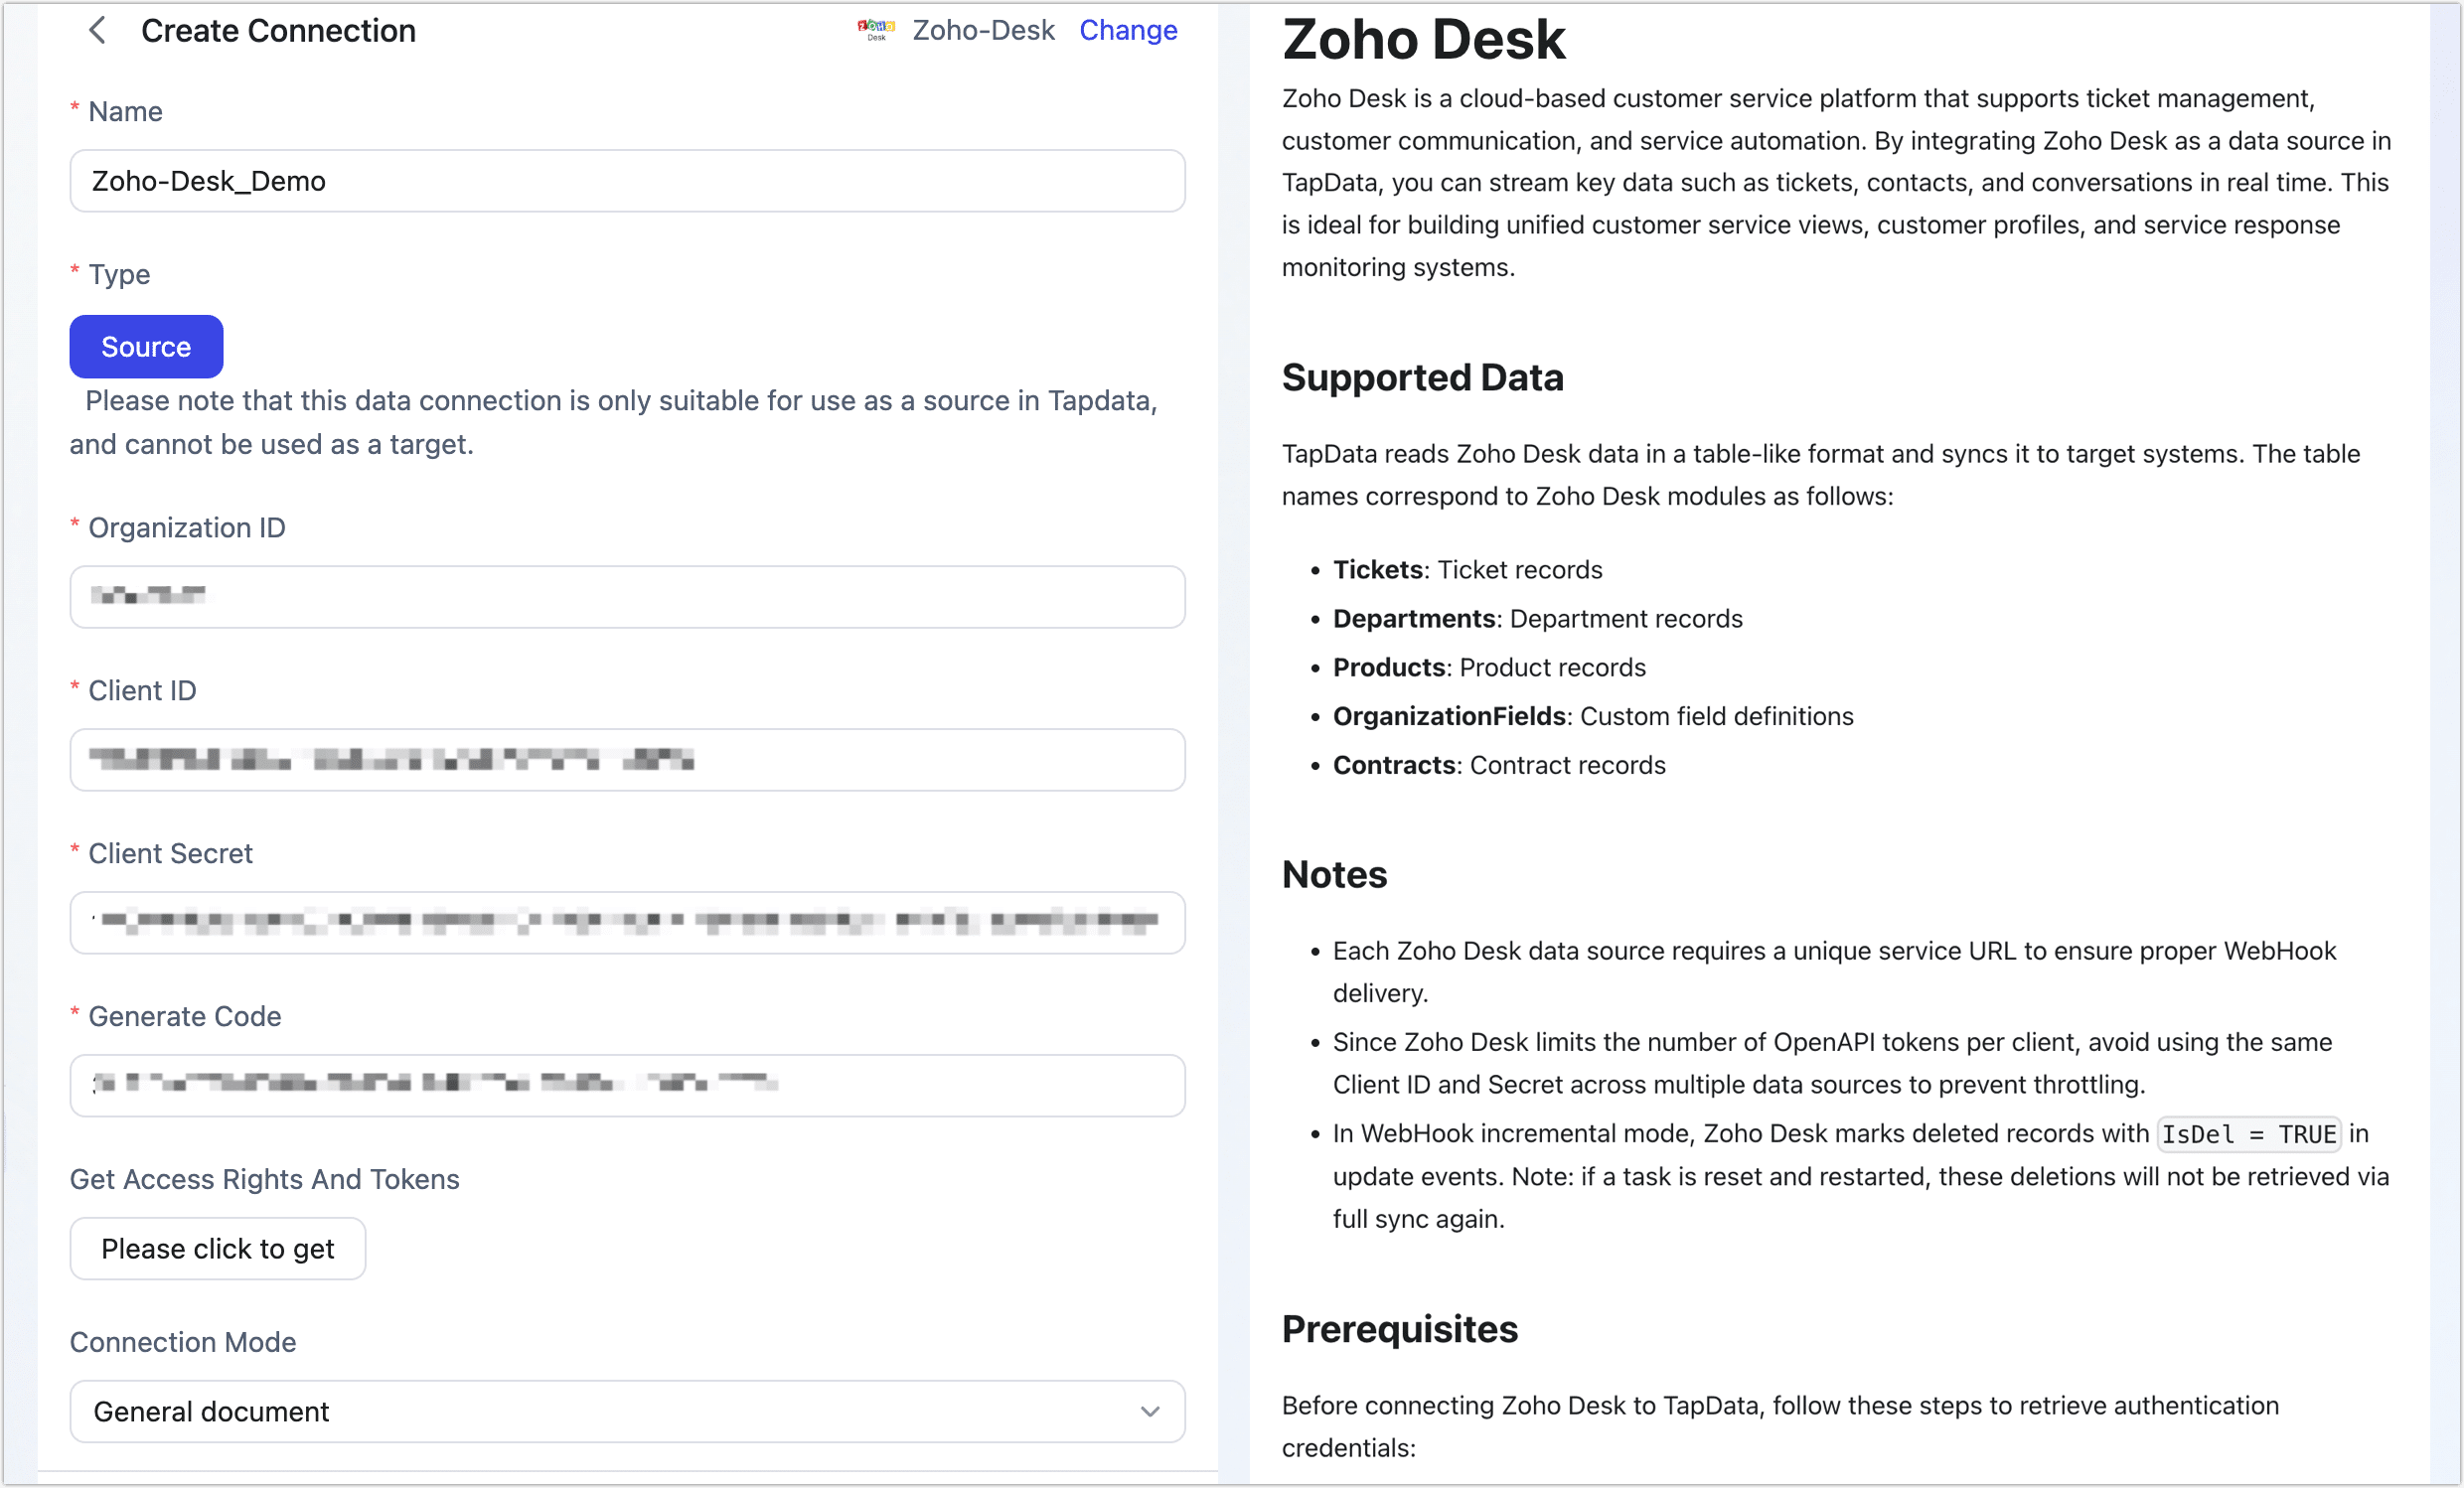
Basic Settings
Name: A meaningful name for the connection.
Type: Source only.
Organization ID: Retrieved from Zoho Desk.
Client ID, Client Secret, and Generate Code: Enter the credentials obtained earlier. See Prerequisites. Click the authorization button to retrieve access tokens. If authentication fails with "invalid_client", the code may have expired—please regenerate it.
Connection Mode: Set to "General document".
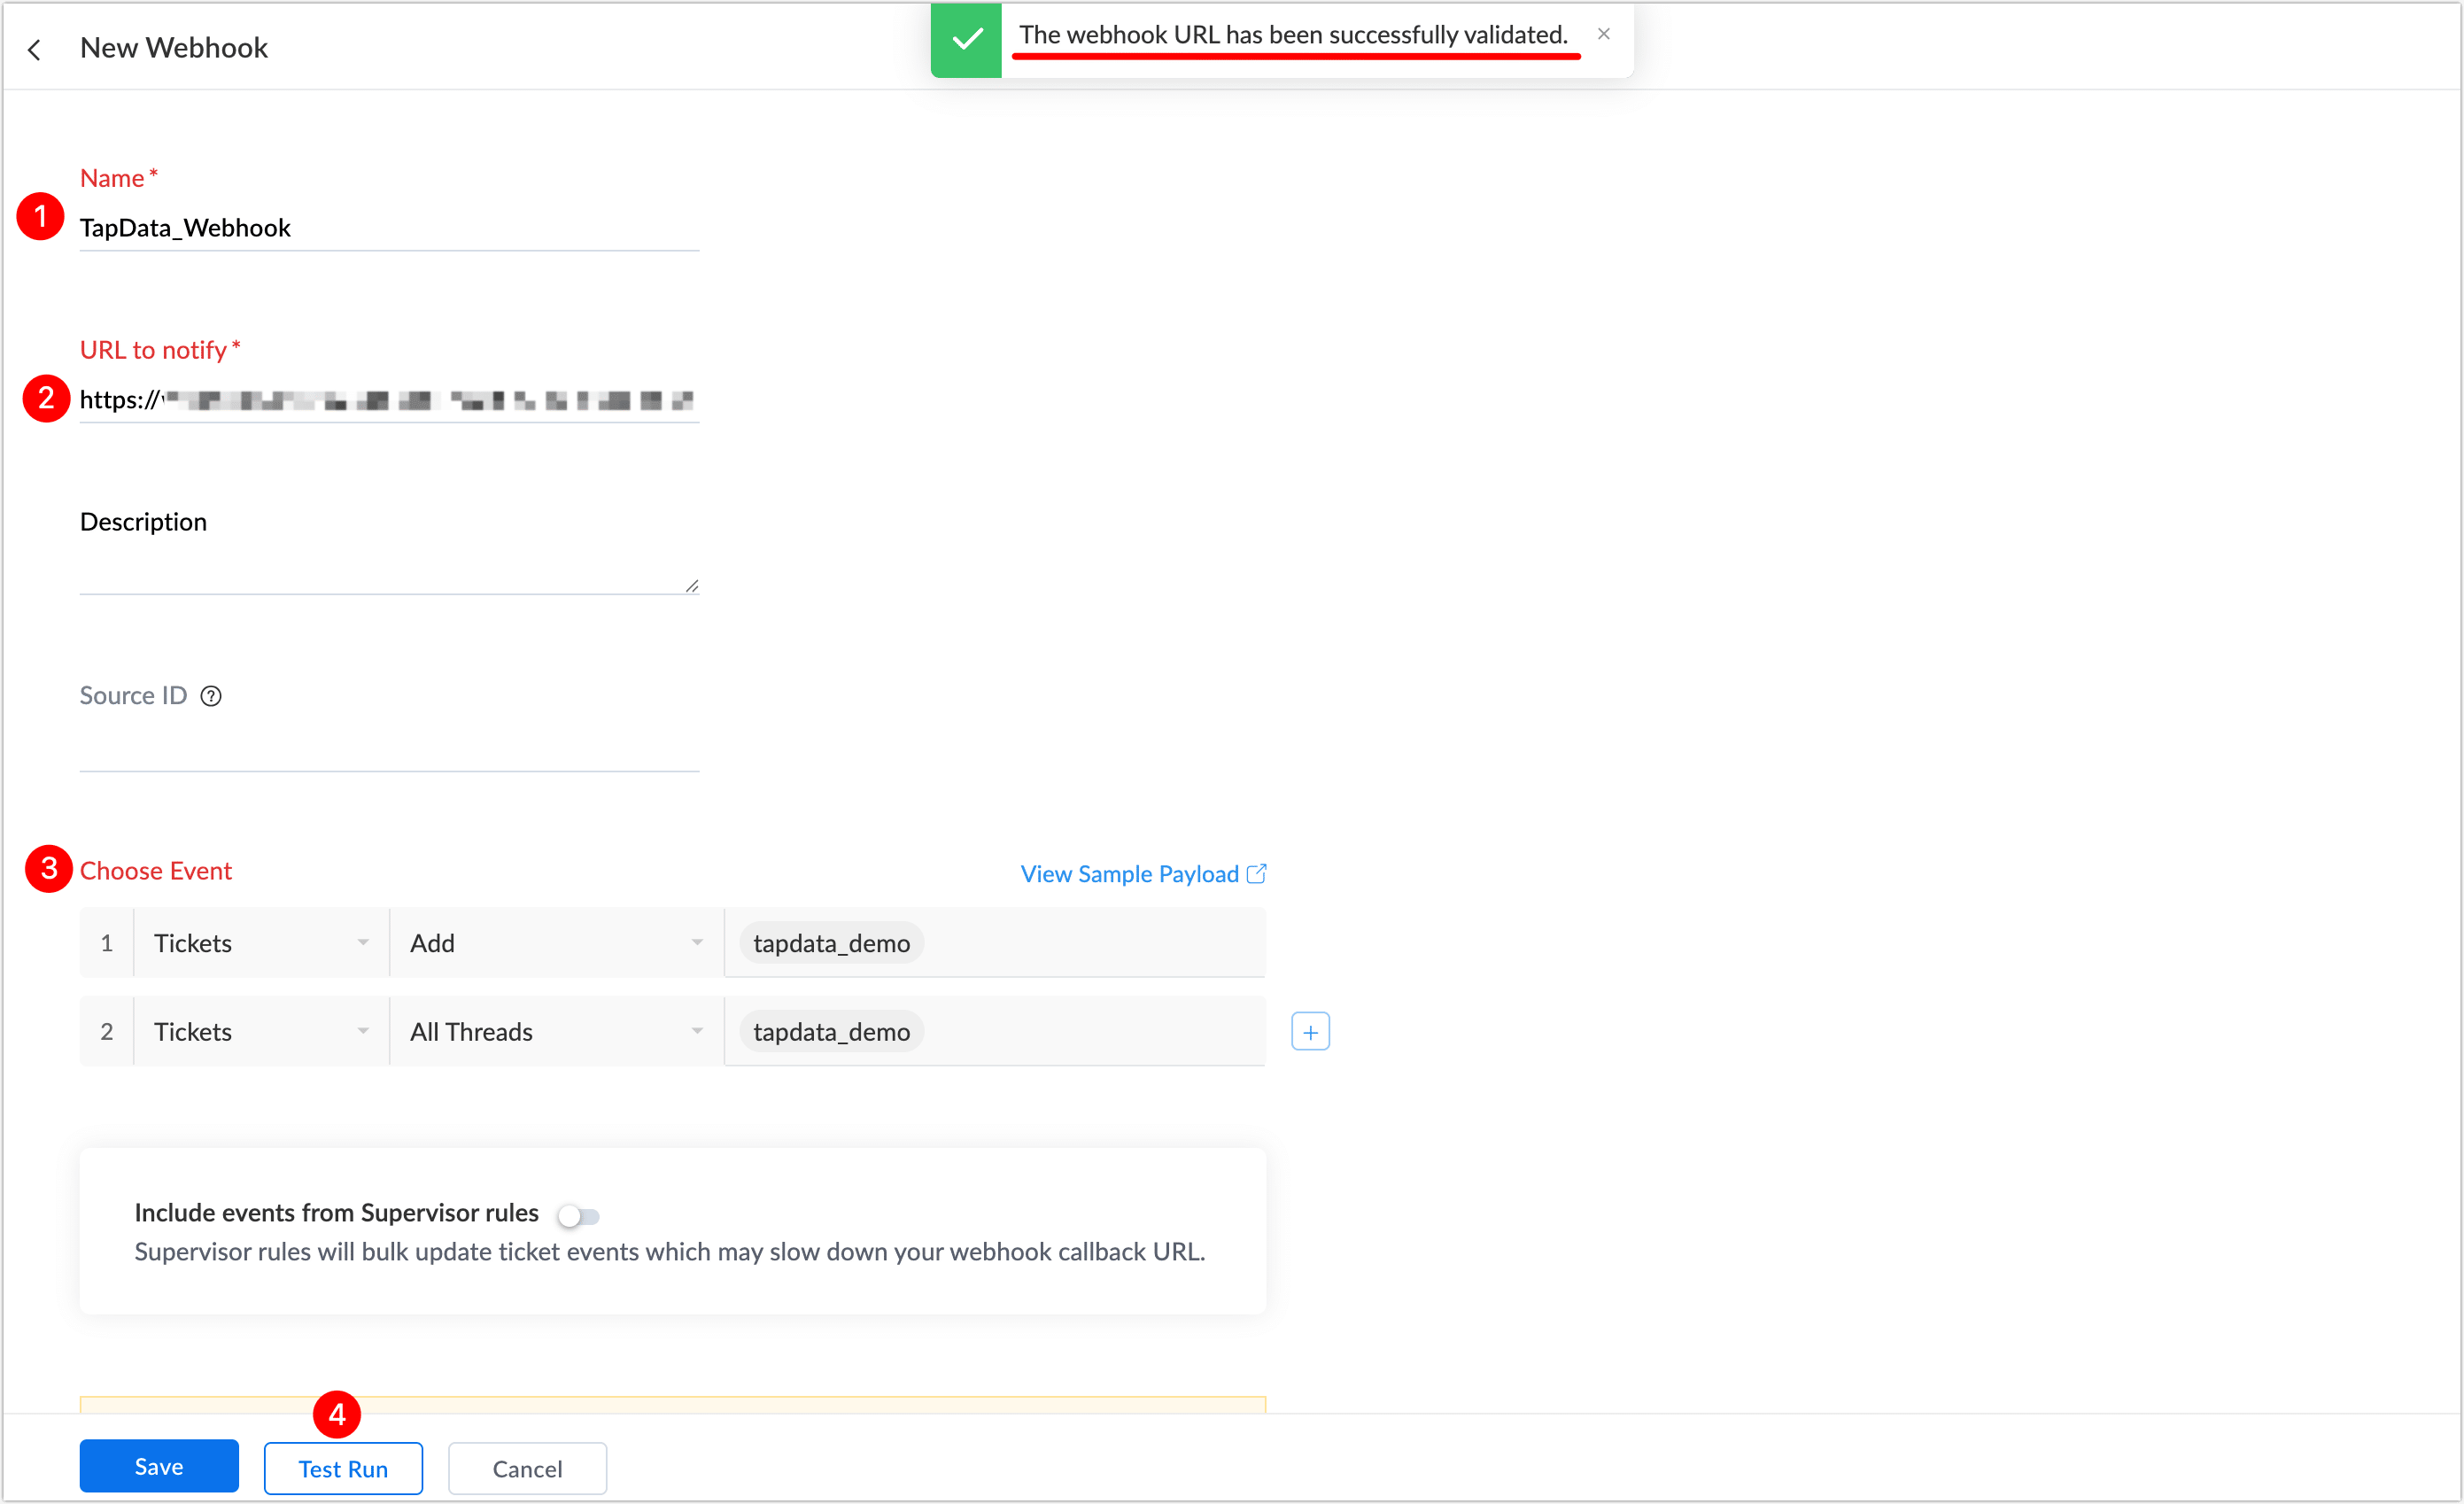
Incremental Mode: Currently only WebHook-based incremental updates are supported. To enable real-time data sync from Zoho Desk, click Generate URL to Notify, then configure WebHooks in Zoho Desk:
tipIf TapData is deployed locally, ensure that the generated URL is accessible through your firewall to guarantee successful receipt of incremental data pushed from Zoho Desk.
Create Webhook (Click to expand)
Advanced Settings
- Agent Settings: Defaults to Platform automatic allocation, you can also manually specify an agent.
- Model Load Time: If there are less than 10,000 models in the data source, their schema will be updated every hour. But if the number of models exceeds 10,000, the refresh will take place daily at the time you have specified.
Click Test at the bottom. Once the test passes, click Save.
Further Reading