LarkTask

 TapData Cloud offers you cloud services that are suitable for scenarios requiring rapid deployment and low initial investment, helping you focus more on business development rather than infrastructure management. Free trial with TapData Cloud.
 TapData Enterprise can be deployed in your local data center, making it suitable for scenarios with strict requirements on data sensitivity or network isolation. It can serve to build real-time data warehouses, enable real-time data exchange, data migration, and more.
Lark is a collaboration and management platform that provides instant messaging, video conferencing, and other features. After completing the Agent deployment, you can follow this guide to add a LarkTask data source in Tapdata, and later use it as a target to build data pipelines.
Prerequisites
Log in to the Lark Open Platform as an administrator.
On the homepage of the development platform, open the self-built application.
For instructions on creating a self-built application, see Development Process.
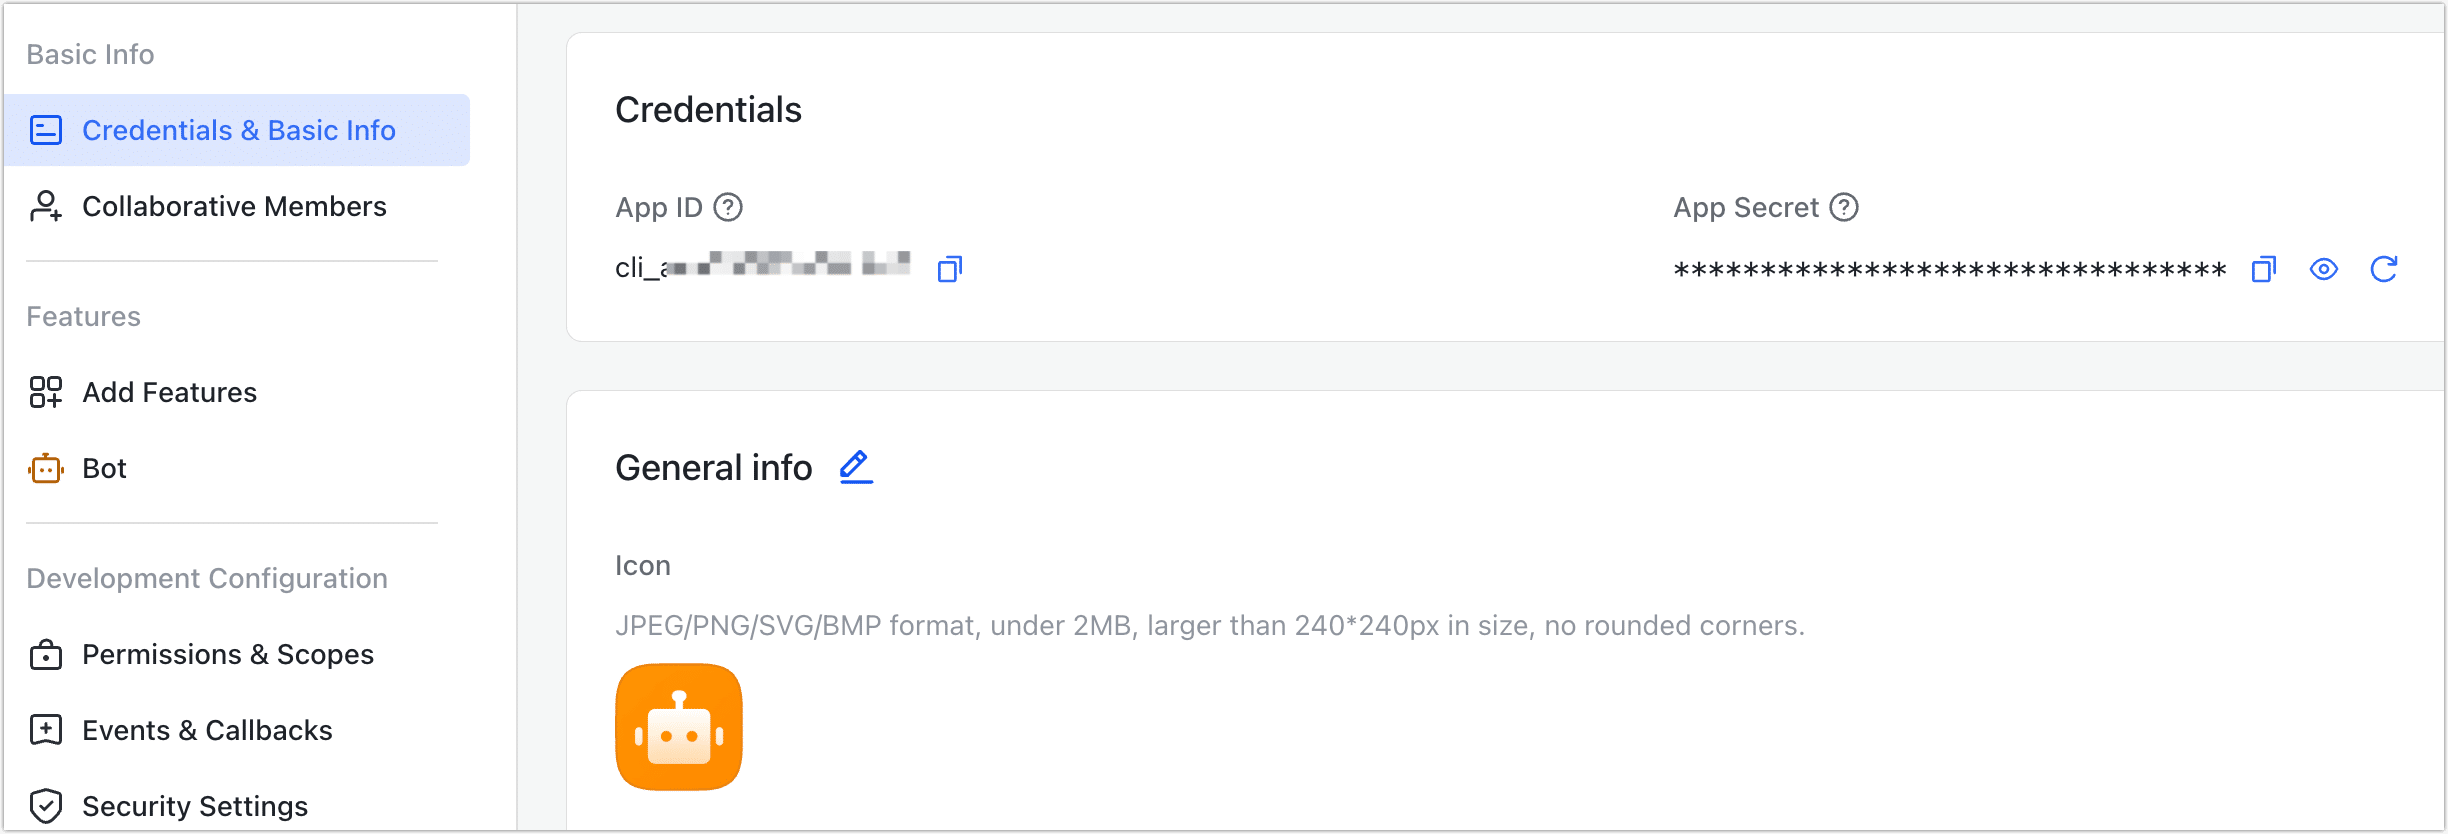
In the left navigation bar, click Credentials & Basic Info to obtain the App ID and App Secret, which are needed when configuring the data source connection.

Connect to LarkTask
In the left navigation panel, click Connections.
On the right side of the page, click Create Connection.
In the pop-up dialog, search for and select LarkTask.
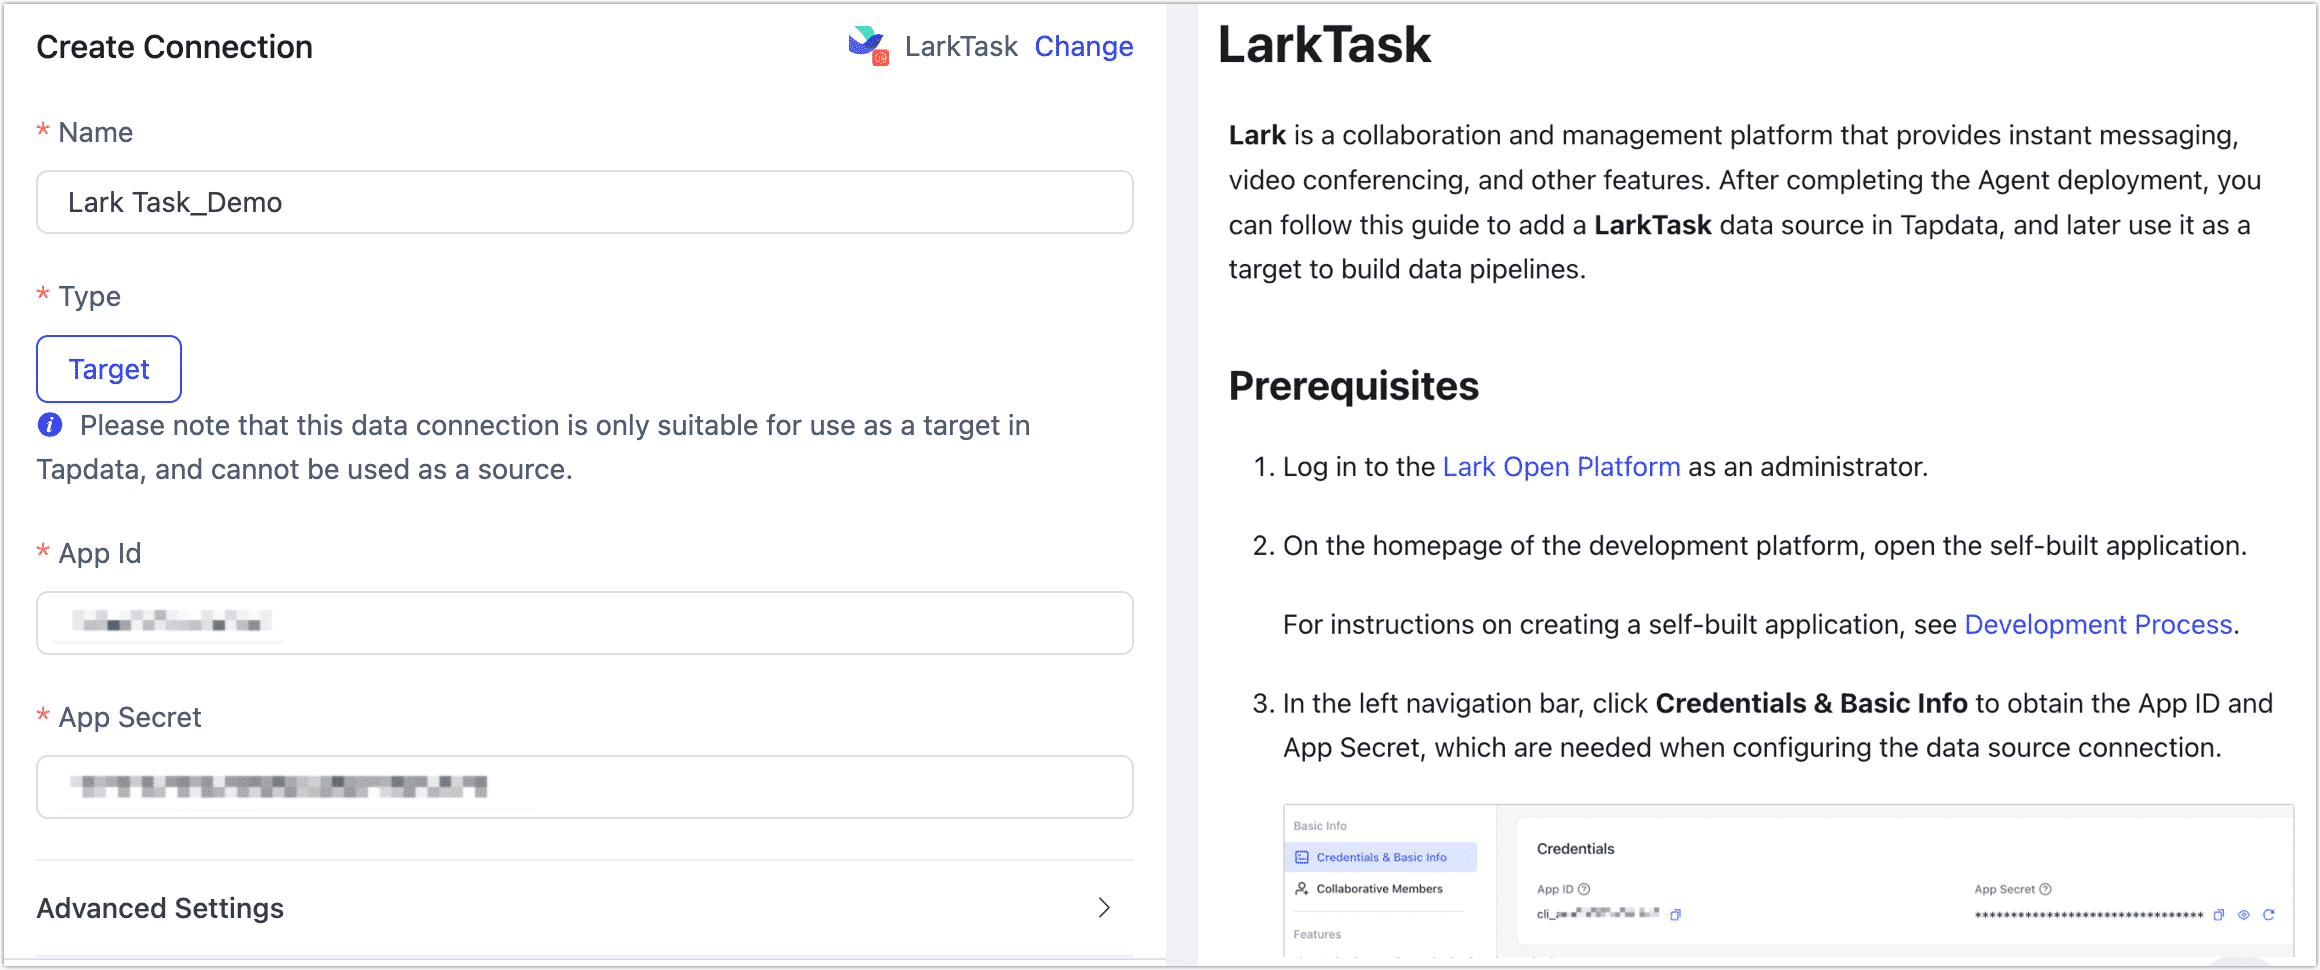
Complete the configuration as described below:

- Name: Enter a unique, business-meaningful name.
- Type: Only supported as a target.
- App ID / App Secret: Obtain these from the Lark Open Platform. See Prerequisites for details.
- Agent Settings: Defaults to Platform automatic allocation, you can also manually specify an agent.
- Model Load Time: If there are less than 10,000 models in the data source, their schema will be updated every hour. But if the number of models exceeds 10,000, the refresh will take place daily at the time you have specified.
Click Test. If the test passes, click Save.
If the connection test fails, follow the on-screen instructions to troubleshoot.