RabbitMQ

 TapData Cloud offers you cloud services that are suitable for scenarios requiring rapid deployment and low initial investment, helping you focus more on business development rather than infrastructure management. Free trial with TapData Cloud.
 TapData Enterprise can be deployed in your local data center, making it suitable for scenarios with strict requirements on data sensitivity or network isolation. It can serve to build real-time data warehouses, enable real-time data exchange, data migration, and more.
 TapData Community is an open-source data integration platform that provides basic data synchronization and transformation capabilities. This helps you quickly explore and implement data integration projects. As your project or business grows, you can seamlessly upgrade to TapData Cloud or TapData Enterprise to access more advanced features and service support.
RabbitMQ is a lightweight, open-source message broker that supports the AMQP protocol. It is widely used in distributed systems for asynchronous communication, application decoupling, and traffic peak shaving (such as handling high-volume order bursts). Combined with TapData, RabbitMQ enables you to build high-performance real-time data pipelines to meet low-latency, high-throughput use cases.
Supported Versions
3.8.x and above
Limitations
- Only JSON object message bodies are supported, e.g.,
{"id":1, "name": "jack"}. - Currently, only direct messaging through the default exchange is supported. Custom exchanges, routing keys, and complex message routing strategies are not yet supported.
Supported Data Types
- OBJECT
- ARRAY
- NUMBER
- INTEGER
- BOOLEAN
- STRING (length below 200)
- TEXT
Prerequisites
Before connecting RabbitMQ as a data source in TapData, it is recommended to create a user with the necessary permissions on the RabbitMQ host. The user must have AMQP message access as well as HTTP API management permissions. Example setup:
# Create a user
rabbitmqctl add_user username your_passwd

# Set permissions (for default virtual host `/`)
rabbitmqctl set_permissions -p / username ".*" ".*" ".*"

# Grant management tag to allow HTTP API access (used by TapData)
rabbitmqctl set_user_tags username management
username: The account name to be created.your_passwd: The password for the new account.
Connect to RabbitMQ
In the left navigation panel, click Connections.
On the right side of the page, click Create.
In the pop-up dialog, search for and select RabbitMQ.
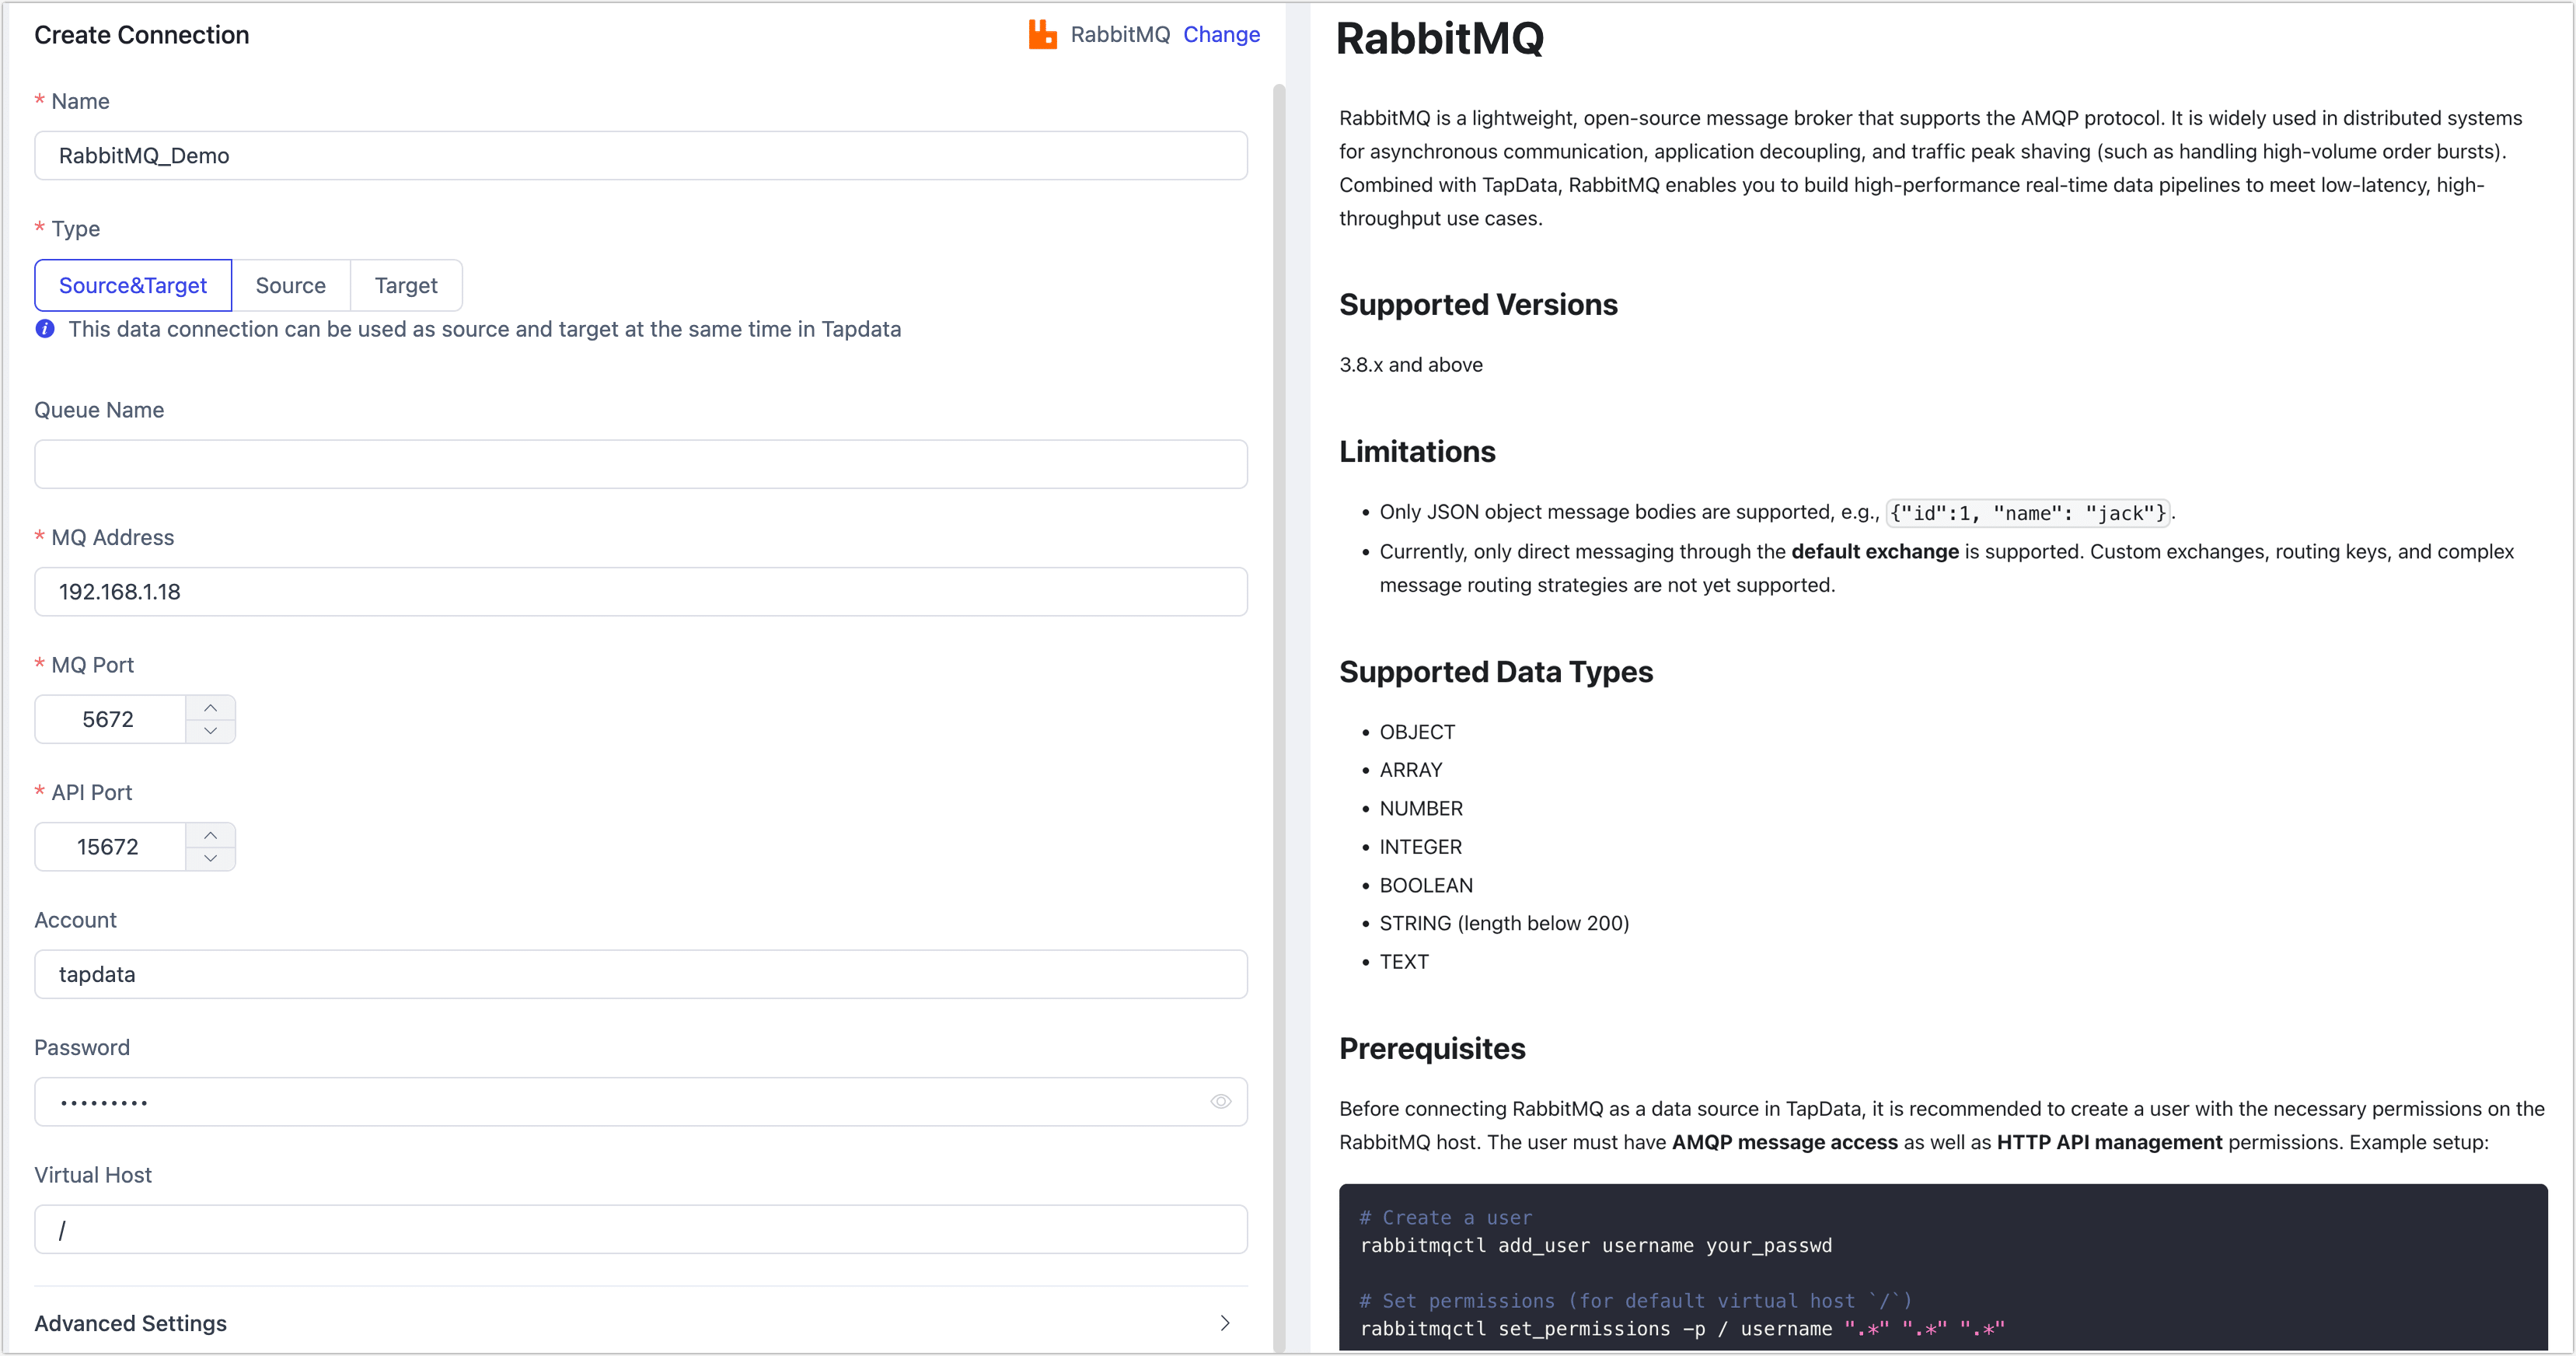
Fill in the connection details as follows:

- Connection Settings
- Name: A unique name with business relevance.
- Type: RabbitMQ can be used as either a source or target.
- Queue Name: Leave empty to load all queues, or specify multiple queues separated by commas.
- MQ Address: The RabbitMQ server address (IP or domain).
- MQ Port: AMQP service port, default is 5672.
- API Port: HTTP API port, default is 15672, used to fetch metadata like queue info.
- Account / Password: Provide the credentials of the RabbitMQ user with both AMQP and HTTP API permissions. If not created yet, refer to the Prerequisites section above.
- Virtual Host: Defaults to
/. If using a custom vhost, ensure the user has access to it.
- Advanced Settings
- CDC Log Caching: Mining the source database's incremental logs. This allows multiple tasks to share the same source database’s incremental log mining process, reducing duplicate reads and minimizing the impact of incremental synchronization on the source database. After enabling this feature, you will need to select an external storage to store the incremental log information.
- Agent settings: Defaults to Platform automatic allocation, you can also manually specify an agent.
- Model Load Time: If there are less than 10,000 models in the data source, their schema will be updated every hour. But if the number of models exceeds 10,000, the refresh will take place daily at the time you have specified.
- Connection Settings
Click Test, and after passing the test, click Save.
tipIf the connection test fails, follow the instructions on the page to resolve the issue.
FAQs
Q: Why do I see
ACCESS_REFUSED - Login was refused using authentication mechanism PLAINduring connection test?A: This typically indicates incorrect credentials or insufficient permissions for the virtual host. Please refer to the Prerequisites section to properly create and authorize the user.
Q: Why do I see
401 UnauthorizedorHttpClientErrorException: 401?A: This means the user lacks access to the RabbitMQ HTTP API (default port 15672), or the API port is incorrect. Use the command
rabbitmqctl set_user_tags your_username managementto grant permission. You can also verify access by visitinghttp://<MQ_HOST>:15672in a browser and logging in.You may also assign a higher-level permission tag such as
administratorfor full access.