ActiveMQ

 TapData Cloud offers you cloud services that are suitable for scenarios requiring rapid deployment and low initial investment, helping you focus more on business development rather than infrastructure management. Free trial with TapData Cloud.
 TapData Enterprise can be deployed in your local data center, making it suitable for scenarios with strict requirements on data sensitivity or network isolation. It can serve to build real-time data warehouses, enable real-time data exchange, data migration, and more.
 TapData Community is an open-source data integration platform that provides basic data synchronization and transformation capabilities. This helps you quickly explore and implement data integration projects. As your project or business grows, you can seamlessly upgrade to TapData Cloud or TapData Enterprise to access more advanced features and service support.
ActiveMQ is an open-source Java message broker that supports multiple industry-standard protocols. It is widely used for enterprise-level messaging, ideal for scenarios such as asynchronous processing, application decoupling, traffic peak shaving (e.g., flash sales), log processing, and message communication. This guide will walk you through adding ActiveMQ as a data source in TapData, enabling seamless integration as either a source or a target to build efficient data pipelines and achieve real-time data synchronization.
Supported Versions
- ActiveMQ Classic 5.14.x
- ActiveMQ Artemis 2.39.x
Limitations
- Only supports messages in JSON Object format, for example:
{"id":1, "name": "John Doe"}. - Only supports queue mode in ActiveMQ, optimized for full data synchronization to ensure efficiency and reliability in data integration tasks.
Supported Data Types
- OBJECT
- ARRAY
- NUMBER
- INTEGER
- BOOLEAN
- STRING (length below 200)
- TEXT
Connect to ActiveMQ
In the left navigation bar, click Connections.
On the right side of the page, click Create.
On the redirected page, search for and select ActiveMQ.
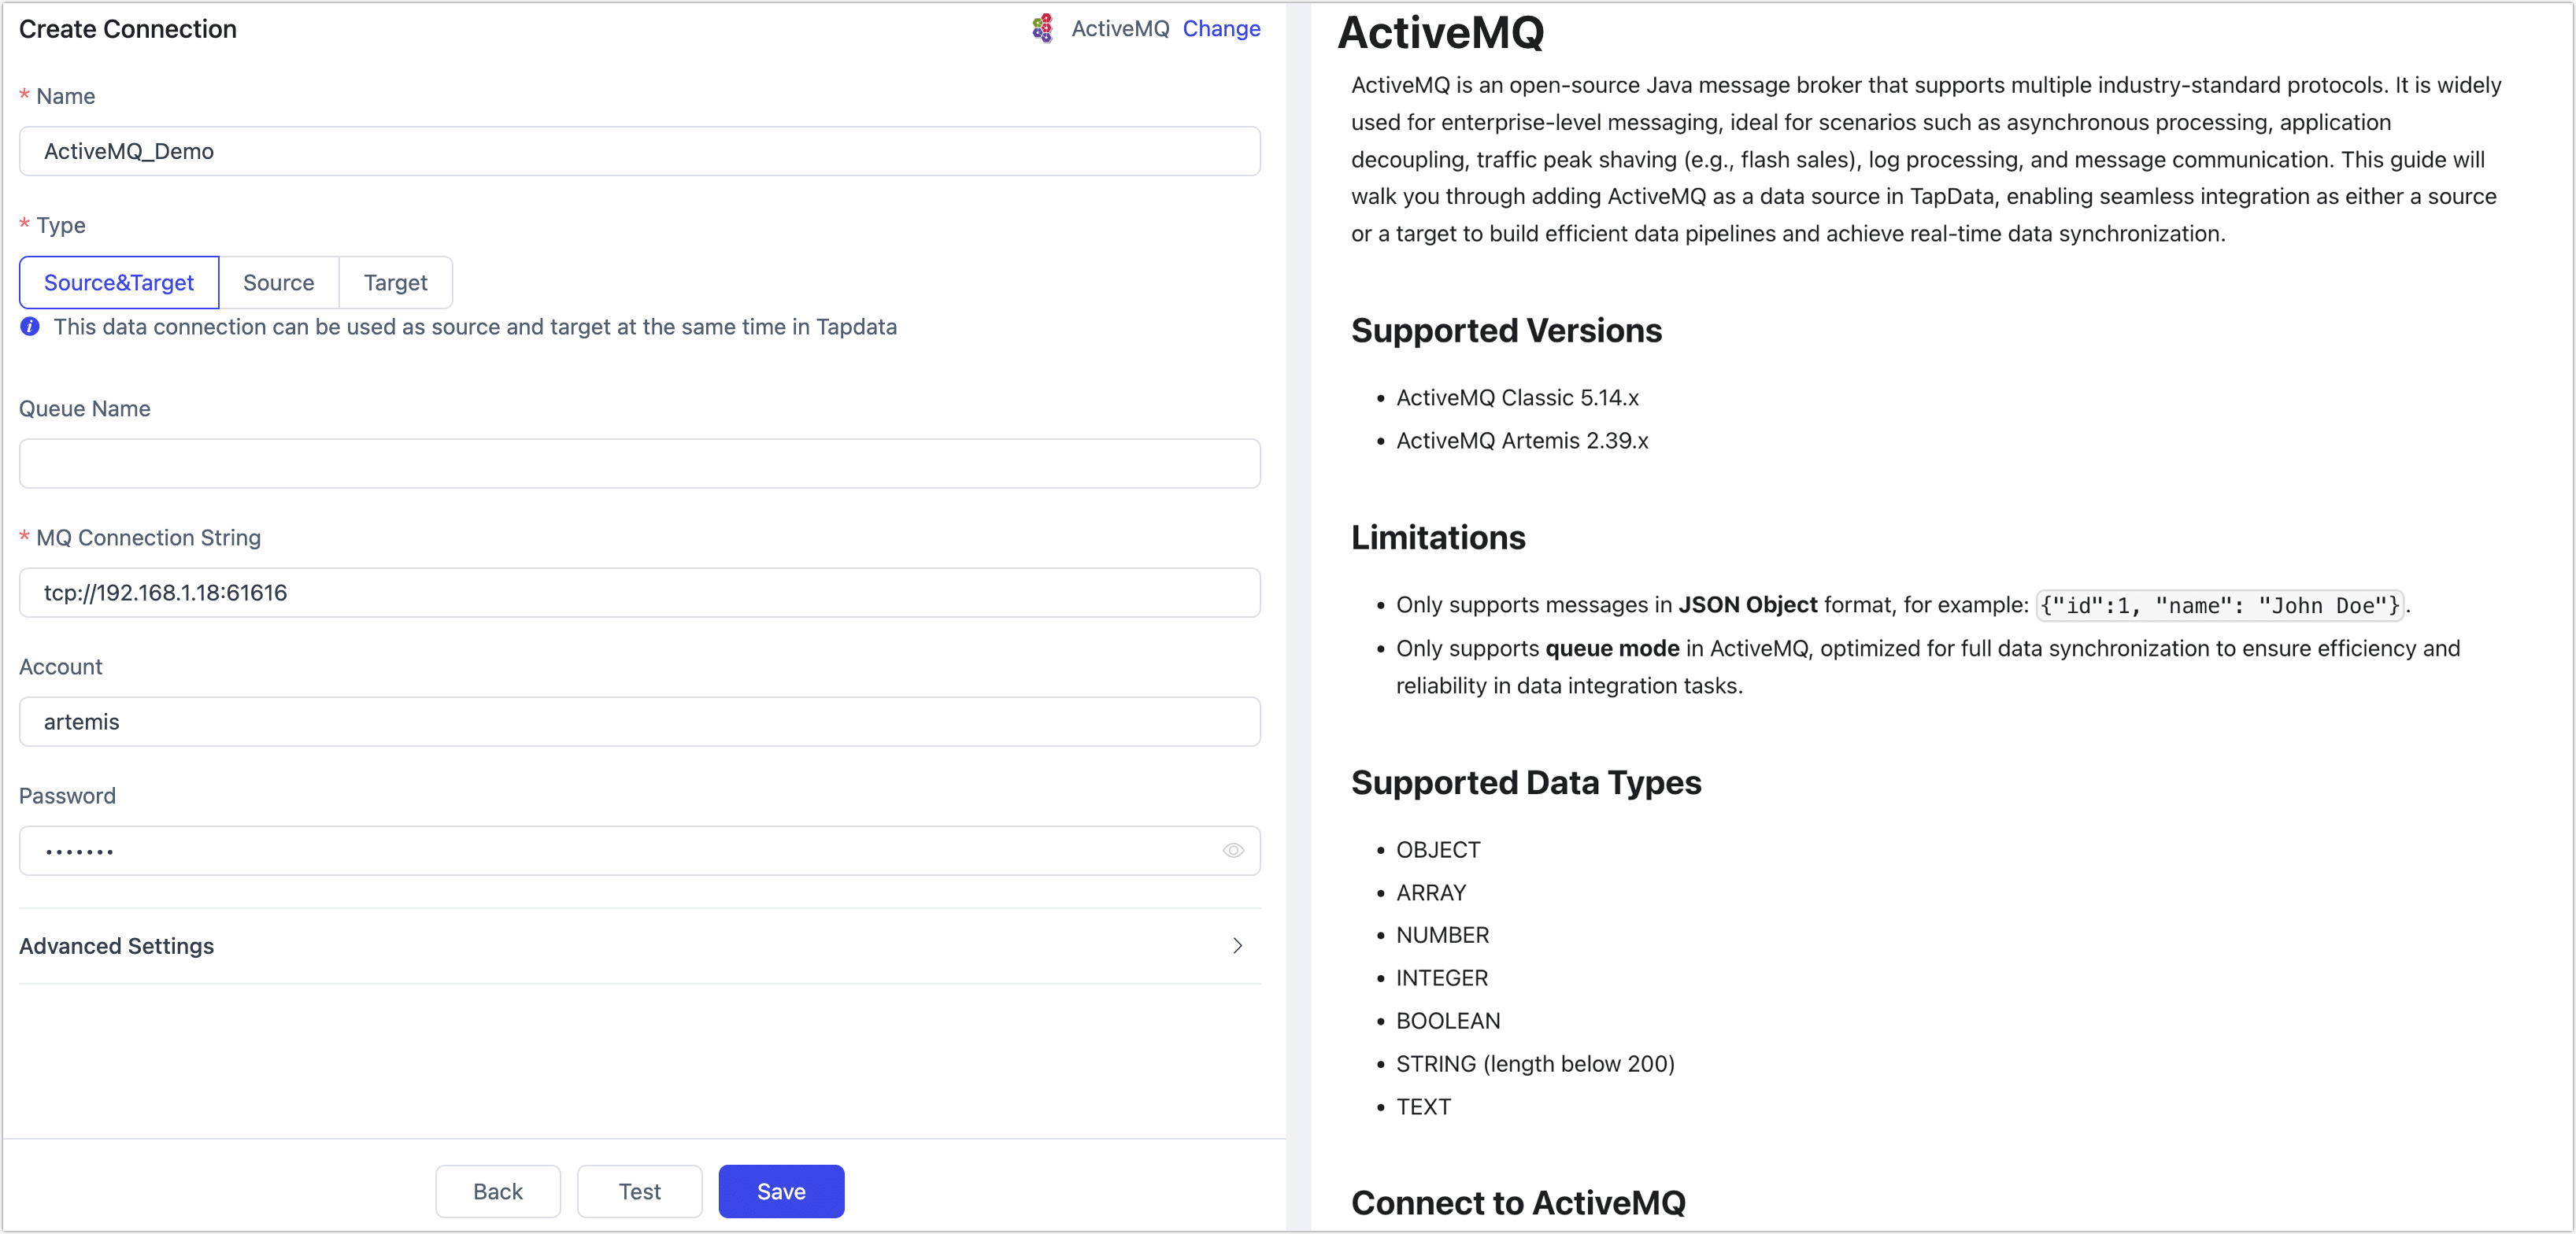
Fill in the ActiveMQ connection details as described below.

- Connection Information Settings
- Name: Enter a meaningful, unique name.
- Type: Supports using ActiveMQ as either a source or a target.
- Queue Name: Defaults to empty, meaning TapData will load all queues. You can also manually specify queues, separating multiple queue names with commas (
,). - MQ Connection String: The connection string in the format
tcp://{host_or_ip}:{port}(e.g.,tcp://192.168.1.18:61616). - Account & Password: Provide the ActiveMQ connection credentials.
- Advanced Settings
- Agent Settings: Defaults to Platform automatic allocation, you can also manually specify an agent.
- Model Load Time: If there are less than 10,000 models in the data source, their schema will be updated every hour. But if the number of models exceeds 10,000, the refresh will take place daily at the time you have specified.
- Connection Information Settings
Click Test, and if the test passes, click Save.
If the connection test fails, follow the on-screen instructions to resolve the issue.