TapData Cloud
The TapData Agent is an essential component for data synchronization, data heterogeneity, and data pipeline scenarios. While it is recommended to install the TapData Agent within the local network where the database is located for real-time processing, an alternative option is available. You can also install the TapData Agent on the TapData Cloud server, eliminating the need for setting up a machine locally. This provides flexibility and convenience for managing your data flow.
Agent Introduction
TapData Agent plays a critical role in the data flow process. It retrieves data from the source, performs necessary processing and transformations, and subsequently transfers it to the designated target. It is important to note that the data being handled by the TapData Agent is not uploaded or stored in TapData Cloud. The agent acts as a facilitator, ensuring efficient and secure data transfer without retaining any data in the cloud environment.
Procedure
TapData Cloud offers pricing based on the specifications and quantity of subscribed Agent instances. You have the option to create one free instance of the SMALL specification Agent, and if required, you can purchase additional Agent instances to align with your specific business requirements.
Next, let's create a free Agent instance.
-
Log in to TapData Platform.
-
In the left navigation panel, click Resource Management.
-
On the right side of the page, click Create Agent.
-
In the pop-up dialog, select deploy mode, spec and subscription period.
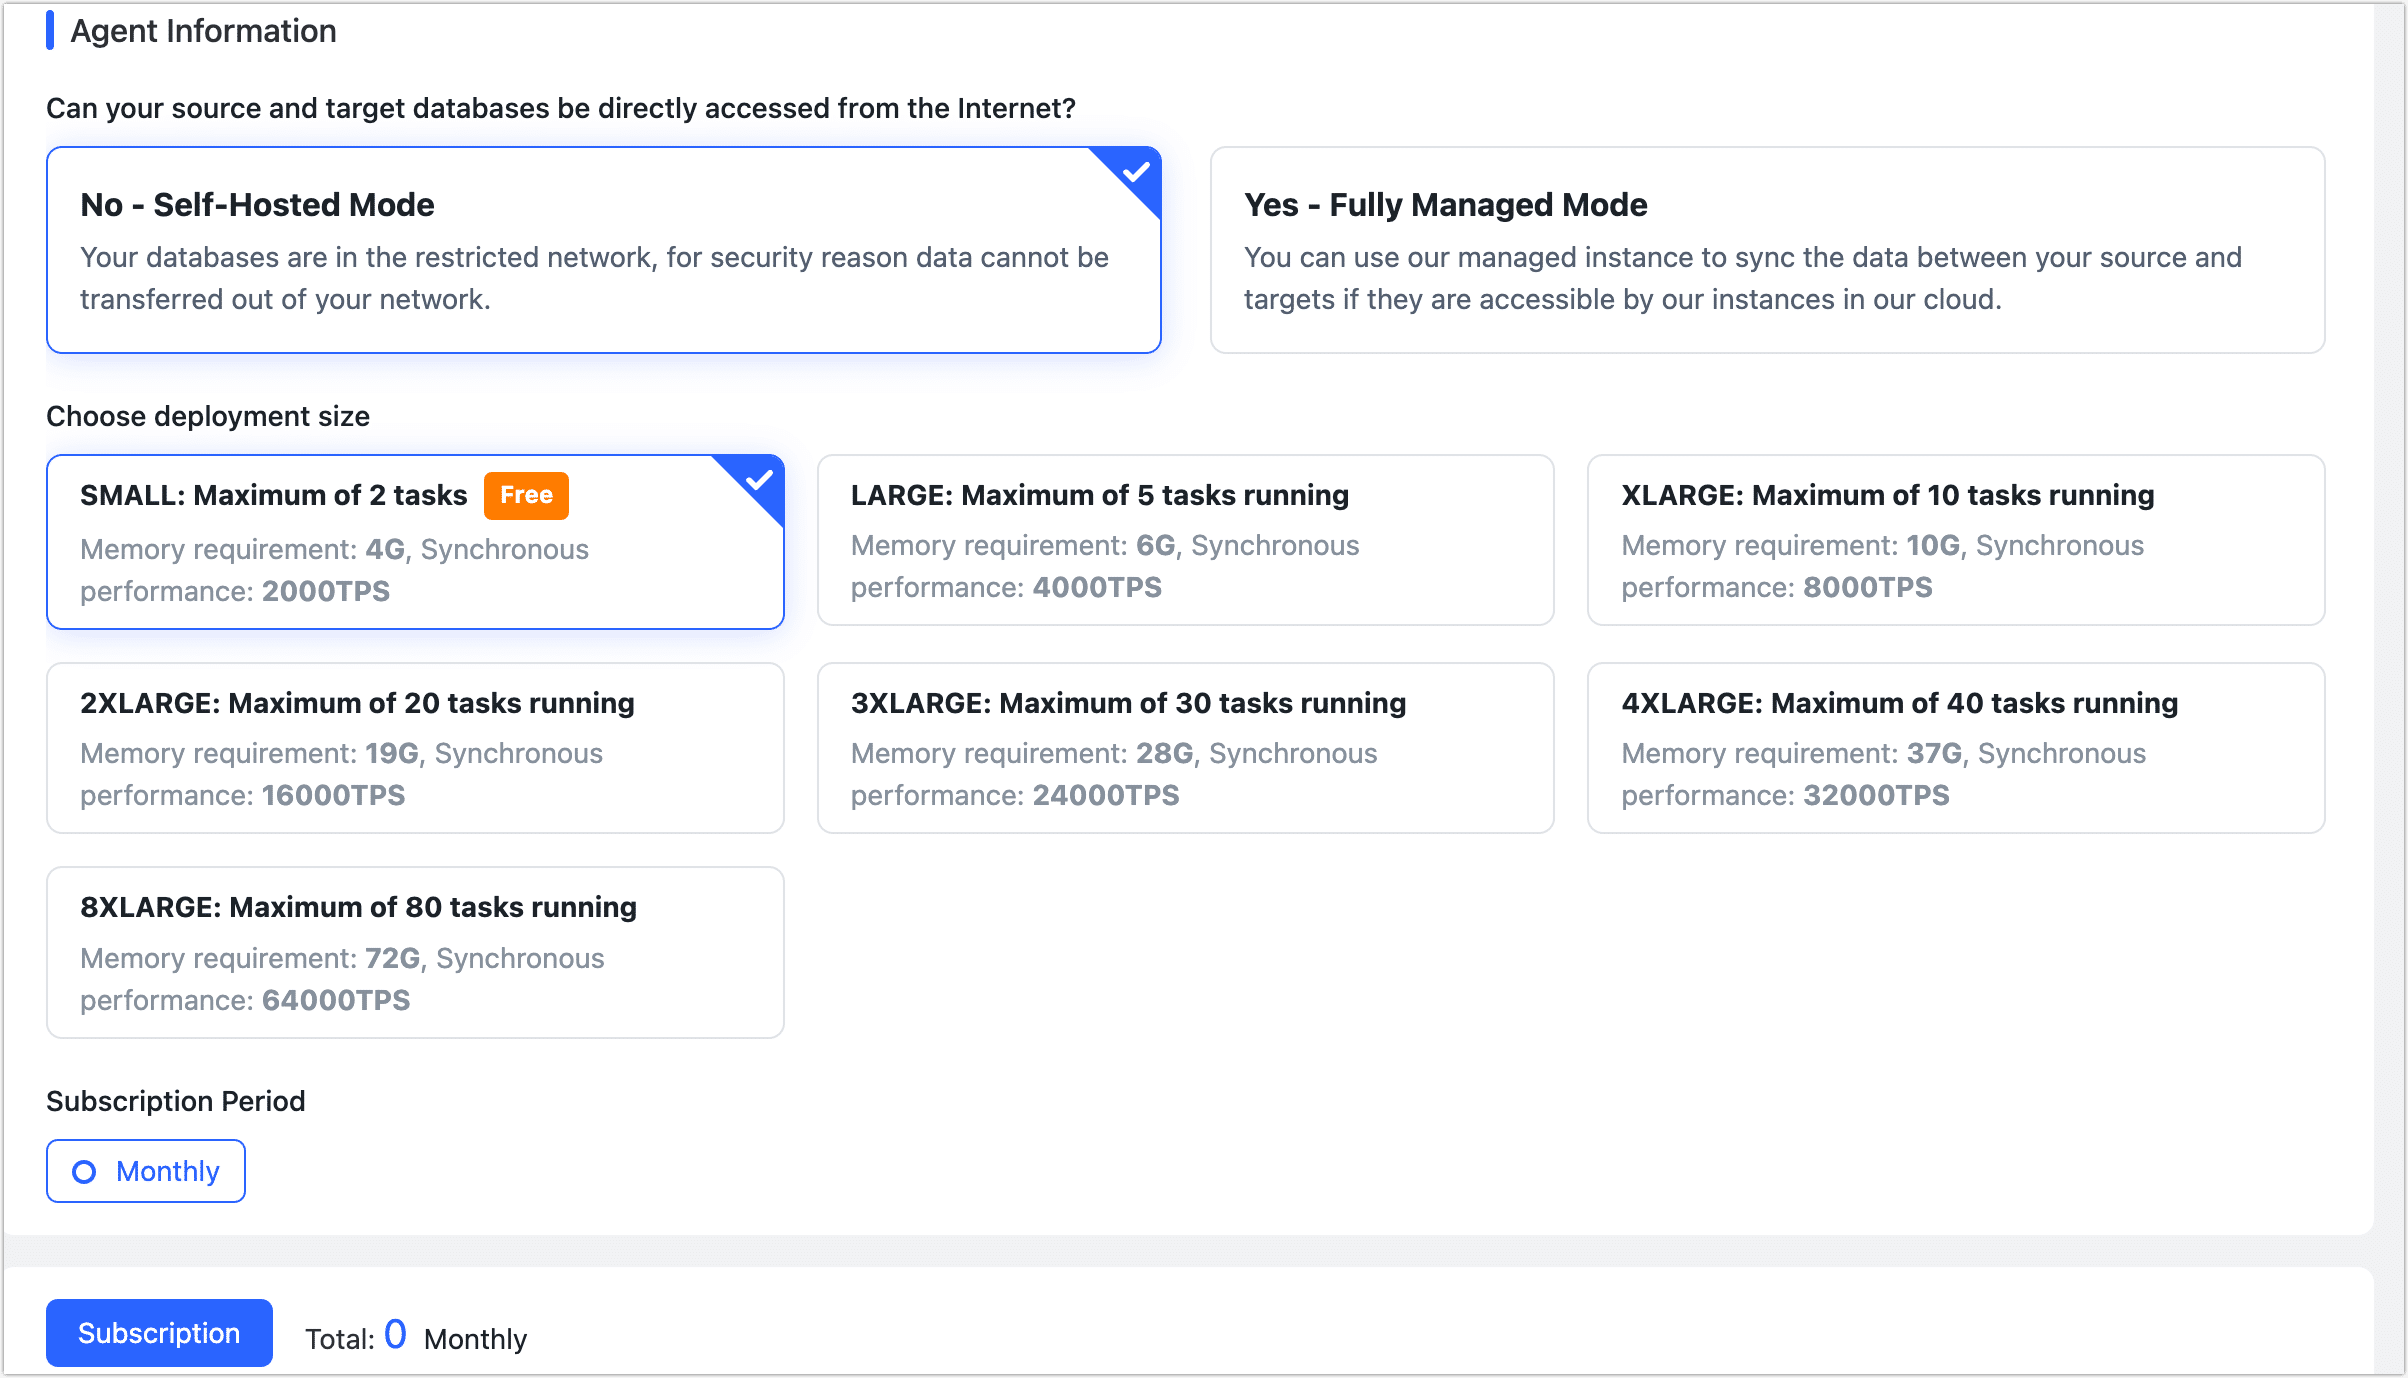
- Deploy Mode
- Self-Hosted Mode: You need provide the equipment for deploying and maintaining the Agent. This allows for the optimal utilization of existing hardware resources, resulting in lower costs and enhanced security.
- Fully Managed Mode: TapData Cloud provides the required computing/storage resources for running the Agent and deploys it automatically. Additionally, we offer unified operational maintenance and resource monitoring to enhance reliability. This enables one-click delivery and usage, eliminating the need for deployment and operational efforts, allowing you to focus on your core business activities.
tip
When selecting the Fully Managed Mode, you also need to choose the cloud provider and region where the Agent will be deployed.
- Agent Spec: Select product specifications based on the number of tasks and performance requirements required for evaluation. You can create an example of SMALL specifications for free.
- Subscription Period: Select the required subscription period, in order to avoid the expiration of the instance affecting the execution of the task, it is recommended to choose the Annually (10% off) or Monthly (5% off).
- Deploy Mode
-
Click Subscription.
-
If you choose the Fully Managed Mode, the Agent will be automatically deployed. If you opt for the Self-Hosted Mode, please follow the steps below for manual deployment.
-
Select the deployment platform on the redirected page.
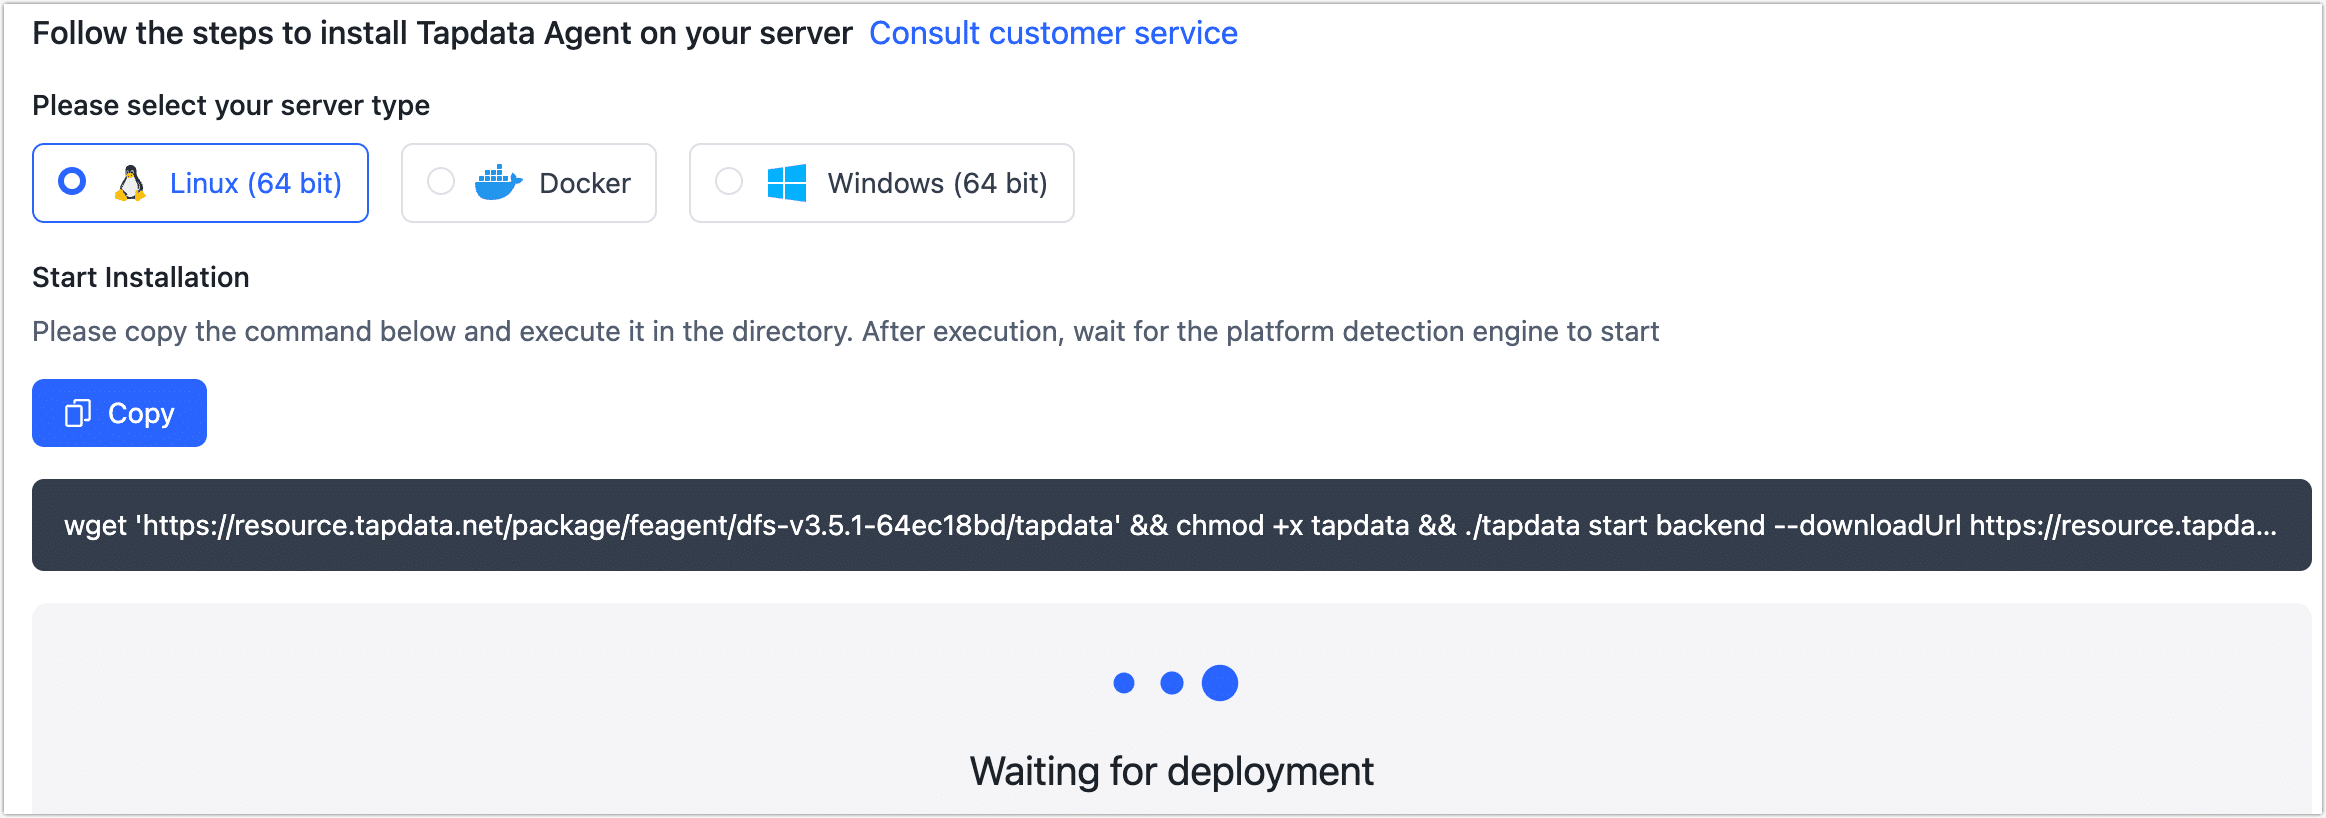
-
Click Copy to obtain the deployment command.
-
Follow the steps below based on the selected deployment platform.
-
Show Requirements
- CPU: x86 Architecture Processor
- Operating System: 64-bit
- Network: Ability to connect to the public network and communicate with the source/target database
- Software: Java 1.8
- Linux (64 bit)
- Docker
- Windows (64 bit)
-
Log in to the device where the Agent will be deployed (without root privileges), create a folder first (e.g., tapdata) and enter it for easier management of the Agent.
-
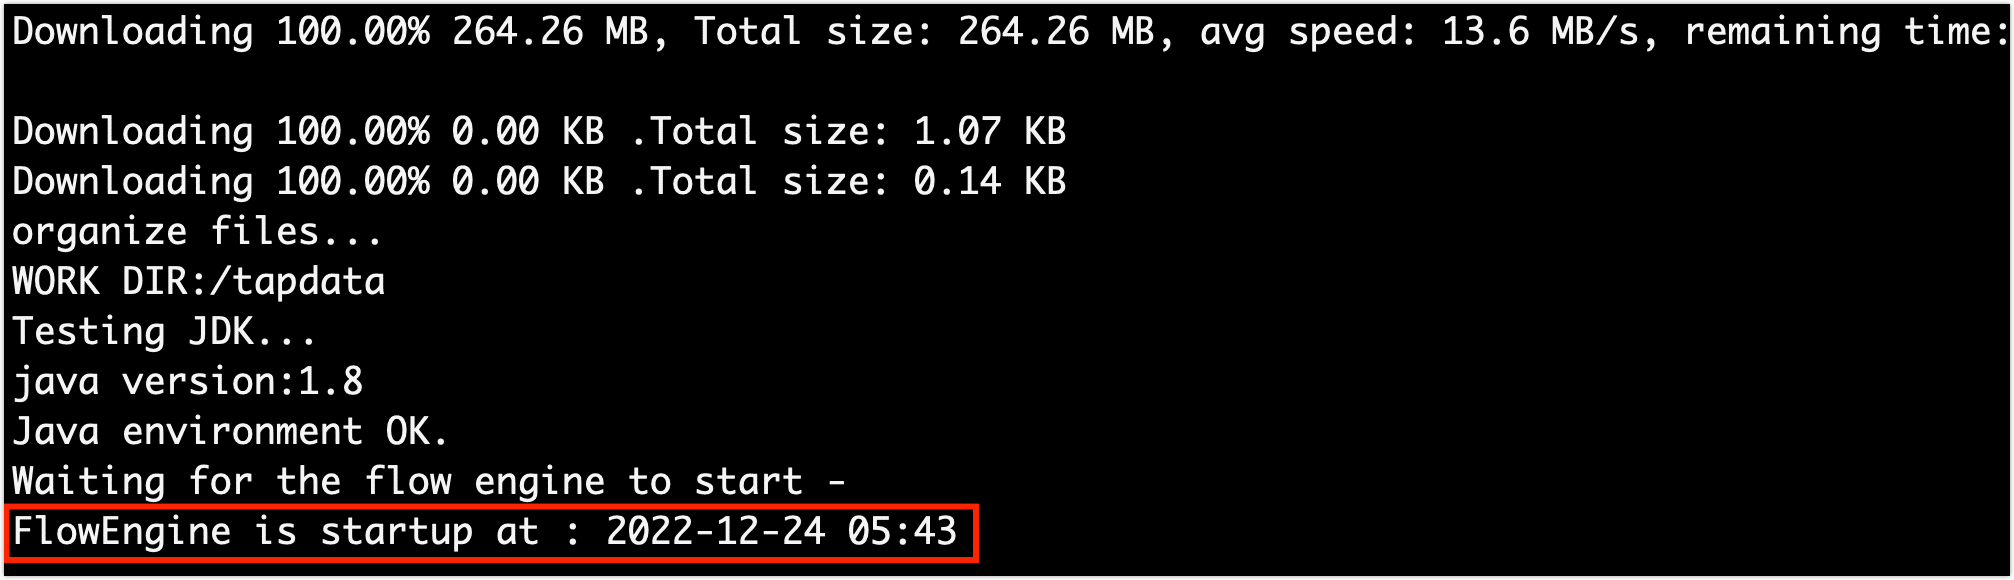
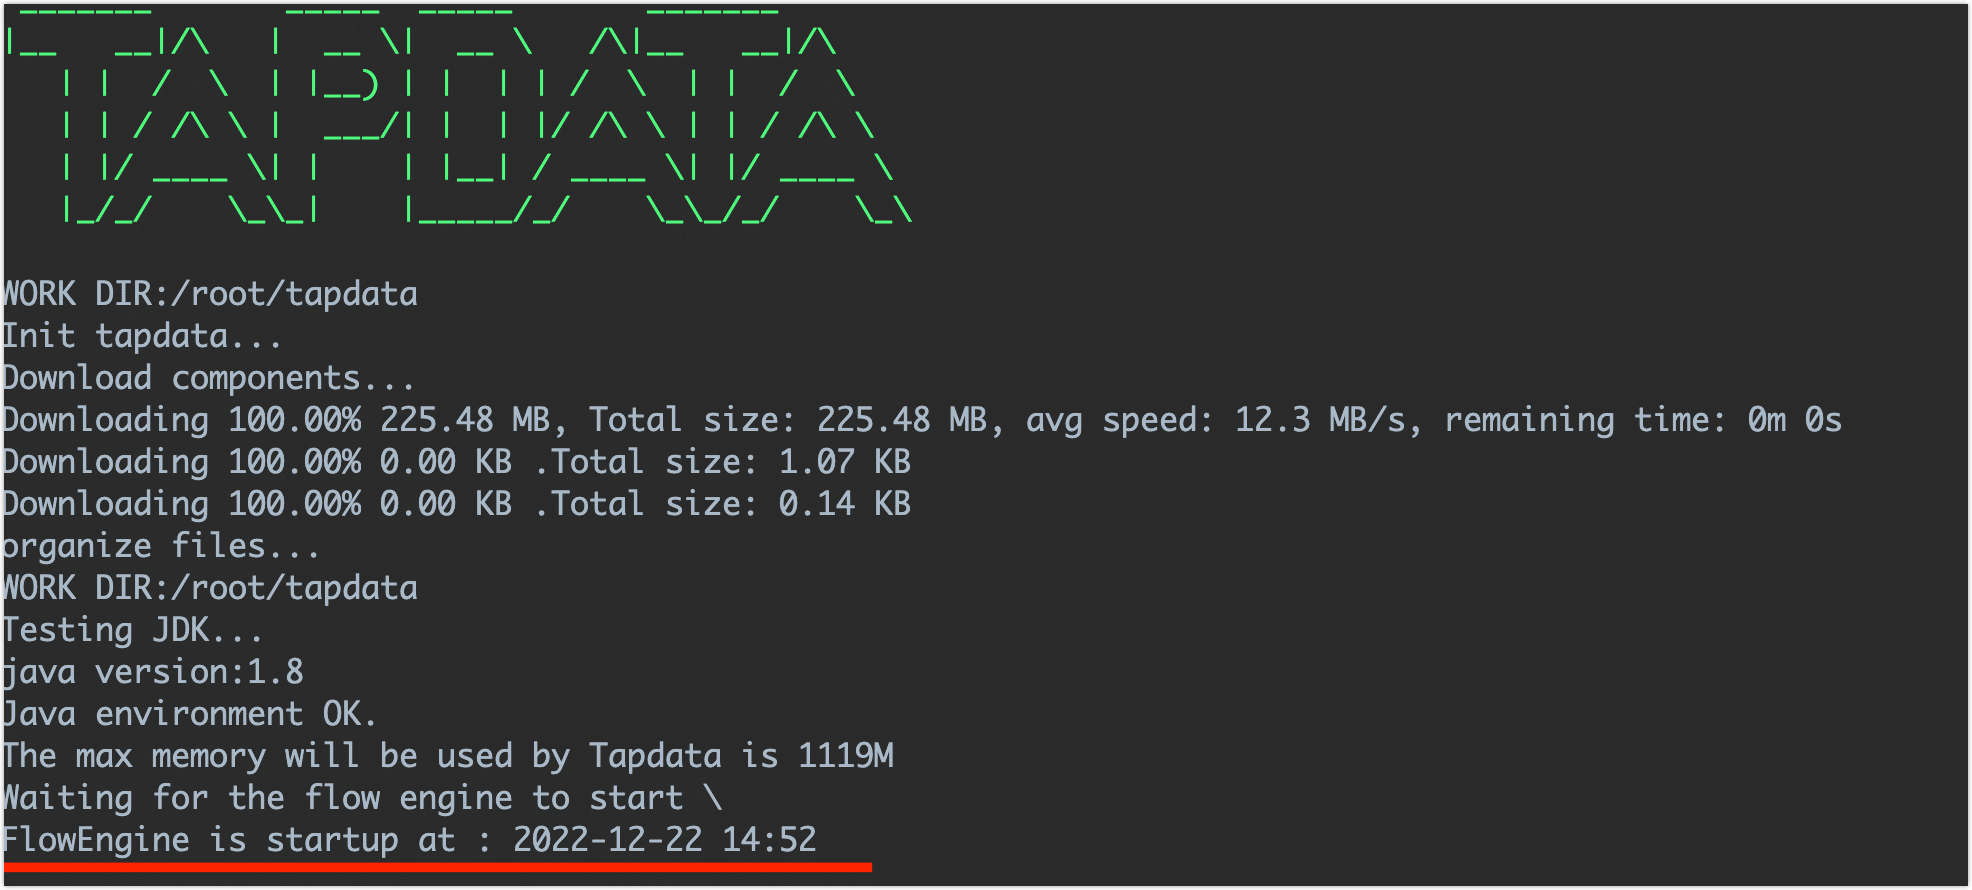
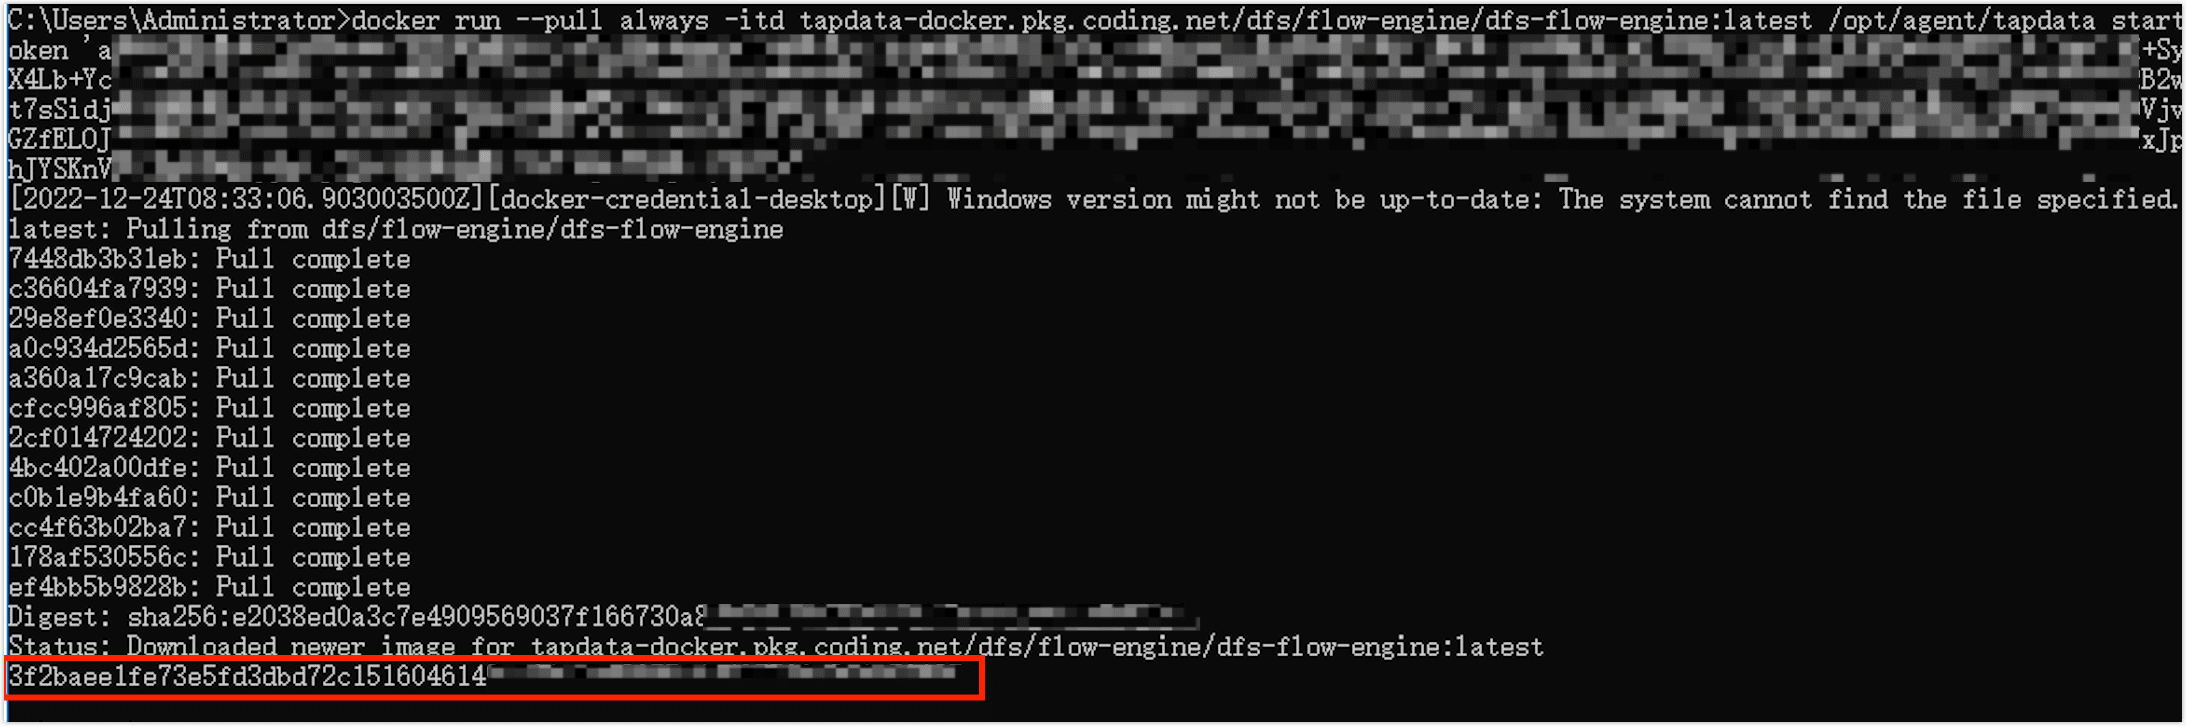
Paste and execute the installation command you copied before, which contains the process of downloading, deploying, and launching the Agent, and the launch success is shown in the figure below.
-
To log in to the device where the Agent will be deployed (without root privileges), create a folder first, such as tapdata. Enter the created folder to facilitate easier management of the Agent.
-
Paste and execute the installation command that you copied before, which includes the steps of downloading, deploying, and launching the Agent. After a successful launch, you can retrieve the container ID, as you can see in below picture.
-
According to the prompts on the page, download the Agent installer and configuration file (application.yml).
-
For easier management of the TapData Agent, we recommend moving the downloaded Agent installer to the installation directory of your choice. For example, you can move it to C:\tapdata on a Windows system. By doing so, you can conveniently access and manage the TapData Agent from the designated installation directory.
-
Double-click on tapdata.exe in the Agent installation directory to complete the installation. After a successful launch, the command window will automatically close.
-
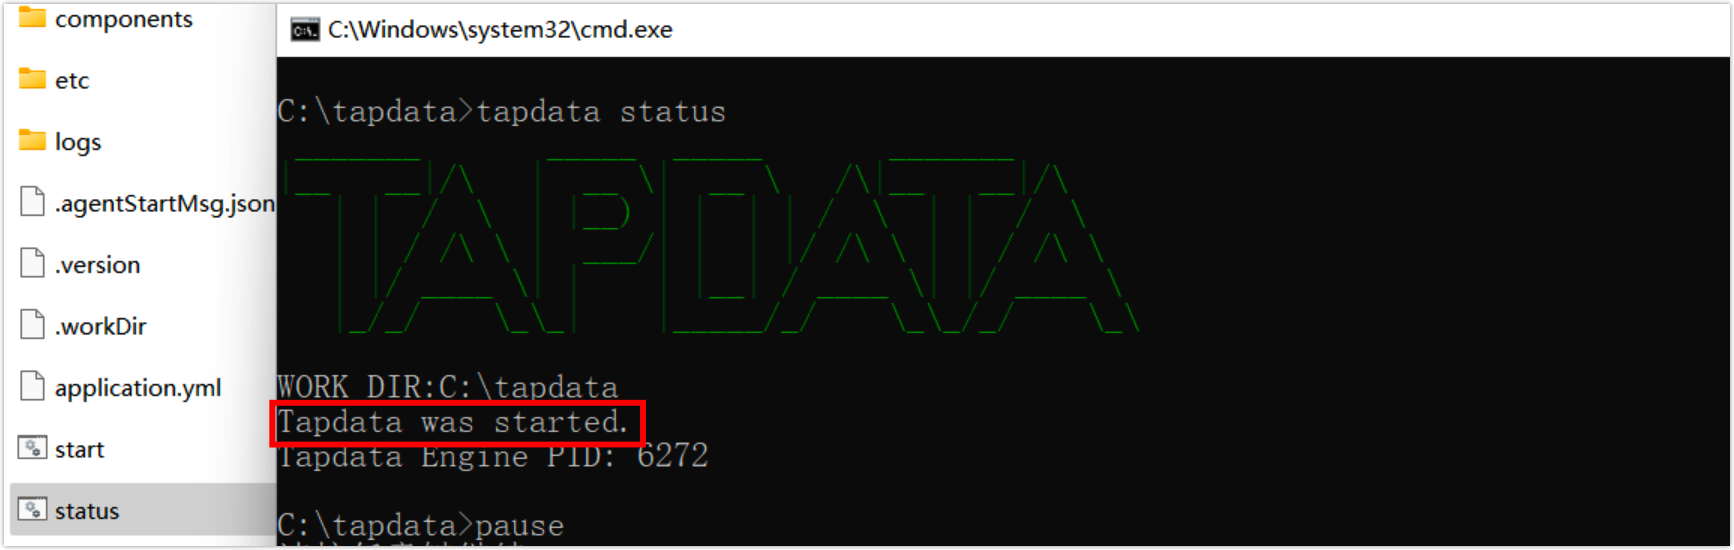
(Optional) Double-click the status.bat in the Agent installation directory to check the status of the Agent. The following is an example of a normal startup.
Need to Install on Mac (M1 Chip)?
-
Open the Mac's terminal, then execute the following command to download and launch the JDK image.
# Download Image
docker pull openjdk:8u312
# Run Image
docker run -t -d openjdk:8u312 -
Execute
docker psto get the container ID, and then execute the following format of the command to enter the container command line, for example:docker exec -it Container-ID /bin/bashtipReplace the Container-ID in the command, such as
docker exec -it 1dbee41b4adc/bin/bash. -
To manage the Agent easily, create a folder (e.g., tapdata) and enter it by executing the following command.
mkdir tapdata&&cd tapdata -
In the container command line, execute the following command to download the Agent program and unzip it.
wget 'https://resource.tapdata.net/doc-source/tapdata.zip' && unzip tapdata.zip -
Back to the Deployment page on TapData Cloud, select Linux(64 bit) as the target operating system and click copy.
-
In the Docker container's command line, paste the copied command, remove the content before
./tapdata, and then execute it. The startup is successful, you can refer to the below figure.