MongoDB Atlas
TapData supports MongoDB Atlas as a data source, enabling real-time data sync, incremental replication, and seamless cloud-to-local data integration.
MongoDB Atlas is a multi-cloud managed database platform. This document describes how to connect MongoDB Atlas in TapData and use it for data migration, analytics, and syncing to local warehouses.
Supported Versions
MongoDB Atlas 5.0.15
When synchronrizing data between MongoDB, it is recommended source/target database are 5.0 and above for ensure data compatibility.
Preparations
Before establishing the connection, it is essential to complete the necessary preparations outlined in the provided article. These preparations may include authorizing an account and performing other relevant steps to ensure a smooth and secure connection.
Log in to MongoDB Atlas.
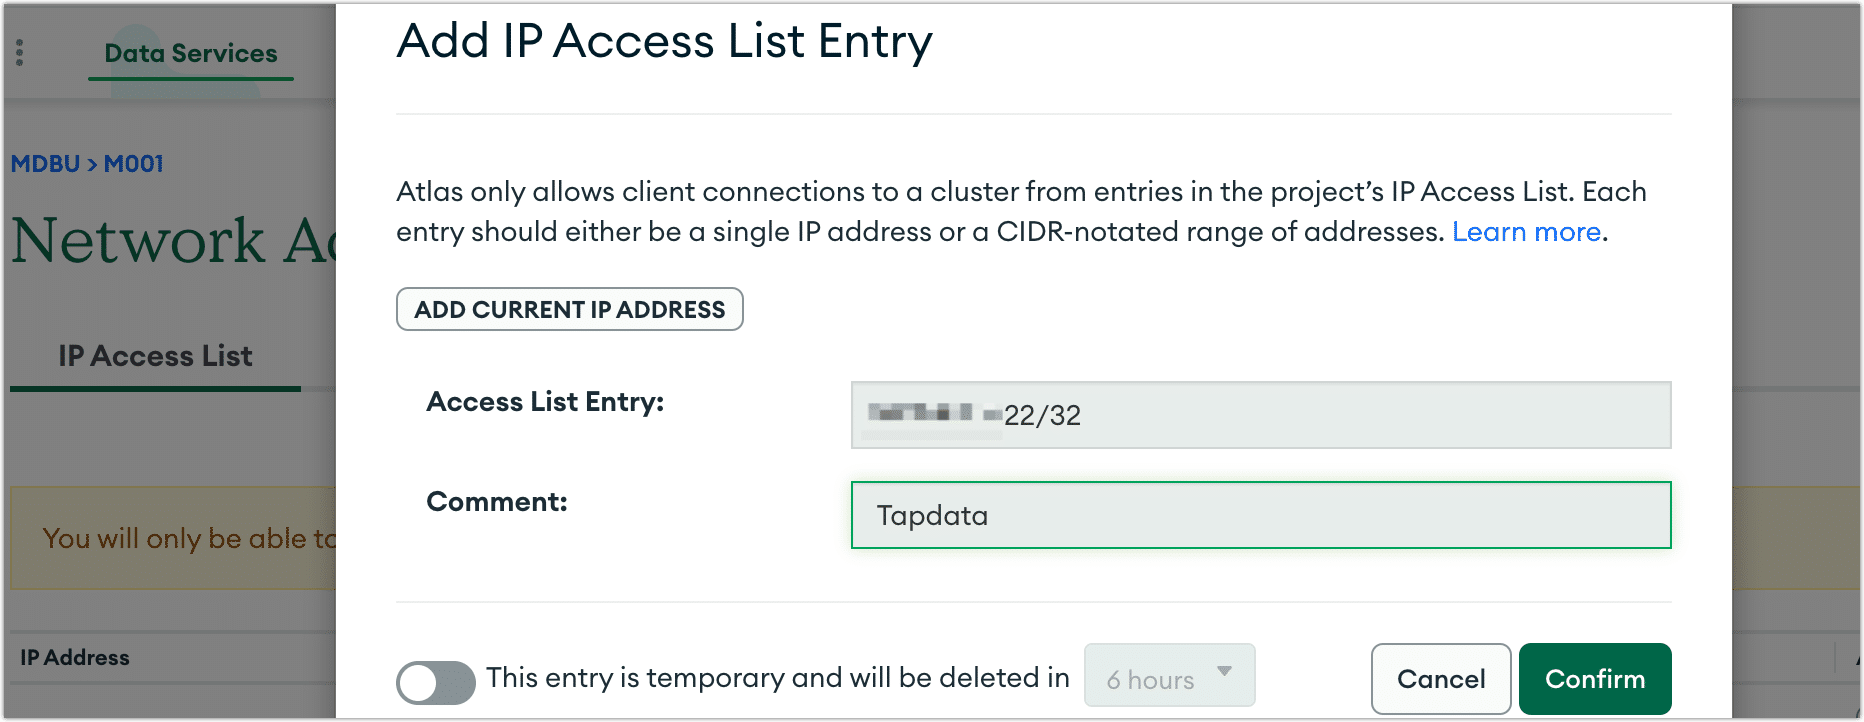
Set up network access control to ensure network connectivity.
In the left navigation panel, click Network Access.
On the right, click ADD IP ADDRESS.
In the pop-up dialog, fill in the public address of the TapData Agent (CIDR format) and click Confirm.
Create an account and grant permissions for database connectivity.
In the left navigation panel, click Database Access.
On the right side of the page, click ADD NEW DATABASE USER.
In the pop-up dialog, select the authentication method and grant permissions.
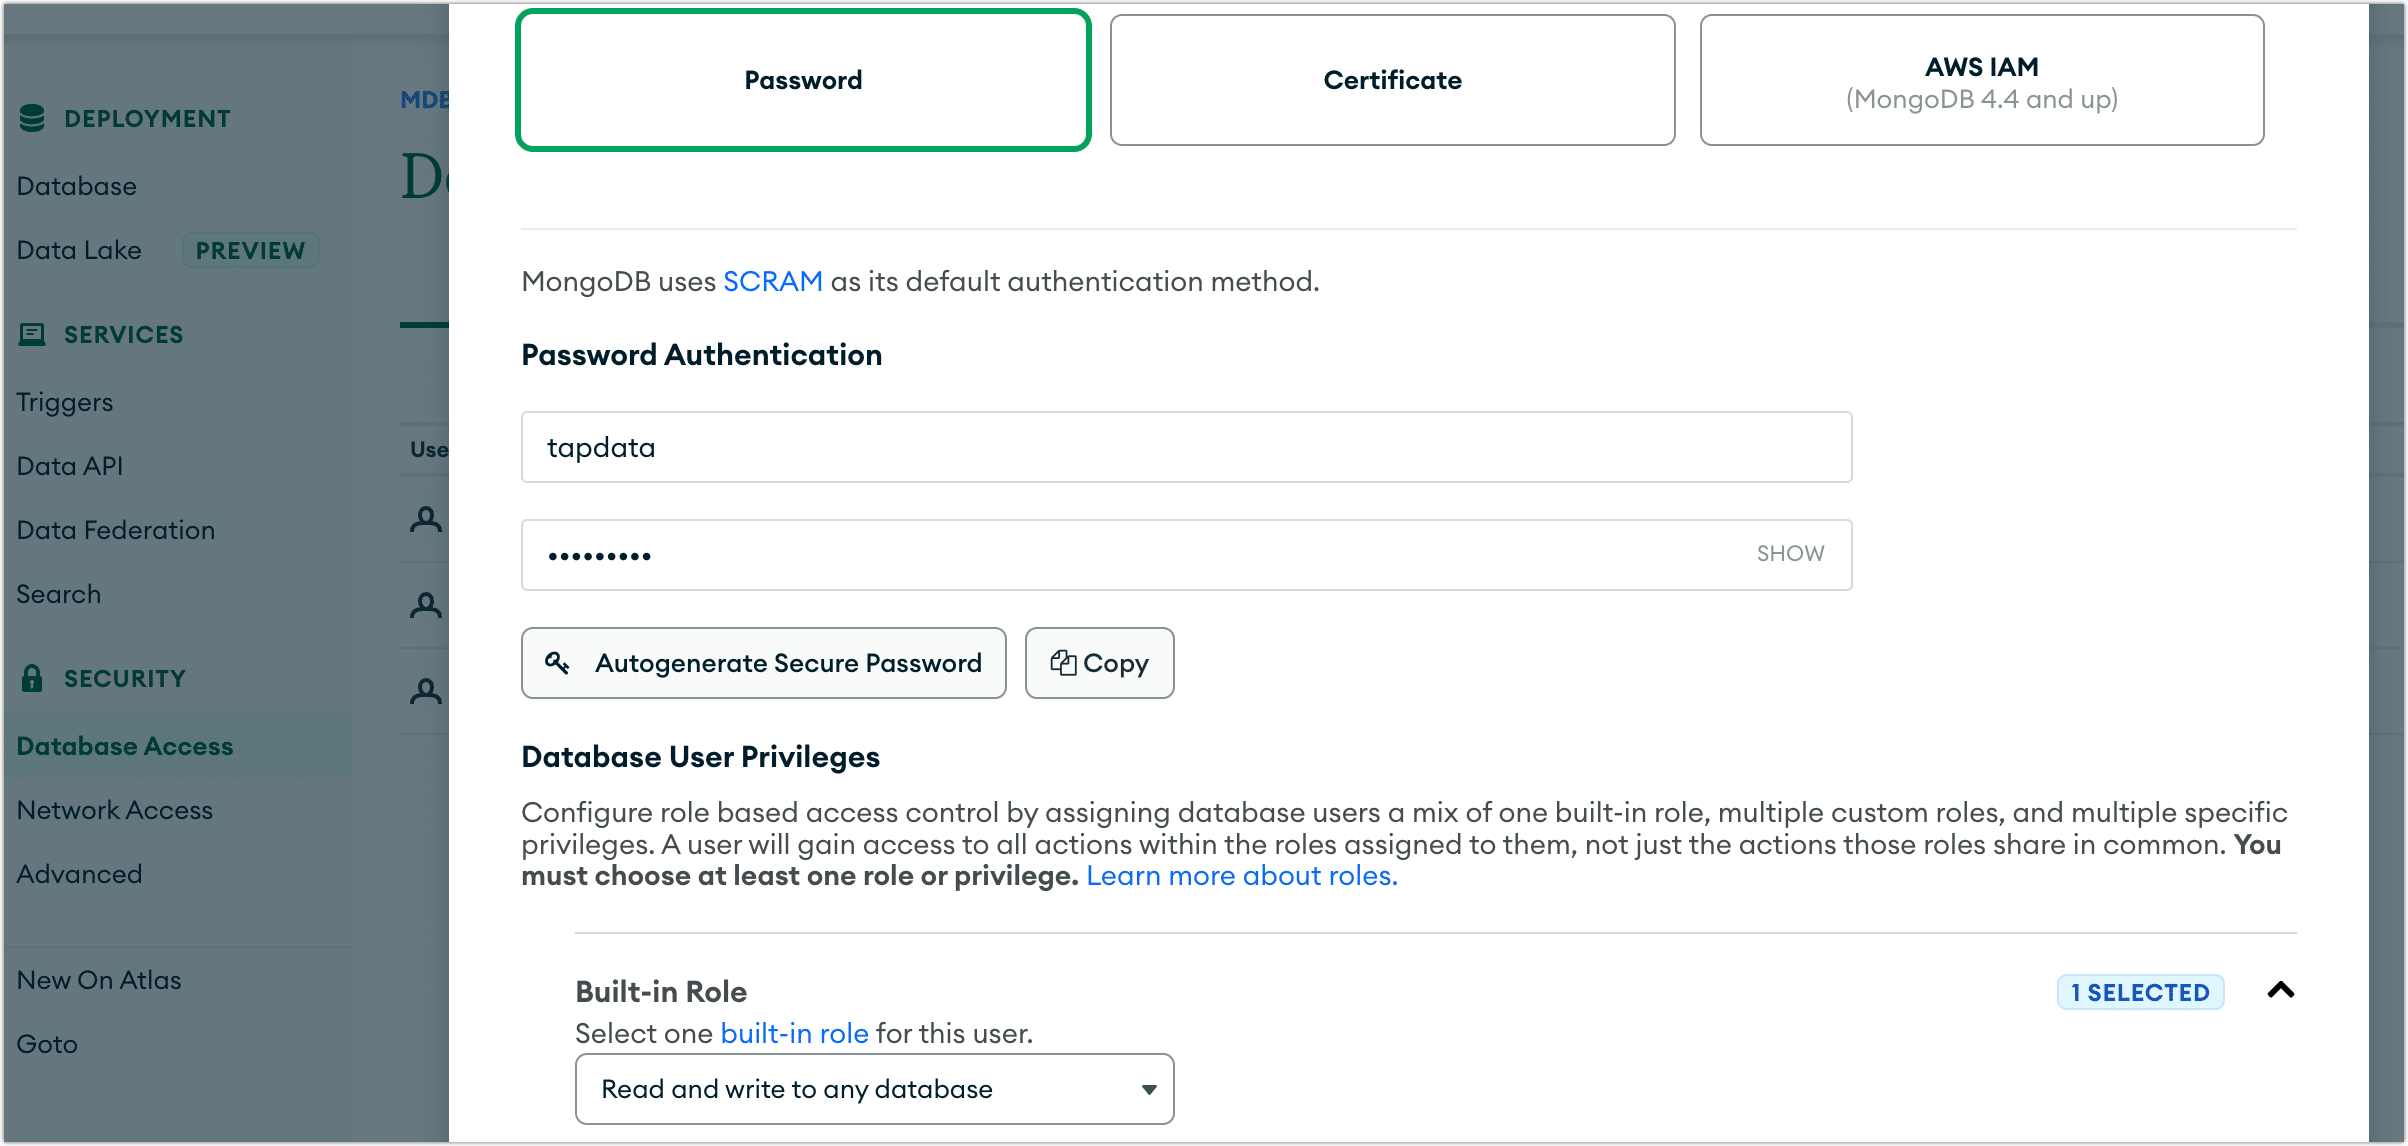
In this case, we will use password authentication as an example to demonstrate the operation process. The permission selection instructions are as follows.
As a Source Database: Select Built-in Role as Only read any database.
As a Target Database: Select Built-in Role for Read and Write to any Database.
Click Add User.
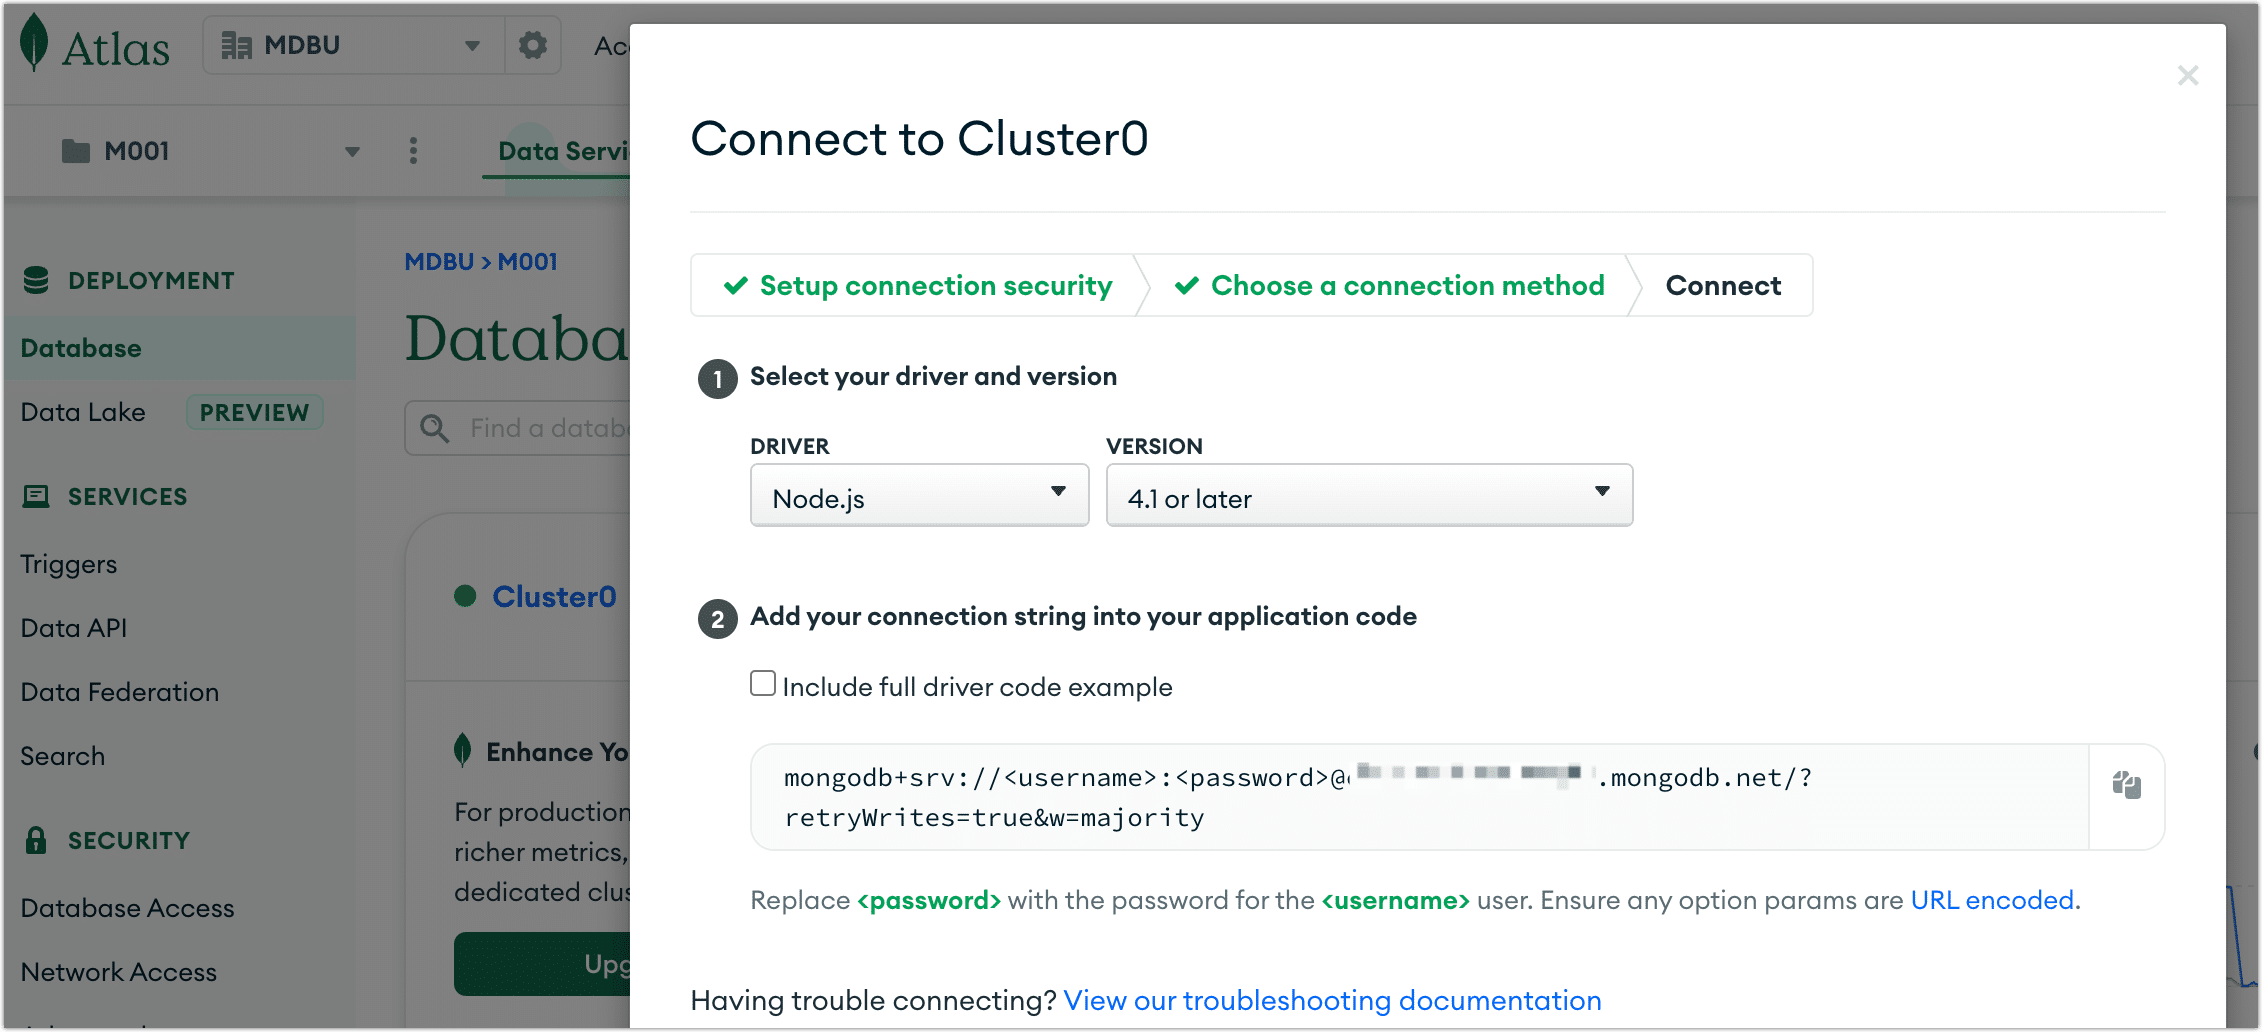
Gets database connection information.
In the left navigation panel, click Database.
Locate the target database and click Connect.
In the pop-up dialog, select Connect to your application to get connection information, which will be used when connecting to the database.
Connect to MongoDB Atlas
In the left navigation panel, click Connections.
On the right side of the page, click Create.
In the pop-up dialog, select MongoDB Atlas.
Fill in the connection information for MongoDB Atlas on the redirected page, following the instructions provided below.
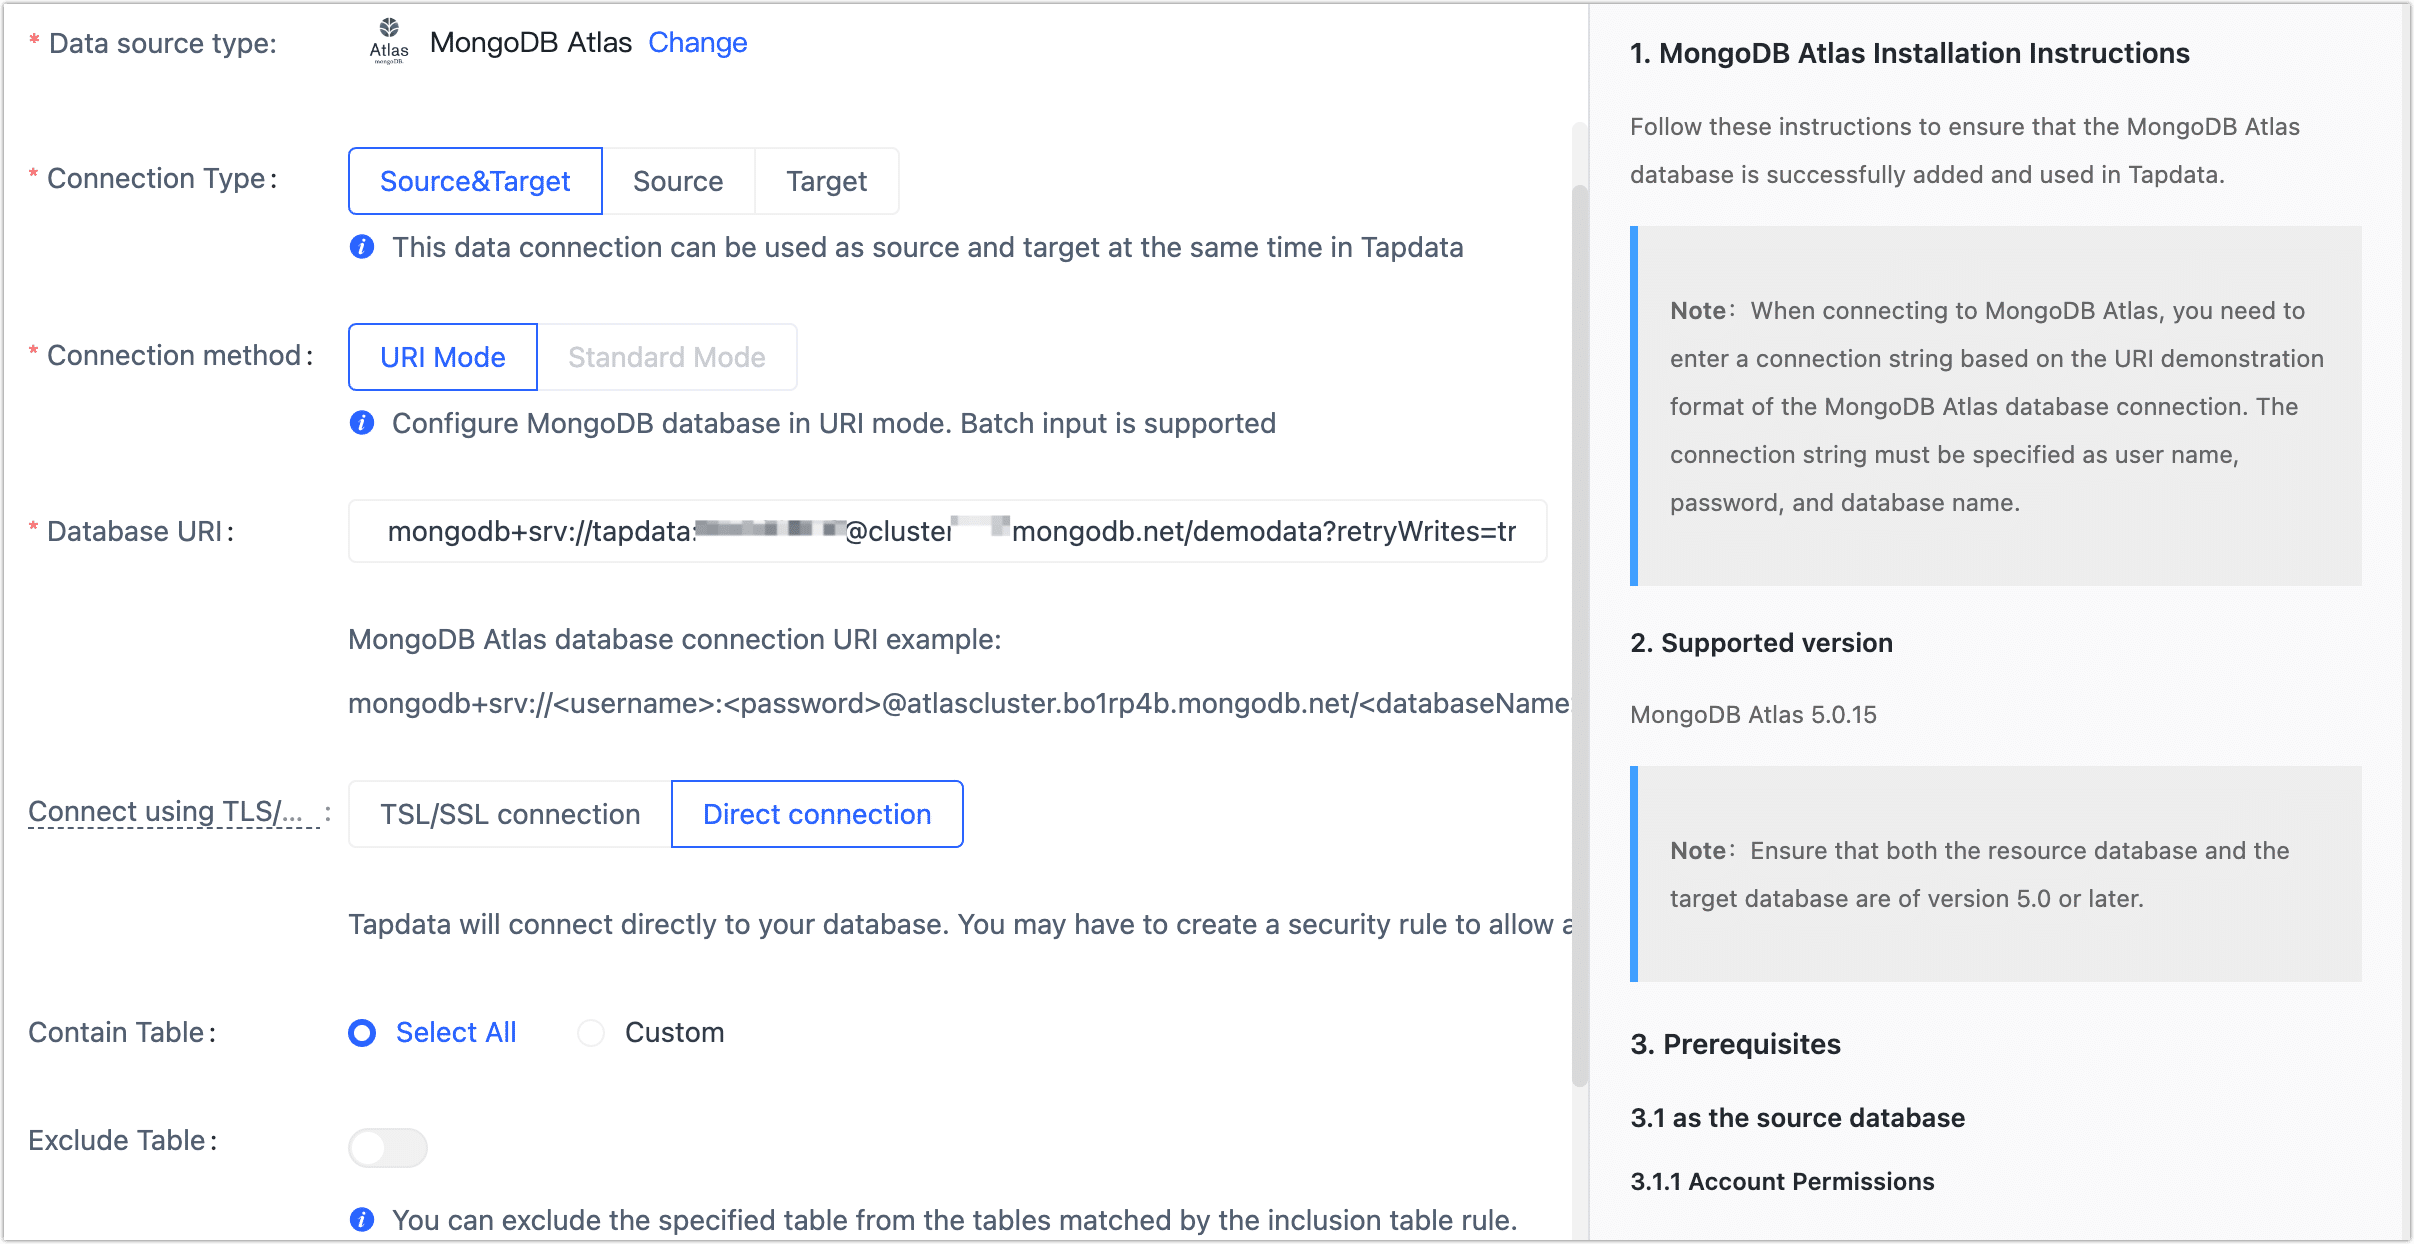
Connection Information Settings
Connection name: Fill in a unique name that has business significance.
Connection type: Supports MongoDB Atlas as a source or target database.
Connection method: Fixed in URI Mode.
Database URI: Fill in the Database URI connection information, and URI should include the username and password, which are concatenated in the format.
For example, the connection string may look like:
mongodb+srv://tapdata:Tap123456@cluster****.mongodb.net/demodata?retryWrites=true&w=majoritytipBe sure to set the database you want to connect in the connection string, for example, in the above example set to demodata, otherwise, it will cause the connection to fail and prompt for an error: 'datbaseName can not be null'.
Connect using TLS/SSL: Choose how you want to connect:
- TSL/SSL connection: In cases where your database is located in an inaccessible subnet, TapData Cloud offers the option to establish a connection through a separate server within the network. This server acts as a TSL/SSL channel to facilitate the connection to the database. This method enables connectivity to the database even when it is in a subnet that would otherwise be inaccessible.
- Direct connection: TapData Cloud will connect directly to the database and you need to set up security rules to allow access.
Advanced settings
- Contain table: The default option is All, which includes all tables. Alternatively, you can select Custom and manually specify the desired tables by separating their names with commas (,).
- Exclude tables: Once the switch is enabled, you have the option to specify tables to be excluded. You can do this by listing the table names separated by commas (,) in case there are multiple tables to be excluded.
- Agent settings: Defaults to Platform automatic allocation, you can also manually specify an agent.
- Model load time: If there are less than 10,000 models in the data source, their information will be updated every hour. But if the number of models exceeds 10,000, the refresh will take place daily at the time you have specified.
- Enable heartbeat table: This switch is supported when the connection type is set as the Source&Target or Source. TapData Cloud will generate a table named tapdata_heartbeat_table in the source database, which is used to monitor the source database connection and task health.tip
After referencing and starting the data replication/development task, the heartbeat task will be activated. At this point, you can click View heartbeat task to monitor the task.
Click Test, and when passed, click Save.
tipIf the connection test fails, follow the prompts on the page to fix it.
Node Advanced Features
When configuring data synchronization or transformation tasks with MongoDB Atlas as the source or target node, TapData provides more advanced features to better meet complex business needs and maximize performance. You can configure these features based on your requirements:
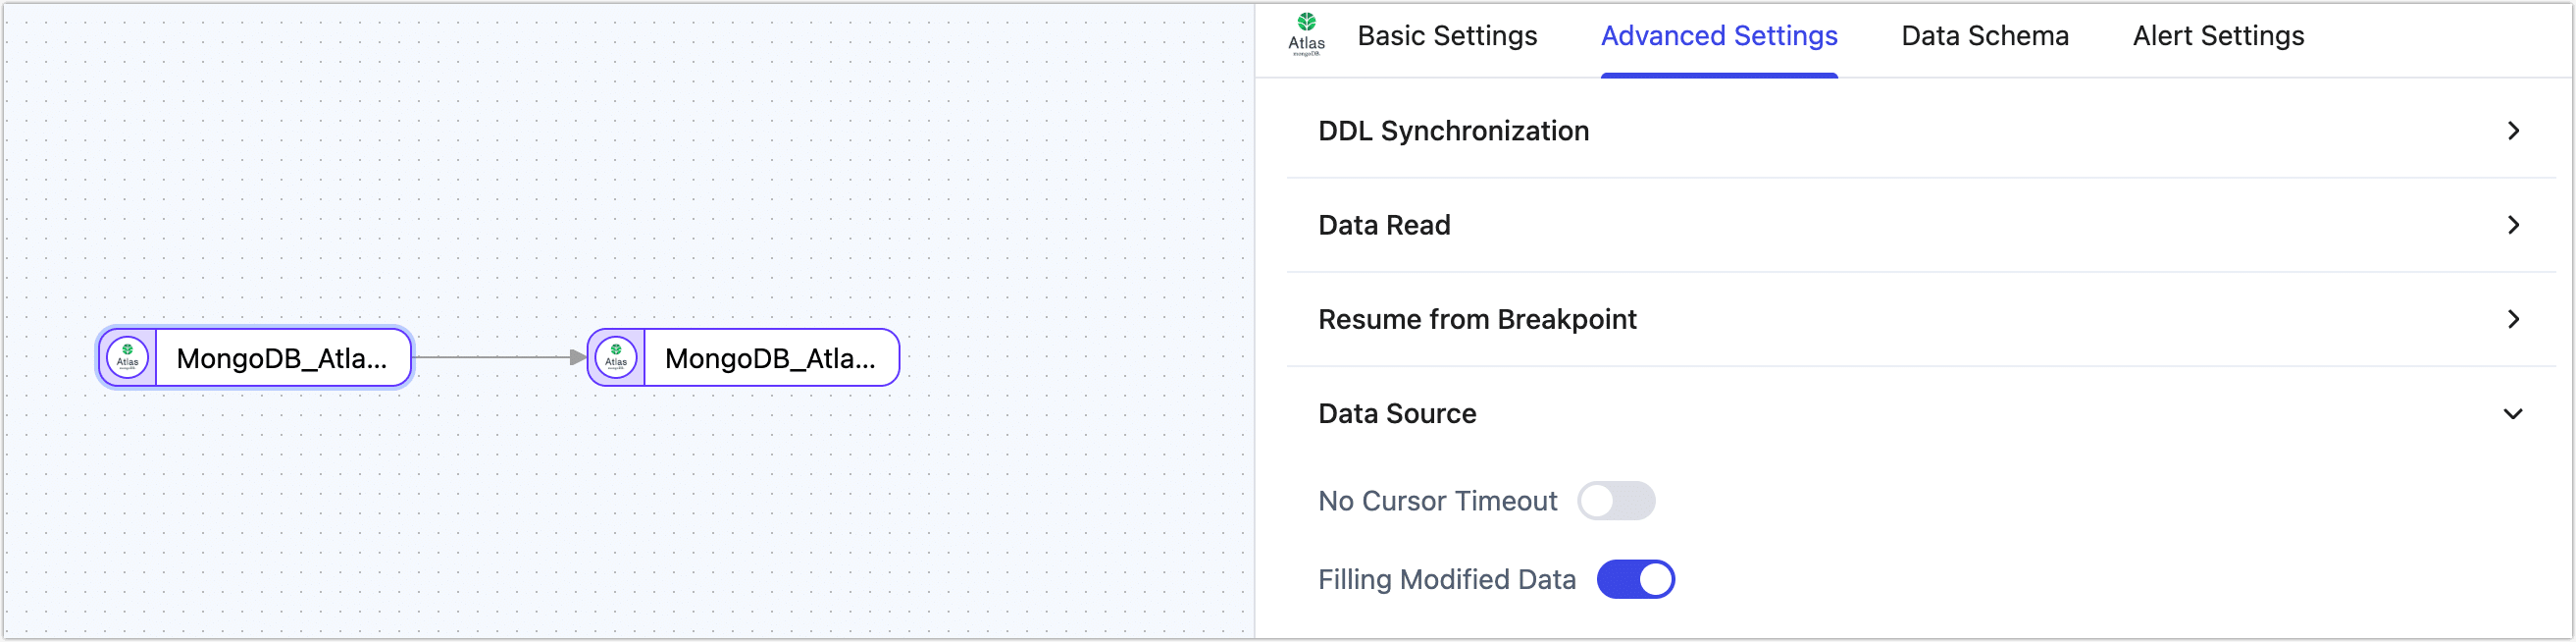
- MongoDB Atlas as a Source Node
- MongoDB Atlas as a Target Node
| Configuration | Description |
|---|---|
| No Cursor Timeout | Disabled by default. When enabled, MongoDB Atlas will disable cursor timeout to prevent timeout errors during data synchronization. |
| Filling Modified Data | Enabled by default. When enabled, it automatically fills in complete fields for UPDATE events. |
| Configuration | Description |
|---|---|
| Sync Index | Disabled by default. When enabled, indexes from the source database will be automatically synchronized to the target database during the full data synchronization phase. |
| Sync Partition Properties | Disabled by default. When enabled, sharding attributes are kept consistent during synchronization between MongoDB Atlas sharded clusters. |
| Save Deleted Data | Disabled by default. When enabled, deleted data content will be cached. Since MongoDB Atlas delete events only return the _id by default, if the sync condition for the target database (e.g., MySQL) does not include _id, the delete operation may fail. In this case, you can first sync the source table A to an intermediate table A_COPY (using _id as the update condition and enabling this option), then create a new task to sync from A_COPY to the target table B. |